

Why You’ll Love This Whipped Cream
Home cooks and busy parents often look for simple ways to make their desserts stand out, and this whipped cream delivers with its easy preparation and fresh taste. Whipped cream comes together in minutes, using just a few basic items from your kitchen, making it ideal for quick treats after dinner. Whether you’re a student craving a sweet snack or a food enthusiast experimenting with new flavors, this recipe offers the fluffy texture that elevates everything from cakes to fruit salads.
One of the main draws of whipped cream is its health benefits, as it uses natural ingredients that provide a dose of fats and a touch of sweetness without overloading on processed additives. By opting for this homemade version, you control the amount of sugar, supporting a balanced diet that diet-conscious individuals appreciate. Its versatility shines through too, adapting smoothly to various diets while keeping that creamy, delightful flavor that makes every bite feel special.
For baking enthusiasts or party hosts, whipped cream’s adaptability means it works for everyone, including those with gluten-free needs. The rich taste and smooth consistency can enhance your favorite whipped cream desserts, turning ordinary moments into memorable ones. With this recipe, you’ll find it’s not just about the end result but the joy of creating something homemade that everyone can enjoy.
Key Benefits of This Recipe
- It takes less than 5 minutes to prepare, perfect for busy lifestyles.
- Uses simple, everyday ingredients to support a wholesome diet.
- Easily adjusts to dietary preferences, making it inclusive for all.
- Delivers a naturally sweet and creamy flavor that stands out in any dish.
This whipped cream recipe has become a go-to for many, including travelers and newlyweds looking to add a special touch to their meals without much effort. Its straightforward nature ensures that even seniors and working professionals can whip it up effortlessly. By focusing on whipped cream as a key ingredient, you’ll discover how it transforms simple recipes into something extraordinary.
Jump to:
- Why You’ll Love This Whipped Cream
- Key Benefits of This Recipe
- Essential Ingredients for Whipped Cream
- Main Ingredients
- Special Dietary Options
- How to Prepare the Perfect Whipped Cream: Step-by-Step Guide
- Gathering Your Supplies
- Detailed Steps for Whipping
- Tips for Perfect Results
- Dietary Substitutions to Customize Your Whipped Cream
- Options for Protein and Main Components
- Ideas for Vegetables, Sauces, and Seasonings
- Mastering Whipped Cream: Advanced Tips and Variations
- Techniques and Flavor Ideas
- How to Store Whipped Cream: Best Practices
- Storage Methods
- FAQs: Frequently Asked Questions About Whipped Cream
- How can I fix whipped cream that has been over-whipped?
- What is the best type of cream to use for making whipped cream?
- How long does homemade whipped cream last in the refrigerator?
- Can I add flavors or colors to whipped cream?
- Is it possible to pipe homemade whipped cream onto cakes or desserts?
- Whipped Cream
- Ingredients
- Instructions
- Last Step:
- Notes
- Did you make this recipe?
Essential Ingredients for Whipped Cream
Getting the right ingredients is key to making smooth whipped cream that holds its shape. This section outlines everything you need, based on the proven recipe that emphasizes cold, fresh elements for the best results. Let’s break it down into a structured list to help you measure accurately and avoid any mistakes.
Main Ingredients
- 1 cup (240g/ml) cold heavy cream or heavy whipping cream
- 2 tablespoons granulated sugar or confectioners’ sugar
- 1/2 teaspoon pure vanilla extract
Special Dietary Options
For those with specific needs, you can swap ingredients to fit your lifestyle. Here’s how to customize:
- For vegan options, use coconut cream instead of heavy cream.
- Keep it gluten-free since all main items are naturally gluten-free; just check your vanilla extract.
- For low-calorie versions, try light coconut milk as a substitute for heavy cream to cut down on fats.
Remember, heavy cream with at least 36% milk fat works best for that fluffy texture. This setup ensures the whipped cream doubles in volume, giving you more to work with in your recipes. If you’re exploring more baking ideas, check out our banana nut bread recipe, where whipped cream makes a great topping.
How to Prepare the Perfect Whipped Cream: Step-by-Step Guide
Making whipped cream at home is straightforward and rewarding, especially if you’re aiming for that smooth and fluffy whipped cream everyone loves. Start by gathering your tools, like a mixer and a chilled bowl, to ensure the process goes smoothly from the first step. This guide walks you through each part, helping home cooks build confidence in the kitchen.
Gathering Your Supplies
Before you begin, make sure you have cold heavy cream, sugar, and vanilla extract ready. Chilling your bowl and beaters helps the cream whip faster and hold better peaks, leading to that ideal homemade whipped cream recipe smooth and fluffy results. This simple prep sets the stage for success, even if you’re new to whipping cream.
Detailed Steps for Whipping
- First, chill a mixing bowl and beaters in the refrigerator for at least 15 minutes to ensure the cream whips properly and forms stable peaks.
- Second, pour 1 cup of heavy cream into the chilled bowl for a rich base that will turn into fluffy whipped cream.
- Third, add 2 tablespoons of powdered sugar and 1 teaspoon of vanilla extract to bring in sweetness and flavor that enhances the overall taste.
- Fourth, using a mixer at medium speed, begin whipping the cream until soft peaks form, which takes about 2-3 minutes and gives a nice, airy texture.
- Fifth, increase the speed to high and continue whipping until stiff peaks are achieved, roughly another 2 minutes, for that perfect hold in your desserts.
- Final step: Serve immediately or refrigerate the whipped cream. For dietary tweaks, swap heavy cream with coconut cream for a vegan twist or use low-fat alternatives to lighten it up.
Throughout the process, keep an eye on the cream to avoid over-mixing, as that can make it grainy. For more ideas on using whipped cream in breakfast treats, visit our maple apple breakfast crisp page, where it adds a delicious layer. According to experts, using an electric mixer ensures even whipping in just 3-4 minutes, making this a quick option for busy parents and students. Always use cold cream for the best volume, as it doubles during whipping and creates a stable topping.
Tips for Perfect Results
If you’re enhancing the flavor, consider adding a hint of cocoa powder or fruit purees after reaching soft peaks. This whipped cream works well for piping onto cakes or as a filling, and it’s a great substitute for store-bought options. Remember, the total preparation time is about 5 minutes, keeping it simple for everyday use.
This method not only creates a light and creamy topping but also lets you enjoy the natural benefits of fresh ingredients.

Dietary Substitutions to Customize Your Whipped Cream
Adapting whipped cream to fit different diets is easy and makes it accessible for everyone, from food enthusiasts to those with restrictions. By swapping a few items, you can create a version that’s just as creamy and delicious. Let’s explore how to make these changes step by step.
Options for Protein and Main Components
- Replace heavy cream with coconut cream for vegan diets, keeping the same 1 cup measurement to maintain texture.
- Use lactose-free cream as a direct substitute for the 1 cup of heavy cream if you’re dealing with lactose intolerance.
Ideas for Vegetables, Sauces, and Seasonings
- Add cinnamon to taste in place of vanilla for a warm flavor twist, starting with about 1/2 teaspoon.
- Opt for stevia as a sugar substitute, using 2 tablespoons equivalent to keep sweetness without extra calories.
- Choose gluten-free vanilla extracts, measuring 1/2 teaspoon to avoid any issues with gluten.
These substitutions ensure your whipped cream cream remains versatile and enjoyable. For instance, adding nutmeg can bring a new twist while staying true to the original recipe’s base.
Mastering Whipped Cream: Advanced Tips and Variations
Taking your whipped cream to the next level involves some pro techniques and creative ideas that can impress your guests. Start with chilling all your equipment and ingredients for better results, as cold cream whips up with more volume. This section dives into ways to experiment and present your whipped cream like a pro.
Techniques and Flavor Ideas
- Chill your bowl and cream thoroughly to get maximum fluffiness in every batch.
- Try almond extract instead of vanilla, using 1/2 teaspoon for a nutty flavor variation.
- Add cocoa powder, about 1 tablespoon, to make chocolate whipped cream that pairs well with desserts.
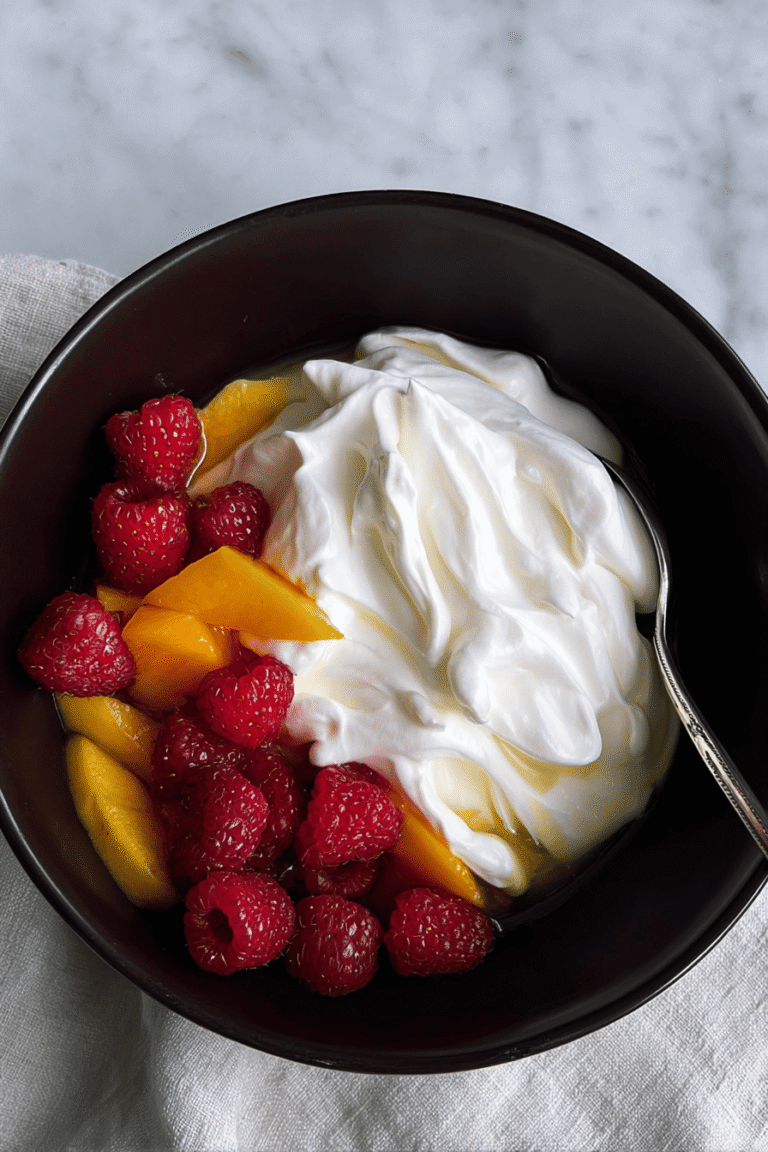
For presentation, pipe the whipped cream using a large star tip to create elegant designs on cakes. You can also sprinkle fresh berries on top for a colorful touch. Preparing whipped cream ahead? Store it in the fridge for a few hours to keep it fresh and ready to use.
How to Store Whipped Cream: Best Practices
Proper storage keeps your whipped cream tasting great and holding its shape for as long as possible. After whipping, place it in an airtight container to lock in freshness. This section covers the basics for fridge and freezer options, making it simple for daily use.
Storage Methods
| Method | Details | Duration |
|---|---|---|
| Refrigeration | Store in an airtight container | Up to 24 hours |
| Freezing | Freeze in dollops on parchment paper | Up to 2 months |
When thawing, re-whip briefly to restore the texture. For meal prep, keep portions small to maintain quality in your desserts.
FAQs: Frequently Asked Questions About Whipped Cream
How can I fix whipped cream that has been over-whipped?
If your whipped cream looks grainy or starts turning into butter, you can fix it by slowly adding a small amount of cold heavy cream. Gently fold the cream in by hand with a spatula until the mixture becomes smooth and fluffy again. This helps loosen the over-whipped texture without losing volume.
What is the best type of cream to use for making whipped cream?
Heavy cream or heavy whipping cream—with at least 36% milk fat—is best for stable, fluffy whipped cream. Whipping cream with around 30% fat is suitable but may not hold peaks as long. For best results, keep the cream very cold before whipping.
How long does homemade whipped cream last in the refrigerator?
Homemade whipped cream should be used within 24 hours for the best texture and flavor. Store it in a tightly sealed container to prevent it from absorbing odors or drying out. After 24 hours, it may start to lose volume and become watery.
Can I add flavors or colors to whipped cream?
Yes, you can enhance whipped cream by adding vanilla extract, cocoa powder, or fruit purees. For coloring, gel food coloring works best because it does not thin the cream. Add flavors or colors gradually and gently fold them in after reaching soft peaks.
Is it possible to pipe homemade whipped cream onto cakes or desserts?
Yes, homemade whipped cream can be piped using large star tips or other piping nozzles for decorative effects. It is best to pipe it immediately after whipping since it softens quickly. Keep the whipped cream cold until use to help it hold its shape longer.
Whipped Cream
🍦 Enjoy smooth and fluffy homemade whipped cream that’s perfect for topping desserts or adding to beverages.
🎂 This easy recipe delivers fresh, creamy results with simple ingredients and minimal effort.
- Total Time: 5 minutes
Ingredients
1 cup (240g/ml) cold heavy cream or heavy whipping cream
2 tablespoons granulated sugar or confectioners’ sugar
1/2 teaspoon pure vanilla extract
coconut cream for vegan option
light coconut milk for low-calorie substitute
Instructions
1-First, chill a mixing bowl and beaters in the refrigerator for at least 15 minutes to ensure the cream whips properly and forms stable peaks.
2-Second, pour 1 cup of heavy cream into the chilled bowl for a rich base that will turn into fluffy whipped cream.
3-Third, add 2 tablespoons of powdered sugar and 1 teaspoon of vanilla extract to bring in sweetness and flavor that enhances the overall taste.
4-Fourth, using a mixer at medium speed, begin whipping the cream until soft peaks form, which takes about 2-3 minutes and gives a nice, airy texture.
5-Fifth, increase the speed to high and continue whipping until stiff peaks are achieved, roughly another 2 minutes, for that perfect hold in your desserts.
6-Final step: Serve immediately or refrigerate the whipped cream. For dietary tweaks, swap heavy cream with coconut cream for a vegan twist or use low-fat alternatives to lighten it up.
Last Step:
Please leave a rating and comment letting us know how you liked this recipe! This helps our business to thrive and continue providing free, high-quality recipes for you.Notes
❄️ Always start with cold cream and chilled utensils for best texture.
🍰 Confectioners’ sugar works well for larger batches to avoid graininess.
🎨 Enhance flavor with additions like extracts or espresso powder, and use for piping or spreading.
- Prep Time: 5 minutes
- undefined: undefined
- Category: Topping
- Method: Whipping





