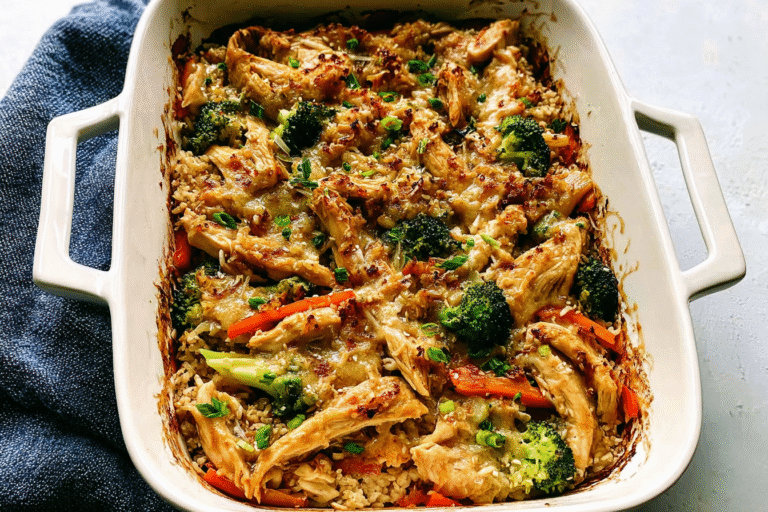
Ingredients
– 3/4 cup low-sodium soy sauce for sauce base
– 1/2 cup water for diluting and blending
– 1/4 cup brown sugar for sweet balance
– 1/2 teaspoon ground ginger for spice and aroma
– 1/2 teaspoon minced garlic for robust flavor
– 2 tablespoons cornstarch for thickening
– 2 tablespoons water for cornstarch slurry
– 1 pound boneless skinless chicken breasts for main protein
– 1 bag (12 ounces) refrigerated stir-fry vegetables for crunch and nutrients
– 3 cups cooked brown or white rice for hearty base
Instructions
1-First Step: Preheat and Prep Start by preheating your oven to 350°F and spraying a 9×13-inch baking pan with non-stick spray. This sets the stage for even cooking and prevents sticking, making cleanup a breeze. Gather all your ingredients so everything is ready to go, which saves time and keeps the process smooth for your Teriyaki Chicken Casserole.
2-Second Step: Make the Sauce In a small saucepan, combine 3/4 cup low-sodium soy sauce, 1/2 cup water, 1/4 cup brown sugar, 1/2 teaspoon ground ginger, and 1/2 teaspoon minced garlic. Bring this mixture to a boil over medium heat, then let it simmer uncovered for 1 minute to blend the flavors. You’ll notice the aroma filling your kitchen, which is a sign you’re on track for a delicious Teriyaki Chicken Casserole.
3-Third Step: Thicken the Sauce Separately, stir 2 tablespoons cornstarch with 2 tablespoons water until it’s smooth and lump-free. Add this to the boiling sauce and stir constantly until it thickens, then remove from heat. This step is crucial as it creates that glossy coating that makes your Teriyaki Chicken Casserole extra appealing and flavorful.
4-Fourth Step: Assemble the Casserole Place 1 pound of boneless skinless chicken breasts in the prepared baking pan and surround them with 1 bag (12 ounces) of steamed stir-fry vegetables. Pour 1 cup of the prepared sauce over the top, then cover the pan with foil. This setup ensures the chicken cooks evenly and absorbs the Teriyaki flavors, perfect for a one-pan meal that minimizes dishes.
5-Fifth Step: Bake the Chicken Bake the assembled casserole for 30 minutes, or until the chicken reaches an internal temperature of 165°F. Keep an eye on it to avoid overcooking, as this keeps the meat tender and juicy in your Teriyaki Chicken Casserole. Once done, remove the foil for the next step.
6-Sixth Step: Shred and Mix Take the pan out and shred the chicken directly in the pan using two forks to make it easy and mess-free. Add 3 cups of cooked rice and most of the remaining sauce, then gently toss everything together. This combines all the elements, creating a cohesive dish that’s full of Teriyaki goodness.
7-Final Step: Finish and Serve Return the pan to the oven and bake for an additional 10 minutes, or until everything is heated through. Let the casserole stand for 5 minutes before serving, and drizzle each portion with the reserved sauce for extra flavor. For variations, feel free to adapt based on dietary preferences, like using chicken thighs and increasing bake time by 8-10 minutes if needed.
Last Step:
Please leave a rating and comment letting us know how you liked this recipe! This helps our business to thrive and continue providing free, high-quality recipes for you.Notes
🥬 For better texture, use fresh vegetables (steam lightly before adding) instead of frozen.
🧂 Reduce soy sauce to 1/4-1/2 cup if too salty; coconut aminos can be substituted for lower sodium.
❄️ Can be frozen before the final baking step (step 8) for make-ahead meals.
- Prep Time: 15 minutes
- Resting Time: 5 minutes
- Cook Time: 40 minutes
- Category: Main Dish
- Method: Baking
- Cuisine: Japanese-Inspired
- Diet: Gluten-Free Option Available
Nutrition
- Serving Size: 1 serving (approximately 1.5 cups)
- Calories: 464
- Sugar: 9
- Sodium: 890
- Fat: 1.5
- Saturated Fat: 0.4
- Unsaturated Fat: 1.1
- Trans Fat: 0
- Carbohydrates: 21
- Fiber: 3
- Protein: 31
- Cholesterol: 65