

Pineapple Ham Glaze Recipe
If you are looking for a Pineapple Ham Glaze that is sweet, tangy, and easy to make, this recipe is one I come back to again and again. I like how the fresh pineapple, warm cinnamon, and brown sugar come together into a glossy glaze that works beautifully on holiday ham or a simple weeknight roast. It takes just 5 minutes to prep and about 20 minutes to cook, which makes it a smart choice for busy cooks who still want big flavor.
For a bit of helpful background on pineapple, you can also read this guide to the nutrition benefits of pineapple. And if you are planning a full holiday meal, it can be useful to compare this glaze with a classic holiday main dish using this holiday ham nutrition guide.
This pineapple ham glaze recipe is sweet, shiny, and simple enough for any home cook to make with confidence.
Jump to:
- Pineapple Ham Glaze Recipe
- Why You’ll Love This Pineapple Ham Glaze
- Essential Ingredients for Pineapple Ham Glaze
- Special Dietary Options
- How to Prepare the Perfect Pineapple Ham Glaze: Step-by-Step Guide
- First Step: Gather and measure everything
- Second Step: Combine the glaze base in the pot
- Third Step: Bring it to a boil
- Fourth Step: Simmer until syrupy
- Fifth Step: Stir in the butter
- Final Step: Use it right away or store it
- Protein and Main Component Alternatives
- Different Ham Options
- Non Pork Serving Ideas
- Vegetable, Sauce, and Seasoning Modifications
- Vegetable Pairings That Work Well
- Sauce and Seasoning Swaps
- Mastering Pineapple Ham Glaze: Advanced Tips and Variations
- Pro cooking techniques
- Flavor variations
- Presentation tips
- Make-ahead options
- How to Store Pineapple Ham Glaze: Best Practices
- Refrigeration
- Freezing
- Reheating
- Meal prep considerations
- FAQs: Frequently Asked Questions About Pineapple Ham Glaze
- How do you glaze a ham with pineapple glaze?
- How long does pineapple ham glaze last in the fridge?
- Can you freeze pineapple ham glaze?
- How do you reheat pineapple ham glaze?
- What makes pineapple ham glaze caramelize perfectly?
- Pineapple Ham Glaze
- Ingredients
- Instructions
- Last Step:
- Notes
- Nutrition
- Did you make this recipe?
Why You’ll Love This Pineapple Ham Glaze
- Easy to prepare: This easy pineapple ham glaze comes together in one pot with simple pantry ingredients. You just stir, boil, simmer, and finish with butter. Since the cook time is only about 20 minutes, it fits neatly into holiday prep or a fast dinner plan.
- Great flavor balance: The pineapple glaze brings bright fruit flavor, while brown sugar and cinnamon add warmth. The cloves give a tiny bit of spice, which keeps the glaze from tasting flat. It is sweet, rich, and a little tangy all at once.
- Versatile for different meals: This brown sugar pineapple ham glaze works well for spiral ham, a whole ham, or even smaller baked ham portions. It also stores well, so you can make it ahead for parties, family dinners, or meal prep.
- Comforting and crowd-friendly: Glazed ham feels festive without being fussy. This holiday pineapple ham glaze gives you that classic caramelized finish people expect at special meals, but it does not require special skills.
Essential Ingredients for Pineapple Ham Glaze
Here is the full ingredient list for this pineapple ham glaze recipe. I like to keep it simple and exact so you know what to gather before you start.
- 1 cup finely chopped fresh pineapple – Adds bright fruit flavor, natural sweetness, and little bits of texture.
- 1 cup pineapple juice – Helps the glaze cook down smoothly and gives it that classic pineapple ham glaze taste.
- 3/4 cup packed light brown sugar – Builds the sticky sweetness and helps the glaze caramelize on the ham.
- 1/2 teaspoon ground cinnamon – Brings warm spice that pairs well with both pineapple and ham.
- 1/8 teaspoon cloves – Adds a subtle holiday-style depth without overpowering the glaze.
- 1 tablespoon unsalted butter – Gives the glaze a glossy finish and smoother texture.
Special Dietary Options
- Vegan: Swap the butter for a plant-based butter. The rest of the ingredients are already naturally vegan-friendly.
- Gluten-free: This ham glaze is naturally gluten-free as written, but always check labels on your brown sugar and pineapple juice if you have a sensitive kitchen.
- Low-calorie: For a lighter version, reduce the brown sugar slightly and simmer longer so the glaze still thickens well. You can also use a smaller amount on each serving of ham.
| Ingredient | What It Does |
|---|---|
| Fresh pineapple | Gives fresh flavor and a little texture |
| Pineapple juice | Creates the sweet-tart base |
| Brown sugar | Helps the glaze thicken and caramelize |
| Cinnamon and cloves | Add warmth and holiday spice |
| Butter | Finishes with shine and smoother mouthfeel |
How to Prepare the Perfect Pineapple Ham Glaze: Step-by-Step Guide
First Step: Gather and measure everything
Before you turn on the stove, measure out 1 cup finely chopped fresh pineapple, 1 cup pineapple juice, 3/4 cup packed light brown sugar, 1/2 teaspoon ground cinnamon, 1/8 teaspoon cloves, and 1 tablespoon unsalted butter. A small to medium pot works best for this recipe because the glaze needs room to bubble and reduce without splashing everywhere. I like to keep a spoon or whisk nearby so I can stir right away.
If you are serving the glaze with ham, it also helps to prepare the ham first. For a non pre sliced ham, score the surface in a crosshatch pattern about 1 inch apart. That helps the pineapple glaze settle into the meat and gives you better flavor in every bite.
Second Step: Combine the glaze base in the pot
Add the pineapple, pineapple juice, brown sugar, cinnamon, and cloves to the pot. Stir well so the brown sugar starts breaking down and the spices mix through the liquid. At this point, the mixture will look loose and a little cloudy, which is completely normal. The sugar has not dissolved yet, so give it a minute of stirring before you heat it.
This is where the flavor starts to build. The fresh pineapple gives a brighter taste than canned versions, while the cinnamon and cloves create that familiar holiday aroma. If you like planning meals ahead, this step is quick enough to do even on a busy day.
Third Step: Bring it to a boil
Place the pot over high heat and bring the mixture to a boil. Keep an eye on it, because pineapple juice and sugar can bubble fast once the heat rises. Stir occasionally to help prevent sticking on the bottom of the pot. You want a real boil here, not just a few tiny bubbles around the edge.
Once it reaches a boil, lower the heat right away. This shift matters because the glaze needs to reduce slowly after the initial boil. A rushed boil can make it too thin in some spots and scorched in others.
Fourth Step: Simmer until syrupy
Reduce to low heat and cook for about 10 minutes, stirring now and then, until the mixture thickens into a syrup. This is the part that turns a simple fruit mixture into a real ham glaze. It should look glossy and slightly reduced, with the pineapple pieces softening as they cook.
Do not rush this step. Simmer the glaze long enough to thicken without boiling too hard, because excessive bubbling can cause overflow or burning. If you are cooking for a holiday meal, this is a good moment to check your ham, set the table, or prep side dishes.
Fifth Step: Stir in the butter
Once the glaze has thickened, add the 1 tablespoon of unsalted butter. Stir until the butter melts fully and blends into the glaze. This last step makes a noticeable difference in the texture and appearance. The glaze looks smoother, richer, and more polished once the butter goes in.
Do not skip the butter. It gives the glaze a softer shine and helps it coat the ham more evenly.
Final Step: Use it right away or store it
You can use the glaze immediately while it is warm, or let it cool if you want to save it for later. If you are glazing a baked ham, brush about 1/4 of the glaze on before baking at 325°F for 90 minutes wrapped in foil. Then add more glaze and bake uncovered at 400°F for 30 to 40 minutes until caramelized. Baste every 10 minutes for the best finish. Use a meat thermometer and aim for an internal temperature of 140°F.
Once the ham comes out of the oven, let it rest for 15 minutes before slicing. That gives the juices time to settle, which makes serving much easier. If you want a ham that looks shiny and tastes sweet all the way through, this method works beautifully.
Protein and Main Component Alternatives
Different Ham Options
This pineapple ham glaze recipe is made for ham, but you can use it with different cuts depending on what is in your kitchen. Spiral sliced ham is the easiest option because the glaze slips between the slices. A whole bone in ham also works well, especially if you score the surface first. If you are cooking for a smaller group, a half ham gives you enough servings without too many leftovers.
For people who want a different main dish, the same glaze can brush onto pork loin or pork tenderloin in small amounts. The flavor is still sweet and tangy, but the texture of the meat is a little lighter. That makes it a nice choice for family meals when ham is not available.
Non Pork Serving Ideas
If you need a different protein altogether, try the glaze on baked chicken thighs during the last 10 to 15 minutes of cooking. It also works in a small amount on roasted tofu for a sweet savory finish. I would keep the glaze light for any substitute, since the sugar content is high and a thin layer goes a long way.
One thing I like about pineapple glaze for ham is that it gives you room to adjust. You can keep it classic for holiday dinners or use it in a smaller, more casual meal. That flexibility helps when you are cooking for different tastes at the same table.
Vegetable, Sauce, and Seasoning Modifications
Vegetable Pairings That Work Well
This glaze pairs nicely with roasted carrots, green beans, sweet potatoes, and Brussels sprouts. The sweet tang of the pineapple ham glaze plays well with vegetables that have a little earthiness. If you are serving a full meal, those sides help balance the richness of the ham.
For a brighter plate, add peas or steamed broccoli near the end of the meal. A little salty or fresh vegetable contrast keeps the whole dinner from feeling too sweet. If you want a simple family plate, even plain mashed potatoes can help soak up the extra glaze.
Sauce and Seasoning Swaps
If you want a slightly different flavor, try adding a tiny pinch of ginger, nutmeg, or black pepper. Ginger gives the glaze a warmer edge, while black pepper adds a tiny savory bite. Nutmeg leans into holiday flavors and can be used sparingly for depth.
You can also change the sweetness level by using a little less brown sugar or adding a splash more pineapple juice. For a thicker brown sugar glaze, let it simmer a minute or two longer. If you prefer a softer fruit note, add a bit more chopped pineapple. These small changes make it easy to match the glaze to the rest of your menu.
Mastering Pineapple Ham Glaze: Advanced Tips and Variations
Pro cooking techniques
For the best texture, keep the heat steady once the glaze starts simmering. Stir often enough to keep it from sticking, but not so much that it never reduces. If the glaze seems too thin after 10 minutes, let it cook for another 2 to 3 minutes and check again. It should coat the back of a spoon and look syrupy before you take it off the heat.
If you are glazing a holiday ham, brush on the first layer early and save some for the final caramelized finish. That layered method gives better color and a deeper sweet pineapple flavor. It is one of the easiest ways to make a simple ham look special.
Flavor variations
For a brighter taste, stir in a little orange zest. For a deeper holiday flavor, add a pinch more cloves or a tiny amount of nutmeg. If you want the glaze to taste a bit richer, use dark brown sugar instead of light brown sugar.
Another nice variation is to mix in a spoonful of Dijon mustard for a more savory glaze. That version works especially well if you are serving ham with roasted vegetables or potatoes. You still get the pineapple sweetness, but the mustard keeps it from tasting too dessert-like.
Presentation tips
When the ham is finished, spoon some extra glaze over the top right before serving. A glossy finish always looks great on the table. If you want a prettier look, add a few small pineapple pieces around the platter, or garnish with fresh herbs like parsley.
I also like to serve the glaze in a small warm bowl on the side. That gives guests the option to add more without making the ham soggy. It is a simple touch, but it makes the meal feel thoughtful.
Make-ahead options
This glaze is a great prep-ahead recipe. You can make it up to 3 days before serving, then store it in the fridge until you need it. If you are hosting a party, that extra time matters a lot. You get one less task on the day of the meal, which always helps.
For even more convenience, freeze a batch and thaw it later. Since the ingredients are sturdy, the glaze holds up well after chilling or freezing. That is one reason I like keeping this recipe in my holiday rotation.
How to Store Pineapple Ham Glaze: Best Practices
Refrigeration
Let the glaze cool completely before transferring it to an airtight container. In the refrigerator, it keeps well for up to 7 days. If you notice a little separation after chilling, just stir it again before using. This makes it handy for leftovers or meal prep.
Freezing
You can freeze pineapple ham glaze for up to 3 months. Pour it into a freezer safe container or bag, leaving a little room for expansion. When you are ready to use it, thaw it overnight in the refrigerator. Once thawed, stir well to bring the texture back together.
Reheating
You usually do not need to reheat the glaze, because it brushes on cold just fine. If you want it warm, heat it in a small saucepan over low to medium heat for 3 to 5 minutes, stirring often. You can also warm it in the microwave at 50 percent power in short bursts. If it thickens too much, stir in a small splash of pineapple juice.
Meal prep considerations
This glaze is especially useful for holiday meal prep, since you can make it ahead and store it until serving day. If you are cooking several dishes at once, making the glaze in advance saves time and stove space. It is one of those small steps that makes the whole meal feel more manageable.

FAQs: Frequently Asked Questions About Pineapple Ham Glaze
How do you glaze a ham with pineapple glaze?
Start by preheating your oven to 325°F. Place the ham in a roasting pan and brush about a quarter of the pineapple ham glaze over the surface. Wrap the ham tightly in foil to trap moisture and bake for about 90 minutes. Remove the foil, brush on another generous layer of glaze, then increase the oven temperature to 400°F. Bake uncovered for 30-40 minutes more, basting every 10 minutes, until the glaze caramelizes into a glossy, golden finish. Use a meat thermometer to ensure the internal temperature reaches 140°F for safety. This method locks in juicy flavor while creating that irresistible sticky exterior. Let the ham rest 15 minutes before slicing for even easier serving. (92 words)
How long does pineapple ham glaze last in the fridge?
After cooling completely, transfer the pineapple ham glaze to an airtight container and store it in the refrigerator for up to 7 days. The combination of pineapple juice, brown sugar, and spices keeps it fresh, but always check for off smells or mold before using. For best results, label the container with the date made. This makes it perfect for holiday meal prep or quick weeknight dinners. If you notice separation, stir well before applying to your ham. Proper storage prevents waste and maintains the sweet-tangy taste that pairs so well with baked ham. (98 words)
Can you freeze pineapple ham glaze?
Yes, pineapple ham glaze freezes beautifully for up to 3 months. Let it cool fully to room temperature, then pour into freezer-safe bags or containers, leaving space for expansion. Squeeze out excess air to avoid freezer burn. Thaw overnight in the fridge before use, and stir to recombine any separated ingredients. This is ideal for batch cooking ahead of events like Easter or Christmas. Once thawed, it retains its vibrant pineapple flavor and thick texture for glazing. Avoid refreezing after thawing to preserve quality and safety. (89 words)
How do you reheat pineapple ham glaze?
You don’t need to reheat pineapple ham glaze for most uses, as it brushes on cold just fine. For warm glaze, pour it into a small saucepan and heat over low-medium heat, stirring constantly for 3-5 minutes until hot and smooth—avoid boiling to prevent sugar from scorching. Microwave in a glass bowl on 50% power in 30-second bursts, stirring between, until warmed through. Warm glaze flows better for even coating on ham. Taste and adjust with a splash of pineapple juice if it thickens too much. (92 words)
What makes pineapple ham glaze caramelize perfectly?
Caramelization happens from the sugars in pineapple juice and brown sugar reacting under high heat. After initial covered baking at 325°F, uncover and baste at 400°F for 30-40 minutes, rotating the ham halfway. The glaze thickens as moisture evaporates, forming a shiny, sticky crust. For extra shine, brush with pan juices in the final 10 minutes. Aim for a deep golden color without burning—watch closely after 30 minutes. This step transforms simple glaze into a crowd-pleasing, glossy finish that elevates any ham dinner. (94 words)
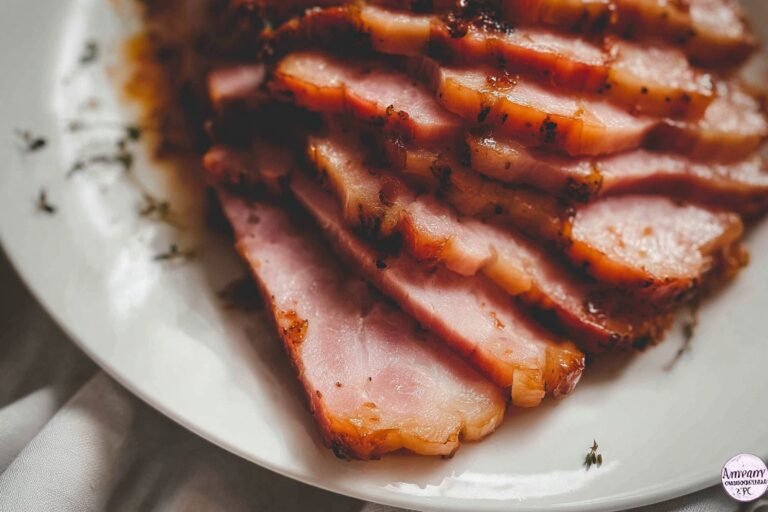
Pineapple Ham Glaze
🍍 Irresistible sweet-tangy pineapple glaze that caramelizes into glossy perfection on your holiday ham!
🐷 Elevates simple ham to gourmet levels with tropical pineapple flavor – easy prep, big wow factor.
- Total Time: 25 minutes
- Yield: 2 cups (12 servings)
Ingredients
– 1 cup finely chopped fresh pineapple
– 1 cup pineapple juice
– 3/4 cup packed light brown sugar
– 1/2 teaspoon ground cinnamon
– 1/8 teaspoon cloves
– 1 tablespoon unsalted butter
Instructions
1-First Step: Gather and measure everything Before you turn on the stove, measure out 1 cup finely chopped fresh pineapple, 1 cup pineapple juice, 3/4 cup packed light brown sugar, 1/2 teaspoon ground cinnamon, 1/8 teaspoon cloves, and 1 tablespoon unsalted butter. A small to medium pot works best for this recipe because the glaze needs room to bubble and reduce without splashing everywhere. I like to keep a spoon or whisk nearby so I can stir right away. If you are serving the glaze with ham, it also helps to prepare the ham first. For a non pre sliced ham, score the surface in a crosshatch pattern about 1 inch apart. That helps the pineapple glaze settle into the meat and gives you better flavor in every bite.
2-Second Step: Combine the glaze base in the pot Add the pineapple, pineapple juice, brown sugar, cinnamon, and cloves to the pot. Stir well so the brown sugar starts breaking down and the spices mix through the liquid. At this point, the mixture will look loose and a little cloudy, which is completely normal. The sugar has not dissolved yet, so give it a minute of stirring before you heat it. This is where the flavor starts to build. The fresh pineapple gives a brighter taste than canned versions, while the cinnamon and cloves create that familiar holiday aroma. If you like planning meals ahead, this step is quick enough to do even on a busy day.
3-Third Step: Bring it to a boil Place the pot over high heat and bring the mixture to a boil. Keep an eye on it, because pineapple juice and sugar can bubble fast once the heat rises. Stir occasionally to help prevent sticking on the bottom of the pot. You want a real boil here, not just a few tiny bubbles around the edge. Once it reaches a boil, lower the heat right away. This shift matters because the glaze needs to reduce slowly after the initial boil. A rushed boil can make it too thin in some spots and scorched in others.
4-Fourth Step: Simmer until syrupy Reduce to low heat and cook for about 10 minutes, stirring now and then, until the mixture thickens into a syrup. This is the part that turns a simple fruit mixture into a real ham glaze. It should look glossy and slightly reduced, with the pineapple pieces softening as they cook. Do not rush this step. Simmer the glaze long enough to thicken without boiling too hard, because excessive bubbling can cause overflow or burning. If you are cooking for a holiday meal, this is a good moment to check your ham, set the table, or prep side dishes.
5-Fifth Step: Stir in the butter Once the glaze has thickened, add the 1 tablespoon of unsalted butter. Stir until the butter melts fully and blends into the glaze. This last step makes a noticeable difference in the texture and appearance. The glaze looks smoother, richer, and more polished once the butter goes in. Do not skip the butter. It gives the glaze a softer shine and helps it coat the ham more evenly.
6-Final Step: Use it right away or store it You can use the glaze immediately while it is warm, or let it cool if you want to save it for later. If you are glazing a baked ham, brush about 1/4 of the glaze on before baking at 325°F for 90 minutes wrapped in foil. Then add more glaze and bake uncovered at 400°F for 30 to 40 minutes until caramelized. Baste every 10 minutes for the best finish. Use a meat thermometer and aim for an internal temperature of 140°F. Once the ham comes out of the oven, let it rest for 15 minutes before slicing. That gives the juices time to settle, which makes serving much easier. If you want a ham that looks shiny and tastes sweet all the way through, this method works beautifully.
Last Step:
Please leave a rating and comment letting us know how you liked this recipe! This helps our business to thrive and continue providing free, high-quality recipes for you.Notes
🔥 Simmer until thickened but stir often to prevent burning or overflow.
🧈 Never skip the butter – it gives the glaze a beautiful sheen and rich mouthfeel.
📅 Prepare up to 3 days ahead; refrigerate for 7 days or freeze for 3 months.
- Prep Time: 5 minutes
- Cook Time: 20 minutes
- Category: Condiment
- Method: Stovetop
- Cuisine: American
- Diet: Vegetarian
Nutrition
- Serving Size: 2 tablespoons
- Calories: 469 kcal
- Sugar: 100g
- Sodium: 27mg
- Fat: 6g
- Saturated Fat: 4g
- Unsaturated Fat: 2g
- Trans Fat: 1g
- Carbohydrates: 107g
- Fiber: 2g
- Protein: 1g
- Cholesterol: 15mg





