

Why You’ll Love This Pbj Thumbprint Cookies
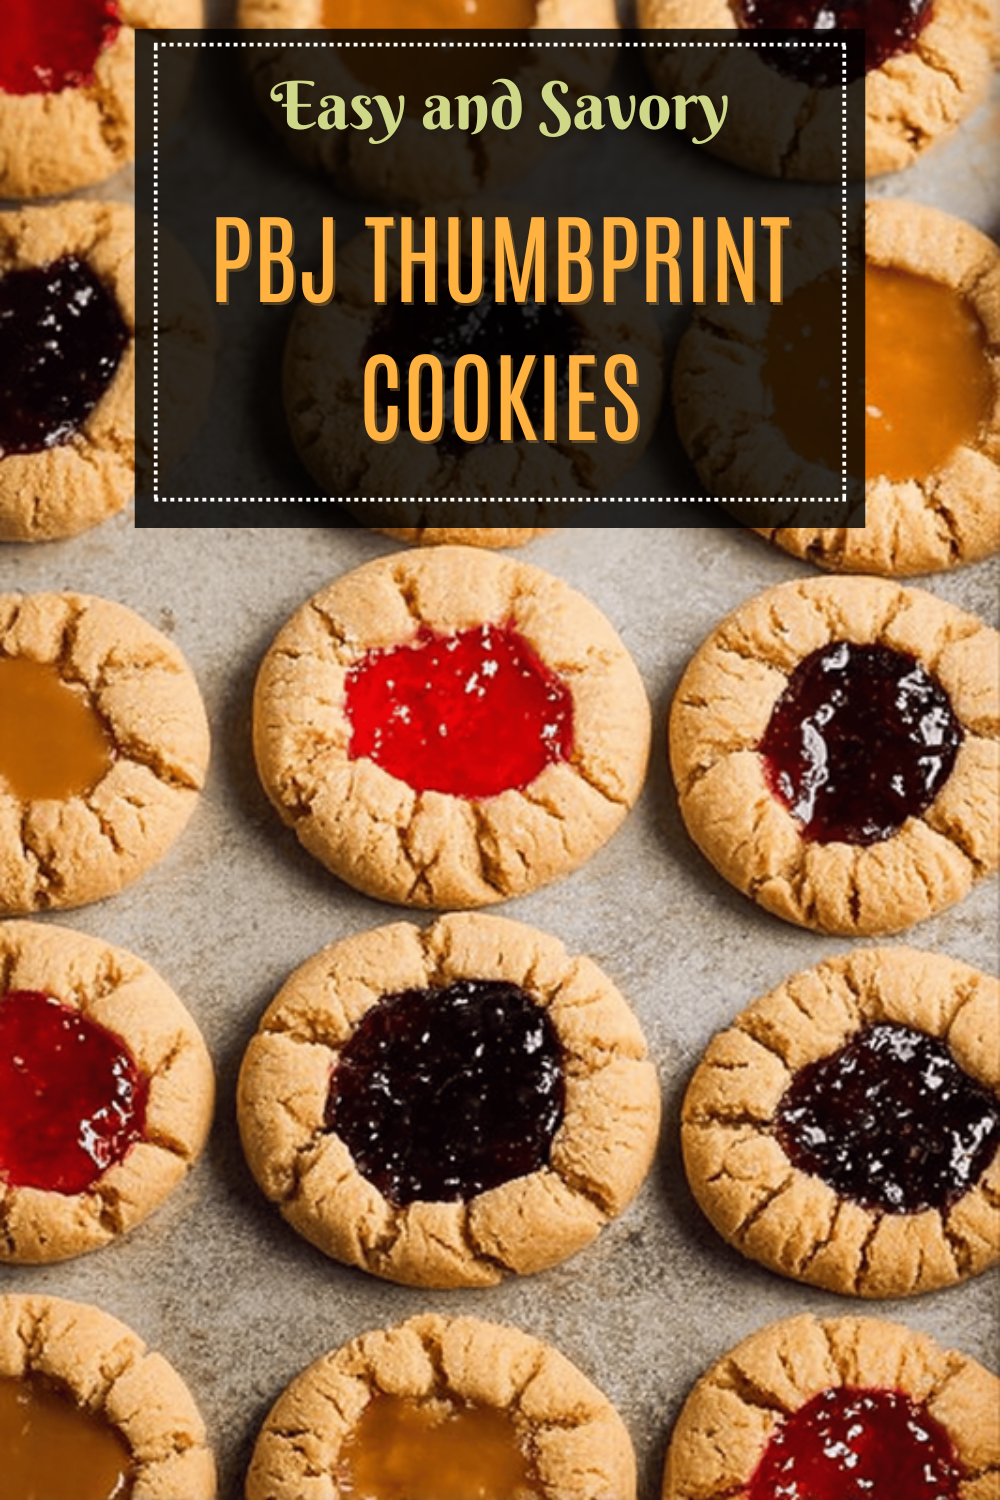
There’s something truly special about a recipe that combines nostalgia with simplicity, and this Pbj Thumbprint Cookies recipe does just that. Imagine biting into a soft, thick cookie that captures the classic taste of a peanut butter and jelly sandwich in every bite. Whether you’re baking for a quick snack or a family gathering, these treats come together with minimal effort, making them a go-to option for anyone from busy parents to baking enthusiasts.
One of the best parts is how easy it is to whip up. With straightforward steps and common kitchen staples, you can have a batch ready in no time, perfect for those moments when you crave something homemade without spending hours in the kitchen. Plus, the combination of creamy peanut butter and fruity raspberry preserves offers a balance of flavors that’s both comforting and delightful, appealing to food lovers of all ages.
Beyond the taste, these cookies pack in some wholesome benefits. They use ingredients like peanut butter, which adds protein, making them a smarter choice for snacks that satisfy hunger while tasting great. You’ll find they adapt easily to different dietary needs, helping everyone enjoy a treat tailored to their preferences without sacrificing flavor or fun.
- Ease of preparation: This Pbj Thumbprint Cookies recipe is quick and simple, requiring minimal ingredients and basic baking skills, making it perfect for busy schedules or beginner bakers.
- Health benefits: Packed with the nutrients of peanut butter and whole ingredients, these cookies offer a wholesome treat that balances taste and wellness.
- Versatility: Easily adaptable, this recipe can be modified for various dietary needs including vegan, gluten-free, and low-calorie diets without compromising flavor.
- Distinctive flavor: The unique combination of creamy peanut butter and fruity jelly creates a sweet and savory taste that sets these thumbprint cookies apart from ordinary treats.
To get more ideas for easy bakes, check out our Banana Nut Bread Recipe, which shares similar simple prep techniques.
Jump to:
- Why You’ll Love This Pbj Thumbprint Cookies
- Essential Ingredients for Pbj Thumbprint Cookies
- How to Prepare the Perfect Pbj Thumbprint Cookies: Step-by-Step Guide
- Dietary Substitutions to Customize Your Pbj Thumbprint Cookies
- Mastering Pbj Thumbprint Cookies: Advanced Tips and Variations
- How to Store Pbj Thumbprint Cookies: Best Practices
- FAQs: Frequently Asked Questions About Pbj Thumbprint Cookies
- How do I store and freeze PBJ thumbprint cookie dough?
- Can I substitute different types of jam in PBJ thumbprint cookies?
- What is the best way to make the thumbprint indentations for these cookies?
- Are PBJ thumbprint cookies suitable for children’s lunchboxes?
- How long do PBJ thumbprint cookies stay fresh after baking?
- Pbj Thumbprint Cookies
- Ingredients
- Instructions
- Last Step:
- Notes
- Nutrition
- Did you make this recipe?
Essential Ingredients for Pbj Thumbprint Cookies
Gathering the right ingredients is the first step to making perfect Pbj Thumbprint Cookies, and this recipe keeps things straightforward with pantry staples that deliver big on flavor. Each item plays a key role in creating those soft, chewy cookies with a burst of raspberry in the center. Let’s break down what you’ll need to ensure your baking goes smoothly.
Start by focusing on the main components that give these cookies their signature taste and texture. Here’s a complete list of the ingredients, pulled directly from the recipe for accuracy:
- 1/2 cup salted butter (softened)
- 1/2 cup creamy peanut butter
- 1/2 cup granulated sugar
- 1/2 cup packed brown sugar
- 1 large egg
- 1/2 teaspoon vanilla extract
- 1/2 teaspoon baking powder
- 1/4 teaspoon salt
- 1 and 1/2 cups all-purpose flour (about 195 grams)
- 1 18-ounce jar raspberry preserves
- Granulated sugar for rolling
This list covers everything required, so double-check your measurements to avoid any surprises. For special tweaks, you can swap in alternatives like plant-based butter for a dairy-free version or gluten-free flour to fit different diets.
Each ingredient contributes to the overall magic for instance, the salted butter adds a rich depth that pairs wonderfully with the peanut butter’s creaminess. If you’re exploring more flour-based recipes, our Pumpkin Crumb Muffins Recipe uses similar basics for another tasty option.
How to Prepare the Perfect Pbj Thumbprint Cookies: Step-by-Step Guide
Getting ready to bake these Pbj Thumbprint Cookies is as fun as eating them, and the process is simple enough for anyone to follow. We’ll walk through each step to help you create soft, delicious treats that mimic the flavor of a classic peanut butter and jelly sandwich. With a total active time of about 30 minutes, you’ll have fresh cookies in no time.
First, preheat your oven to 350 degrees Fahrenheit and line your baking sheets with parchment paper or silicone mats to prevent sticking. In a large bowl, cream together the 1/2 cup salted butter and 1/2 cup creamy peanut butter until smooth and well combined. This base sets the stage for the cookie’s texture.
Next, mix in the 1/2 cup granulated sugar and 1/2 cup packed brown sugar until everything blends nicely. Add the 1 large egg and 1/2 teaspoon vanilla extract, stirring just until incorporated to keep the dough light. Then, stir in the 1/2 teaspoon baking powder, 1/4 teaspoon salt, and 1 and 1/2 cups all-purpose flour until a soft dough forms be careful not to overmix.
- Roll the dough into balls, each about 1 and 1/2 tablespoons in size.
- Roll each ball in granulated sugar for a sweet, crunchy coating.
- Place the balls on the prepared baking sheet, spacing them about 2 inches apart.
- Use a fork to press a crisscross design on top of each ball.
- Press an indent into the center of each cookie with your thumb and fill it with about 1 teaspoon of raspberry preserves from the 18-ounce jar.
- Bake for 8 to 9 minutes, or until the edges are set but the centers remain soft.
- Let the cookies cool on the baking sheet for 5 minutes, then transfer to a wire rack to cool completely.
This method ensures the cookies stay thick and chewy, with that irresistible raspberry center. For more baking inspiration, visit an external resource on cookie baking tricks.

Dietary Substitutions to Customize Your Pbj Thumbprint Cookies
One of the joys of this Pbj Thumbprint Cookies recipe is how flexible it is, allowing you to tweak it for different dietary preferences without losing that yummy taste. Whether you’re aiming for vegan options or something gluten-free, small changes can make a big difference. Let’s look at ways to adapt these cookies to suit your needs.
Protein and main component alternatives: Consider swapping peanut butter with almond or sunflower seed butter for nut-free options, which keeps the creamy texture intact. Use aquafaba or mashed bananas to replace the egg in vegan versions, ensuring the dough holds together just as well.
Vegetable, sauce, and seasoning modifications: Experiment with various fruit preserves like raspberry or apricot to change up the flavors raspberry is recommended for its tart contrast, but feel free to try others. Add a dash of cinnamon or keep it simple with vanilla extract for extra warmth. While these cookies focus on sweet elements, you can get creative with add-ins for a personal twist.
| Original Ingredient | Substitution Option | Why It Works |
|---|---|---|
| Salted butter | Dairy-free butter sticks | Keeps the recipe dairy-free while maintaining rich flavor. |
| All-purpose flour | Gluten-free flour blend | Allows for gluten-free baking with similar texture. |
| Egg | Flaxseed meal mixed with water | Provides binding for vegan adaptations. |
Mastering Pbj Thumbprint Cookies: Advanced Tips and Variations
Once you’re comfortable with the basics, diving into advanced tips can take your Pbj Thumbprint Cookies to the next level. These cookies don’t require chilling, but a brief chill can help them hold shape better, especially on warmer days. Let’s explore how to refine your technique and add creative twists for more excitement in your baking.
Pro cooking techniques: To prevent the dough from spreading, consider chilling it for about 15 minutes before baking. When filling the indents, use exactly 1 teaspoon of raspberry preserves to avoid overflow and keep the cookies neat. For make-ahead options, you can assemble the cookies and refrigerate them on the baking sheet for up to 24 hours before popping them in the oven.
Flavor variations: Try mixing in dark chocolate chips for a decadent upgrade or swapping raspberry preserves with other fruit options like strawberry for a fresh spin. If you’re feeling adventurous, experiment with nut butters beyond peanut butter to create new flavor profiles that still evoke that sandwich vibe.
This recipe’s simplicity lets you play around remember, baking is about enjoying the process and making it your own!
Presentation tips: Arrange your finished cookies on a decorative plate and dust with a bit of powdered sugar for a polished look. For more ideas on presentation, check out our Double Chocolate Oatmeal Cups Recipe, which offers similar styling advice.
How to Store Pbj Thumbprint Cookies: Best Practices
Proper storage is key to keeping your Pbj Thumbprint Cookies fresh and tasty, so let’s cover the best ways to handle them after baking. These cookies are best enjoyed soon after they cool, but with the right methods, you can extend their shelf life without losing that soft texture. Preparation time is about 20 minutes for dough plus 8-9 minutes baking, so it’s easy to make extras.
Refrigeration: Keep cookies in an airtight container in the fridge for up to one week; this helps maintain their moisture, especially with the preserves inside. Freezing: For longer storage, place them in a freezer-safe bag or container for up to three months the fruit center might soften a bit, but they’ll taste great when thawed. Reheating: Pop them in the microwave for a few seconds or warm in the oven to bring back that fresh-baked feel.
Meal prep considerations: Batch prepare the dough balls and freeze them for 1-2 months, thawing overnight in the fridge before filling and baking. This way, you can have homemade treats ready for busy mornings or surprise guests, making it a smart choice for working professionals and families.
FAQs: Frequently Asked Questions About Pbj Thumbprint Cookies
How do I store and freeze PBJ thumbprint cookie dough?
After shaping the cookie dough into thumbprints, place them on a baking sheet lined with parchment paper and freeze until firm, about 1-2 hours. Then transfer the frozen dough balls into an airtight container or freezer bag. They can be stored this way for up to 2 months. When ready to bake, thaw the dough in the refrigerator overnight, add the jam filling, and bake as usual. This method keeps the dough fresh and allows you to bake fresh cookies anytime.
Can I substitute different types of jam in PBJ thumbprint cookies?
Yes, you can use any fruit jam or preserve you prefer in PBJ thumbprint cookies. Classic choices include raspberry, strawberry, or apricot, but flavors like blueberry, blackberry, or even marmalade work well too. Choose a jam with a smooth consistency to prevent the filling from bleeding during baking. Adjust the quantity to fill each thumbprint cavity evenly without overflowing.
What is the best way to make the thumbprint indentations for these cookies?
To create perfect thumbprint indentations, roll the cookie dough into 1-inch balls and place them on a baking sheet. Press your thumb or the back of a small spoon gently into the center of each ball, making a shallow well. Avoid pressing too hard to prevent cracking. If the dough softens too much, chill it briefly before pressing the indentations and filling with jam.
Are PBJ thumbprint cookies suitable for children’s lunchboxes?
Yes, PBJ thumbprint cookies make a kid-friendly treat for lunchboxes. They combine familiar peanut butter and jelly flavors in a handheld cookie form, making them easy to pack. To keep them fresh, store the cookies in an airtight container at room temperature for up to 3 days or freeze for longer storage. Be mindful of peanut allergies when serving to schools or groups.
How long do PBJ thumbprint cookies stay fresh after baking?
Baked PBJ thumbprint cookies typically stay fresh for 3 to 5 days when stored in an airtight container at room temperature. To extend their shelf life, you can refrigerate them for up to 1 week or freeze for up to 2 months. Make sure to separate layers with parchment paper to prevent sticking, especially if the jam is moist. Reheat briefly before serving if desired for a softer texture.
Pbj Thumbprint Cookies
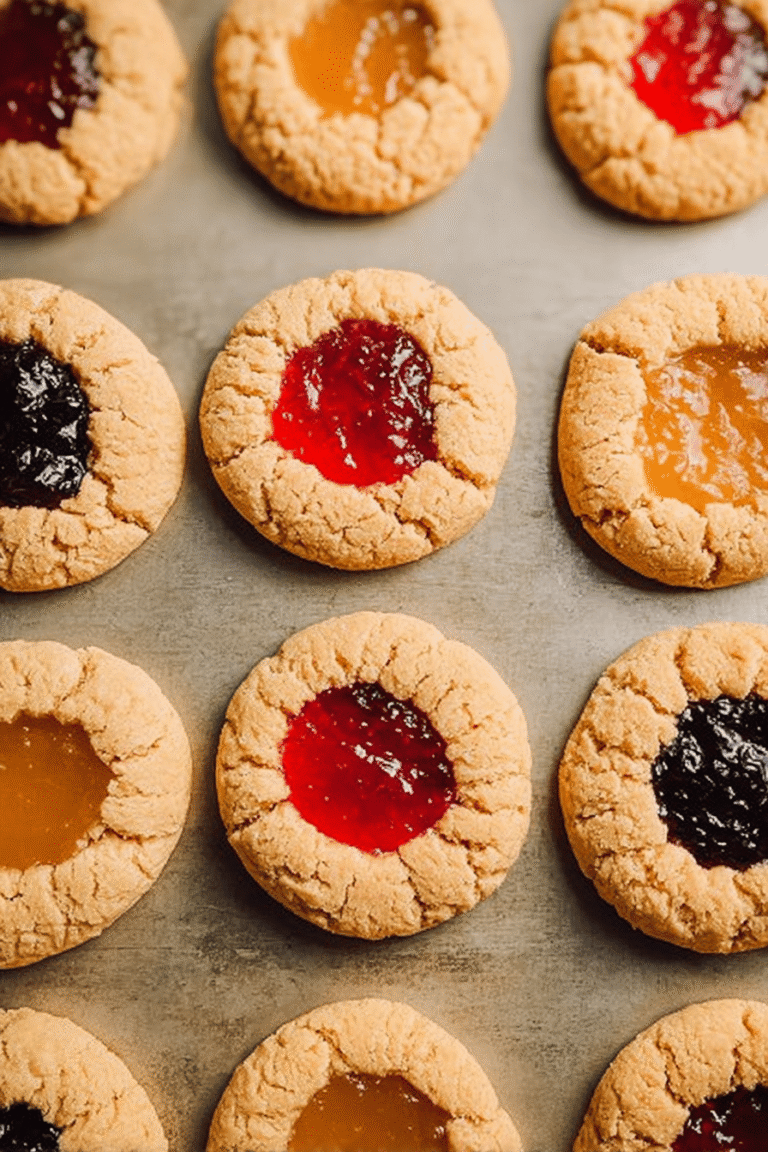
🥜 Enjoy the classic taste of peanut butter and jelly in cookie form with these soft, sweet thumbprint treats.
🍓 These cookies are easy to make and perfect for a nostalgic snack or dessert that everyone will love.
- Total Time: 30 minutes
- Yield: About 24 cookies
Ingredients
– 1/2 cup salted butter (softened)
– 1/2 cup creamy peanut butter
– 1/2 cup granulated sugar
– 1/2 cup packed brown sugar
– 1 large egg
– 1/2 teaspoon vanilla extract
– 1/2 teaspoon baking powder
– 1/4 teaspoon salt
– 1 and 1/2 cups all-purpose flour (about 195 grams)
– 1 18-ounce jar raspberry preserves
– Granulated sugar for rolling
Instructions
Getting ready to bake these Pbj Thumbprint Cookies is as fun as eating them, and the process is simple enough for anyone to follow. We’ll walk through each step to help you create soft, delicious treats that mimic the flavor of a classic peanut butter and jelly sandwich. With a total active time of about 30 minutes, you’ll have fresh cookies in no time.
First, preheat your oven to 350 degrees Fahrenheit and line your baking sheets with parchment paper or silicone mats to prevent sticking. In a large bowl, cream together the 1/2 cup salted butter and 1/2 cup creamy peanut butter until smooth and well combined. This base sets the stage for the cookie’s texture.
Next, mix in the 1/2 cup granulated sugar and 1/2 cup packed brown sugar until everything blends nicely. Add the 1 large egg and 1/2 teaspoon vanilla extract, stirring just until incorporated to keep the dough light. Then, stir in the 1/2 teaspoon baking powder, 1/4 teaspoon salt, and 1 and 1/2 cups all-purpose flour until a soft dough forms be careful not to overmix.
1-Roll the dough into balls, each about 1 and 1/2 tablespoons in size.
2-Roll each ball in granulated sugar for a sweet, crunchy coating.
3-Place the balls on the prepared baking sheet, spacing them about 2 inches apart.
4-Use a fork to press a crisscross design on top of each ball.
5-Press an indent into the center of each cookie with your thumb and fill it with about 1 teaspoon of raspberry preserves from the 18-ounce jar.
6-Bake for 8 to 9 minutes, or until the edges are set but the centers remain soft.
7-Let the cookies cool on the baking sheet for 5 minutes, then transfer to a wire rack to cool completely.
This method ensures the cookies stay thick and chewy, with that irresistible raspberry center. For more baking inspiration, visit an external resource on cookie baking tricks.
Last Step:
Please leave a rating and comment letting us know how you liked this recipe! This helps our business to thrive and continue providing free, high-quality recipes for you.Notes
🍪 Dough can be chilled briefly to hold shape better.
🍓 Use about 1 teaspoon preserves per cookie to avoid overflow.
❄️ Dough balls can be frozen for up to 2 months and thawed overnight before baking.
- Prep Time: 20 minutes
- Cook Time: 9 minutes
- Category: Dessert
- Method: Baking
- Cuisine: American
Nutrition
- Serving Size: 1 cookie
- Calories: 175
- Sugar: 12 g
- Sodium: 121 mg
- Fat: 9 g
- Saturated Fat: 4 g
- Trans Fat: 0.2 g
- Carbohydrates: 21 g
- Fiber: 1 g
- Protein: 3 g
- Cholesterol: 24 mg





