

Why You’ll Love This Mini Lemon Tart
Making a mini lemon tart at home brings simple joys that suit everyone from busy parents to baking enthusiasts. This recipe stands out because it’s easy to prepare, taking just a few steps that fit into any schedule. Plus, it’s packed with fresh flavors that make it a refreshing treat for parties or quiet evenings.
One reason this mini lemon tart shines is its health benefits. Fresh lemon juice and zest deliver a boost of vitamin C, which supports your immune system and adds antioxidants, all while keeping the dessert light and enjoyable. Whether you’re a student looking for a quick snack or a diet-conscious individual, this tart adapts well and still tastes amazing.
Beyond that, the versatility makes it a favorite. You can tweak it for vegan, gluten-free, or low-calorie needs, ensuring it’s perfect for various tastes and occasions. Overall, the bright, tangy filling paired with a buttery crust creates a memorable flavor that elevates everyday moments into something special.
Key Advantages at a Glance
- Simple steps that anyone can follow, ideal for beginners.
- A nutrient-packed option with fresh citrus that adds to your daily wellness.
- Easy swaps for different diets, like using plant-based ingredients.
- A delightful taste that combines zesty lemon with a crisp, buttery base.
To dive deeper into complementary recipes, check out our guide on banana chocolate chip muffins for more baking inspiration that pairs well with citrus flavors.
Jump to:
- Why You’ll Love This Mini Lemon Tart
- Key Advantages at a Glance
- Essential Ingredients for Mini Lemon Tart
- Special Dietary Options
- How to Prepare the Perfect Mini Lemon Tart: Step-by-Step Guide
- Preparing the Tartlet Shells
- Making the Lemon Curd
- Assembling and Final Steps
- Dietary Substitutions to Customize Your Mini Lemon Tart
- Mastering Mini Lemon Tart: Advanced Tips and Variations
- Flavor and Presentation Ideas
- How to Store Mini Lemon Tart: Best Practices
- FAQs: Frequently Asked Questions About Mini Lemon Tart
- Can I use store-bought tart shells to make mini lemon tarts?
- How long can I store mini lemon tarts before serving?
- Is it better to use homemade or store-bought lemon curd for mini lemon tarts?
- Can mini lemon tarts be frozen for later use?
- What toppings work well with mini lemon tarts?
- Mini Lemon Tart
- Ingredients
- Instructions
- Last Step:
- Notes
- Nutrition
- Did you make this recipe?
Essential Ingredients for Mini Lemon Tart
Gathering the right ingredients is the first step to creating a perfect mini lemon tart. This section breaks down everything you need, ensuring your recipe turns out just right. We’ll focus on precise measurements to make baking straightforward and fun.
For the tartlet shells, use these exact quantities to achieve that ideal flaky texture:
- 250 grams all-purpose/plain flour
- 50 grams icing sugar (sifted)
- 1 pinch fine salt
- 120 grams unsalted butter (cold)
- 1 large egg (at room temperature)
Now, for the lemon curd, here’s what you’ll need to craft that smooth, tangy filling:
- 4 egg yolks
- 100 grams caster sugar or fine white granulated sugar
- 125 ml lemon juice (approximately 3 large lemons)
- 75 grams unsalted butter (at room temperature)
- 1 lemon zest (optional)
These ingredients form the heart of the mini lemon tart, blending to create a balanced, zesty dessert. Always measure accurately for the best results, as even small changes can affect the outcome.
Special Dietary Options
Adapting for different needs is easy. For a vegan version, swap butter with a plant-based alternative and eggs with flax eggs. Gluten-free options include using almond flour instead of all-purpose flour, keeping the tart accessible for all.
As an external resource, learn more about butter substitutes at butter substitute options to enhance your baking toolkit.
How to Prepare the Perfect Mini Lemon Tart: Step-by-Step Guide
Creating mini lemon tarts is a rewarding process that anyone can master. Start by preparing your workspace and ingredients for a smooth experience. This guide walks you through each stage, making it simple for home cooks and baking enthusiasts alike.
Preparing the Tartlet Shells
First, combine 250 grams of all-purpose flour, 50 grams of sifted icing sugar, and a pinch of fine salt in a food processor. Add 120 grams of cold unsalted butter cut into small cubes; pulse until small crumbs form. Whisk 1 large egg separately, then add it to the mixture and pulse slowly until dough forms, then gather it into a ball.
Roll the dough between two sheets of baking paper to about 4 mm thickness and chill it in the refrigerator for at least 1 hour, up to 24 hours. Cut out pastry rounds using a cookie cutter that’s 1.5 to 2 cm wider than your muffin pan openings, then gently press the disks into the pan, removing any air bubbles. Chill again for at least 2 hours, preferably overnight.
Preheat your oven to 160°C/325°F and prick the base of each shell with a fork. Place the pan in the freezer while the oven heats, then line each shell with baking paper and fill with baking beads or rice. Bake for 15 minutes, remove the weights and paper, and bake for another 15 minutes until golden and dry. Let them cool completely before proceeding.
Making the Lemon Curd
In a small pot, whisk together 4 egg yolks, 100 grams of caster sugar, and 125 ml of lemon juice. Cook over very low heat, whisking constantly, until the mixture thickens, about 3-5 minutes. Gradually add 75 grams of cubed unsalted butter, whisking until melted before adding more, and stir in 1 lemon zest if using.
Continue cooking on low heat for 5 to 15 minutes, whisking constantly, until the curd thickens enough that a line drawn on the back of a spoon stays clear. This step ensures a silky filling that’s full of flavor.
Assembling and Final Steps
Pour the warm lemon curd into the cooled tartlet shells and tap the pan gently to remove air bubbles. Chill in the refrigerator for at least 2 to 3 hours to set. The total preparation time includes 45 minutes of prep, 30 minutes of cooking, and 6 hours of resting, making the whole process around 7 hours and 15 minutes.
For more baking tips, explore our recipe for maple gingerbread coffee cake, which complements citrus desserts beautifully.

Dietary Substitutions to Customize Your Mini Lemon Tart
Adapting your mini lemon tart for various dietary needs is straightforward and keeps the recipe enjoyable for everyone. Whether you’re vegan or gluten-free, a few swaps can make all the difference without losing that signature taste.
- Replace eggs with flaxseed meal mixed with water for a vegan option that maintains structure.
- Use silken tofu blended with lemon juice for a creamy, egg-free filling that’s just as smooth.
- Swap all-purpose flour with almond flour for gluten-free tarts that are light and nutty.
- Add fresh herbs like basil for a twist, or use alternative citrus juices such as lime to vary the flavor.
- Adjust sweetness with natural options like agave syrup to suit low-calorie preferences.
This flexibility makes the mini lemon tart a go-to recipe for diverse groups, from families to health-focused individuals.
Mastering Mini Lemon Tart: Advanced Tips and Variations
Taking your mini lemon tart to the next level involves some pro techniques and creative ideas. Start with chilled butter and handle the dough minimally to keep the crust flaky and perfect. Blind baking with pie weights helps create a crisp base that holds up well.
Flavor and Presentation Ideas
Experiment by adding lavender or ginger to the filling for extra aroma, or swirl in raspberry puree for a fruity contrast that brightens the tartness. For presentation, dust with powdered sugar and add edible flowers to make your tarts visually stunning and ready for any gathering.
Make-ahead options include preparing and freezing tart shells in advance, then filling them just before baking. This keeps things convenient for busy professionals and party hosts. Remember, both tartlet shells and lemon curd can be made ahead store shells at room temperature for up to 2 days and curd in the fridge for up to 3 days, reheating gently before use.
Try different citrus fruits like Meyer lemons or limes for fun variations, and avoid over-mixing the dough to preserve its texture. If the dough feels too dry, add a bit of cold water; if sticky, add flour.
How to Store Mini Lemon Tart: Best Practices
Proper storage keeps your mini lemon tarts fresh and tasty for longer. Refrigerate them in an airtight container for up to 3 days to preserve that zesty flavor and texture. Freezing is another great option wrap individual tarts in plastic wrap and freeze for up to one month, thawing overnight in the fridge.
- Reheat frozen tarts in a low oven at 300°F for 5-7 minutes to keep the crust crisp.
- For meal prep, bake crusts and prepare filling separately to combine fresh, extending shelf life.
- Using a mini muffin pan makes bite-size tarts that are easy to store and serve.
These methods ensure your treats stay delicious, whether you’re a senior enjoying a quiet meal or a working professional grabbing a quick dessert.
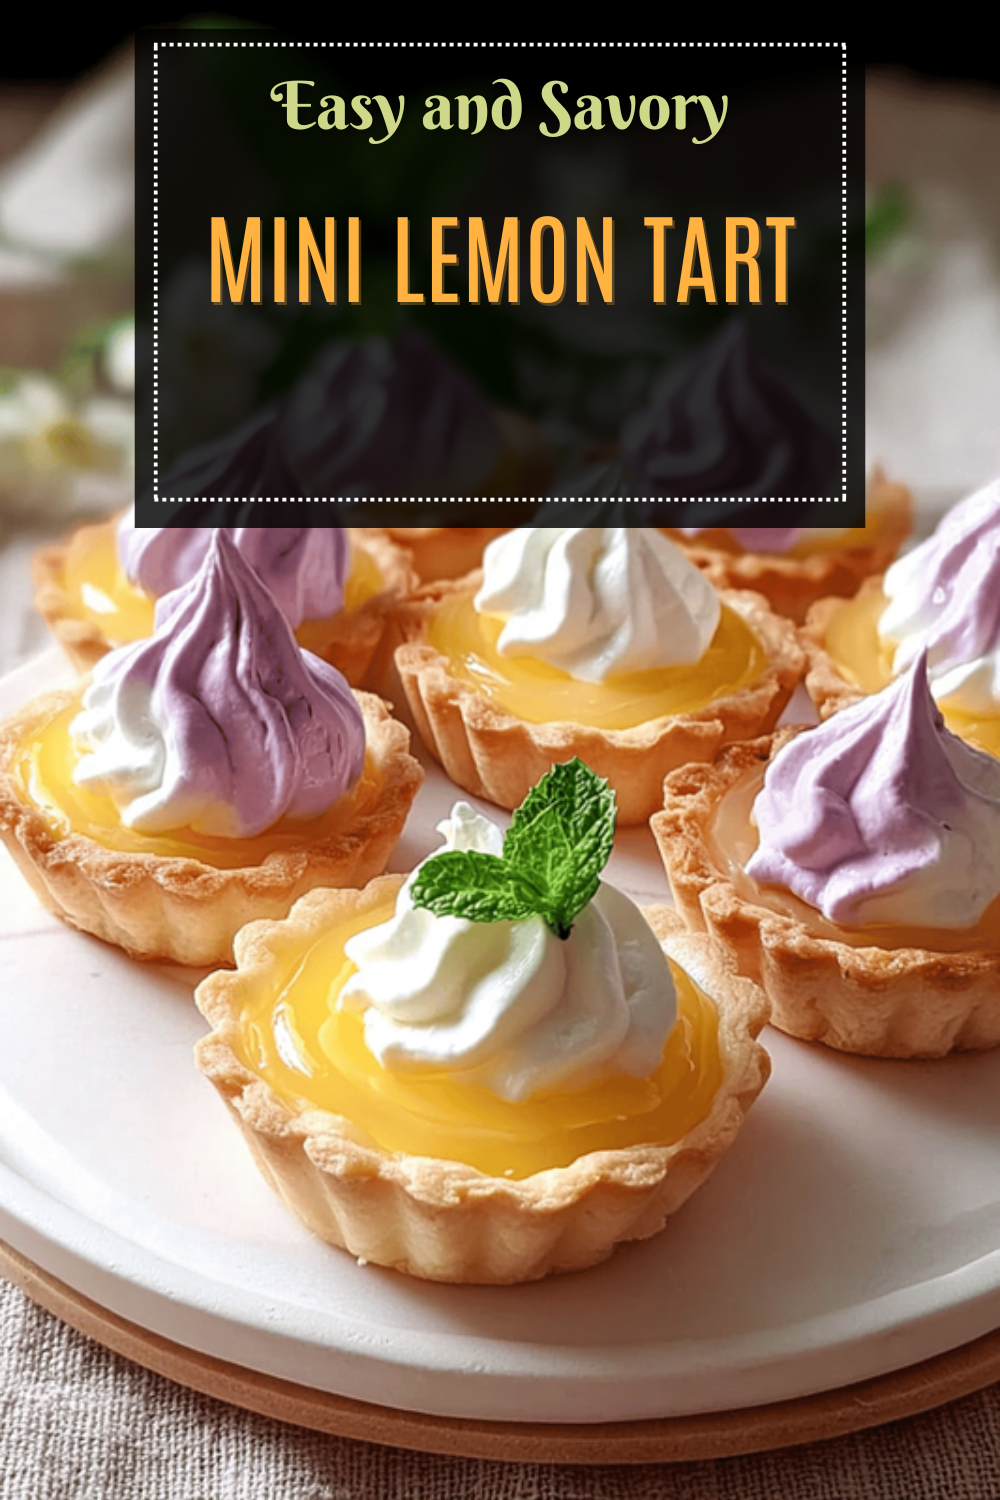
FAQs: Frequently Asked Questions About Mini Lemon Tart
Can I use store-bought tart shells to make mini lemon tarts?
Yes, store-bought tart shells can be used to make mini lemon tarts, which saves time. However, homemade pastry typically offers a fresher buttery flavor and better texture. If using pre-made shells, check that they’re fully baked before filling to prevent sogginess.
How long can I store mini lemon tarts before serving?
You can prepare the tart shells and lemon curd separately in advance. Baked tart shells stay fresh at room temperature for up to 2 days, while lemon curd keeps in the fridge for 3 days. Assemble the tarts 2 to 3 hours before serving and refrigerate to allow the filling to set properly.
Is it better to use homemade or store-bought lemon curd for mini lemon tarts?
Both options work well. Store-bought lemon curd offers convenience, but homemade lemon curd allows you to control the balance of sweetness and tartness. Homemade curd can also provide a richer, fresher flavor, enhancing the overall taste of the tarts.
Can mini lemon tarts be frozen for later use?
Yes, you can freeze baked tart shells for up to a month in an airtight container. Freeze lemon curd separately in a sealed container for up to 2 months. Thaw both completely before assembling the tarts. Avoid freezing assembled tarts to maintain pastry crispness.
What toppings work well with mini lemon tarts?
Mini lemon tarts pair nicely with fresh berries, a dusting of powdered sugar, or a dollop of whipped cream. Adding a small sprig of mint or edible flowers can also enhance presentation. These simple toppings complement the tartness without overpowering the lemon flavor.

Mini Lemon Tart
🍋 This Lemon Curd Tartlets recipe delivers a fresh citrus filling paired with a buttery crust for a delightful treat.
🥧 Its balance of tartness and sweetness makes it a perfect dessert to impress guests or enjoy anytime at home.
- Total Time: 7 hours 15 minutes
- Yield: 12 tartlets 1x
Ingredients
250 grams all-purpose/plain flour
50 grams icing sugar (sifted)
1 pinch fine salt
120 grams unsalted butter (cold)
1 large egg (at room temperature)
4 egg yolks
100 grams caster sugar or fine white granulated sugar
125 ml lemon juice (approximately 3 large lemons)
75 grams unsalted butter (at room temperature)
1 lemon zest (optional)
Instructions
1-Preparing the Tartlet Shells: First, combine 250 grams of all-purpose flour, 50 grams of sifted icing sugar, and a pinch of fine salt in a food processor. Add 120 grams of cold unsalted butter cut into small cubes; pulse until small crumbs form. Whisk 1 large egg separately, then add it to the mixture and pulse slowly until dough forms, then gather it into a ball.
2-Preparing the Tartlet Shells: Roll the dough between two sheets of baking paper to about 4 mm thickness and chill it in the refrigerator for at least 1 hour, up to 24 hours. Cut out pastry rounds using a cookie cutter that’s 1.5 to 2 cm wider than your muffin pan openings, then gently press the disks into the pan, removing any air bubbles. Chill again for at least 2 hours, preferably overnight.
3-Preparing the Tartlet Shells: Preheat your oven to 160°C/325°F and prick the base of each shell with a fork. Place the pan in the freezer while the oven heats, then line each shell with baking paper and fill with baking beads or rice. Bake for 15 minutes, remove the weights and paper, and bake for another 15 minutes until golden and dry. Let them cool completely before proceeding.
4-Making the Lemon Curd: In a small pot, whisk together 4 egg yolks, 100 grams of caster sugar, and 125 ml of lemon juice. Cook over very low heat, whisking constantly, until the mixture thickens, about 3-5 minutes. Gradually add 75 grams of cubed unsalted butter, whisking until melted before adding more, and stir in 1 lemon zest if using.
5-Making the Lemon Curd: Continue cooking on low heat for 5 to 15 minutes, whisking constantly, until the curd thickens enough that a line drawn on the back of a spoon stays clear. This step ensures a silky filling that’s full of flavor.
6-Assembling and Final Steps: Pour the warm lemon curd into the cooled tartlet shells and tap the pan gently to remove air bubbles. Chill in the refrigerator for at least 2 to 3 hours to set. The total preparation time includes 45 minutes of prep, 30 minutes of cooking, and 6 hours of resting, making the whole process around 7 hours and 15 minutes.
Last Step:
Please leave a rating and comment letting us know how you liked this recipe! This helps our business to thrive and continue providing free, high-quality recipes for you.Notes
🔥 Cook lemon curd on very low heat to avoid lumps or burning.
❄️ Chill filled tartlets for 2-3 hours to allow curd to set properly.
📅 Make tartlet shells and lemon curd ahead; store shells at room temp and curd in fridge. Reheat curd gently before filling.
- Prep Time: 45 minutes
- Resting time: 6 hours
- Cook Time: 30 minutes
- Category: Dessert
- Method: Baking
- Cuisine: French-inspired
- Diet: Vegetarian
Nutrition
- Serving Size: 1 tartlet
- Calories: 179
- Sugar: 9g
- Sodium: 9mg
- Fat: 10g
- Saturated Fat: 6g
- Trans Fat: 1g
- Carbohydrates: 20g
- Fiber: 1g
- Protein: 2g
- Cholesterol: 76mg





