

Why You’ll Love This Cortadillo Mexican Pink Cake Recipe
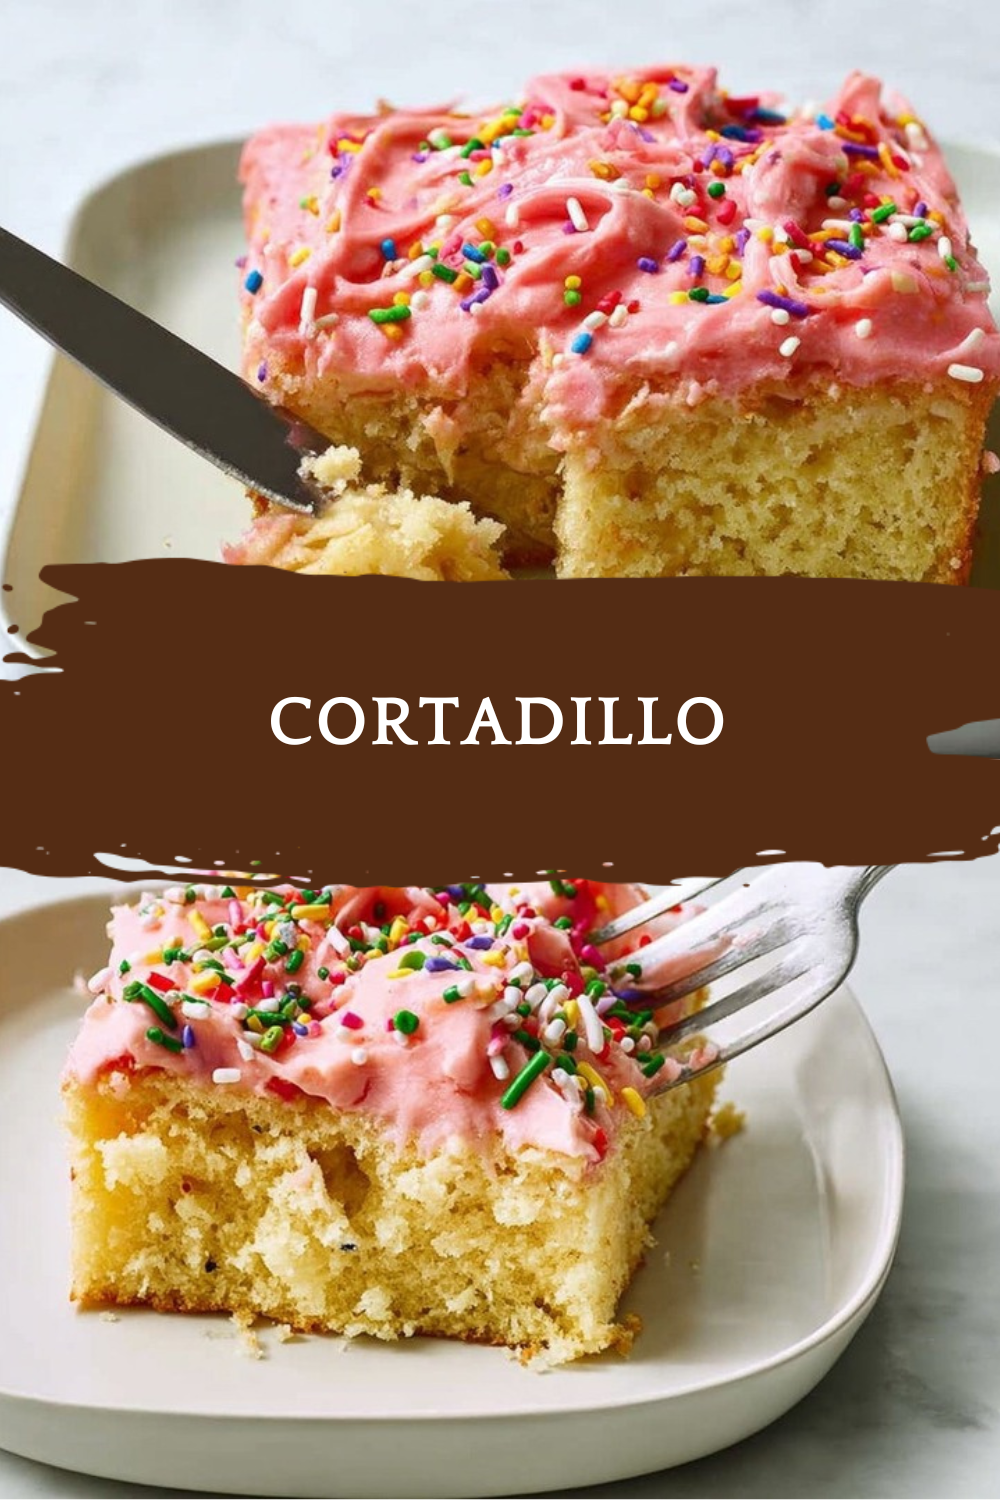
If you have a soft spot for sweet pan dulce, Cortadillo is the kind of treat that feels both familiar and special. This Mexican pink cake brings together a fluffy vanilla-orange sponge, bright pink icing, and colorful sprinkles for a nostalgic dessert that fits right in at birthdays, school snacks, holiday tables, or an easy weekend bake. It is the kind of recipe that makes the kitchen smell amazing and brings everyone around the pan before it even cools.
- Easy to make: This cortadillo recipe uses simple pantry staples and comes together in about 15 minutes of prep time, making it friendly for busy parents, students, and working professionals.
- Comforting and satisfying: With eggs, milk, and flour, each slice feels hearty enough for breakfast or a snack, and the orange zest gives it a bright, bakery-style taste.
- Great for gatherings: Since it serves 12, this cortadillo cake works well for parties, potlucks, and family celebrations. Frost it in the pan for easy serving.
- Classic flavor and color: The soft crumb, sweet icing, and festive sprinkles give this receta cortadillo the cheerful look people remember from Mexican bakeries.
This is one of those bakes that feels simple, but it always gets attention because the color and texture are so cheerful.
If you enjoy breakfast-style sweets, you may also like our maple gingerbread coffee cake or a quick side bake like banana nut bread for another cozy treat.
For more on the flavor in the glaze, you can also read about the health benefits of oranges.
Jump to:
- Why You’ll Love This Cortadillo Mexican Pink Cake Recipe
- Essential Ingredients for Cortadillo
- Ingredients for the Bread
- Ingredients for the Icing
- Special Dietary Options
- Nutritional Snapshot
- How to Prepare the Perfect Cortadillo: Step-by-Step Guide
- First Step: Get the pan and oven ready
- Second Step: Mix the dry ingredients
- Third Step: Build the wet mixture
- Fourth Step: Add the flour and milk in stages
- Fifth Step: Bake the cake
- Sixth Step: Cool before frosting
- Seventh Step: Make the icing
- Eighth Step: Frost, decorate, and slice
- Dietary Substitutions to Customize Your Cortadillo
- Protein and Main Component Alternatives
- Vegetable, Sauce, and Seasoning Modifications
- Mastering Cortadillo: Advanced Tips and Variations
- Pro cooking techniques
- Flavor variations
- Presentation tips
- Make-ahead options
- How to Store Cortadillo: Best Practices
- FAQs: Frequently Asked Questions About Cortadillo
- What is cortadillo Mexican pink bread?
- Where does cortadillo bread come from?
- How do you make cortadillo at home?
- How do you store and freeze cortadillo bread?
- What are common ways to serve cortadillo?
- Cortadillo
- Ingredients
- Instructions
- Last Step:
- Notes
- Nutrition
- Did you make this recipe?
Essential Ingredients for Cortadillo
For the best authentic cortadillo recipe, use the exact measurements below. The ingredients are split into the bread and the icing so the process stays clear and easy to follow.
Ingredients for the Bread
- 3.5 cups flour – Gives the cake its structure and soft crumb.
- 1.5 cups sugar – Adds sweetness and helps the cake stay tender.
- 1.5 cups cooking oil – Keeps the crumb moist and fluffy.
- 1.5 cups milk – Brings the batter together and adds richness.
- 6 eggs – Provide lift, structure, and a delicate sponge texture.
- 2 tablespoons baking powder – Helps the cake rise properly.
- 2 tablespoons vanilla extract – Adds warm, bakery-style flavor.
- 1 pinch salt – Balances the sweetness.
- 2 tablespoons orange zest – Gives the cake its bright, traditional flavor.
- 3 to 4 drops yellow food coloring, optional – Adds a light golden tint to the batter.
Ingredients for the Icing
- 3.5 cups confectioner’s sugar – Forms the sweet pink frosting.
- 7 tablespoons milk – Smooths the icing to a spreadable texture.
- 3 drops neon pink food coloring – Gives the frosting its classic pink bakery look.
Special Dietary Options
- Vegan: Replace eggs with a baking-friendly egg substitute, use plant milk, and check that your sugar and sprinkles are vegan-friendly.
- Gluten-free: Swap the flour for a 1:1 gluten-free baking blend with xanthan gum.
- Lower sugar: Reduce the sugar in the icing or add a small splash of citrus juice for a brighter taste with less sweetness.
Nutritional Snapshot
| Per serving | Amount |
|---|---|
| Calories | 677 |
| Carbohydrates | 91g |
| Protein | 8g |
| Fat | 32g |
| Fiber | 1g |
| Sugar | 62g |
Other values per serving include 4g saturated fat, 8g polyunsaturated fat, 19g monounsaturated fat, 0.1g trans fat, 87mg cholesterol, 53mg sodium, 337mg potassium, 187IU vitamin A, 1mg vitamin C, 155mg calcium, and 2mg iron.
How to Prepare the Perfect Cortadillo: Step-by-Step Guide
First Step: Get the pan and oven ready
Preheat your oven to 350°F and grease a 9×13-inch baking pan well. If you want easier release, dust the pan lightly with flour too. This step matters because the cake bakes into a tender sheet, and a good pan setup helps it lift out cleanly after cooling.
Set out all your ingredients before you begin. Since the batter comes together quickly, having everything measured first makes the whole process smoother. This is especially helpful for busy parents and first-time bakers.
Second Step: Mix the dry ingredients
Sift the flour into a medium bowl. Add the baking powder and salt, then whisk them together so the leavening is evenly distributed. Sifting also helps break up lumps, which gives the cake a finer texture.
Keep this bowl nearby, because you will add it in stages. That gradual method helps prevent over-mixing, which is one of the biggest mistakes in a traditional Mexican cortadillo cake.
Third Step: Build the wet mixture
In a large mixing bowl, combine the eggs, vanilla extract, sugar, and orange zest. Mix on low speed for about 2 minutes until the mixture looks well blended and slightly lighter. Then pour in the cooking oil and mix for about 30 seconds more.
If you are using the optional yellow food coloring, add 3 to 4 drops at this stage. The batter should have a soft golden tint, but the color is only for appearance. The flavor comes mostly from the vanilla and fresh orange zest, so using fresh zest gives the best result.
Fourth Step: Add the flour and milk in stages
Add half of the flour mixture to the wet ingredients and mix just until combined. Pour in the milk, then add the remaining flour mixture. Stir until the batter is smooth, but stop as soon as the ingredients are blended.
Do not over-mix. A gentle hand keeps the crumb fluffy and soft instead of dense. If you are measuring flour by volume, spoon it into the cup and level it off rather than scooping straight from the bag.
Fifth Step: Bake the cake
Transfer the batter into the prepared pan and spread it evenly with a spatula. Place the pan on the middle rack of the oven and bake for about 45 minutes. The cake is ready when a toothpick inserted in the center comes out clean.
Ovens can vary, so start checking near the end of baking time. If the top is browning too quickly, keep an eye on it during the last 10 minutes. The finished cake should be set, lightly golden, and spring back when touched.
Sixth Step: Cool before frosting
Let the cake cool completely in the pan. This is important because warm cake can melt the icing and make it run off the sides. Cooling also helps the crumb settle, which makes cutting easier later.
If you are in a hurry, place the pan on a wire rack to speed things up. Still, give it enough time so the top feels cool to the touch before you move to the frosting stage.
Seventh Step: Make the icing
In a bowl, mix the confectioner’s sugar, milk, and neon pink food coloring until smooth. You want a spreadable icing that is thick enough to stay in place but soft enough to glide across the cake. If it looks too thick, add a little more milk, one teaspoon at a time.
For a slightly less sweet frosting, add a tiny splash of citrus juice or reduce the sugar a bit. That small change gives the icing a brighter edge without changing the classic look too much.
Eighth Step: Frost, decorate, and slice
Spread the icing over the cooled cake while it is still in the pan. Sprinkle your decorations on top while the icing is wet so they stick well. Let the icing set for about 30 minutes before cutting into squares.
That resting time helps the frosting firm up and makes cleaner slices. Serve your cortadillo cake with milk, coffee, or hot chocolate for the most classic pairing.
For the easiest cleanup and the neatest squares, frost the cake right in the pan and cut it after the icing has set.

Dietary Substitutions to Customize Your Cortadillo
Protein and Main Component Alternatives
If you want to make cortadillo fit different needs, you have a few simple swaps. For a dairy-free version, use unsweetened oat milk or almond milk in place of regular milk. If you are avoiding eggs, try a trusted baking egg replacer, though the texture may be slightly less airy.
For those watching fat intake, you can replace part of the oil with unsweetened applesauce, but keep in mind that the cake may become a little denser. If you want a gluten-free version, use a 1:1 baking flour blend made for cakes and cookies.
Vegetable, Sauce, and Seasoning Modifications
While this recipe is a sweet bread, you can still change the flavor in small ways. Swap the orange zest for lemon zest if you want a sharper citrus note. You can also add a little almond extract along with the vanilla for a bakery-style twist.
For the icing, use less milk for a thicker finish or add a few drops of citrus juice for a tangy glaze. If you prefer a more classic bakery look, skip the yellow coloring in the batter and keep the frosting a bright neon pink. This recipe is flexible enough to suit casual family baking or a festive party tray.
Mastering Cortadillo: Advanced Tips and Variations
Pro cooking techniques
The biggest secret to a good cortadillo recipe is a light hand. Mix the batter only until the flour disappears, because too much stirring can make the cake heavy. Fresh baking powder also matters, since old leavening can keep the cake from rising well.
Another helpful habit is accurate flour measurement. Too much flour can dry out the crumb, while too little can make the center sink. For the best results, use fresh orange zest instead of dried flavorings, since the scent and taste are brighter.
Flavor variations
You can keep the classic flavor or try small changes for variety. Add a little cinnamon to the batter for a warmer taste, or swap the pink icing for white icing if you want a softer look. Some bakers also split the cake and spread strawberry jam between layers for a more festive cortadillo cake.
If you like breakfast bakes, this sweet pan cake pairs nicely with recipes such as easy breakfast bars or a slice of chocolate zucchini bread for a mixed brunch spread.
Presentation tips
Sprinkles make a big difference here. Add them while the icing is wet so they stay put and give the cake that cheerful bakery feel. Cut the cake into even squares for parties, or serve larger rectangles for a more rustic family-style dessert.
If you are making this for a birthday, place the pan on a bright tray and serve alongside coffee, milk, or hot chocolate. The colors look especially pretty next to fruit platters or other pan dulce.
Make-ahead options
You can bake the cake a day ahead and frost it the next morning. That plan works well for party hosts and newlyweds planning a brunch table. The unfrosted cake also freezes well, so you can make it in advance and finish it later with fresh icing.
How to Store Cortadillo: Best Practices
Storing cortadillo the right way keeps the cake soft and the frosting fresh. Since this dessert is moist and sweet, good wrapping makes a big difference.
- Refrigeration: Cover the cake with plastic wrap or foil and refrigerate for up to 4 days. This keeps the icing from drying out.
- Freezing: Cool the cake fully, then wrap slices tightly in plastic wrap and foil. Place them in a freezer bag and freeze for 2 to 3 months.
- Reheating: Let frozen slices thaw at room temperature for 2 to 3 hours, or overnight in the fridge. Avoid reheating in the oven unless you want the icing to soften a lot.
- Meal prep: Cut the cake into individual squares before chilling so you can grab a serving when needed.
If you plan to freeze the cake, wrap it before adding the icing for the best texture, then frost after thawing.
FAQs: Frequently Asked Questions About Cortadillo
What is cortadillo Mexican pink bread?
Cortadillo is a popular Mexican pink bread found in panaderias, made from a fluffy single-layer sponge cake topped with pink or white frosting and colorful sprinkles. Some versions include two layers with strawberry jam in between. It’s a sweet treat often served at birthdays as a kid’s cake or enjoyed daily as a breakfast item or snack. Pair it with milk, coffee, or hot chocolate for the best experience. This simple yet festive bread captures the charm of Mexican baking traditions, weighing about 1-2 pounds per loaf depending on the bakery. (78 words)
Where does cortadillo bread come from?
Cortadillo originated in Spain as part of pan dulce and arrived in Mexico during the colonial era around the 16th century. Influences from Italy and France later shaped Mexican pastries, but local ingredients like fresh eggs and flour created unique versions. Today, it’s a staple in Mexican bakeries, with over 2,000 panaderias across Mexico producing it daily. This evolution reflects how colonial sweets adapted to regional tastes, making cortadillo a cultural icon. (82 words)
How do you make cortadillo at home?
To make cortadillo, preheat your oven to 350°F (175°C). Whisk 4 eggs with 1 cup sugar until fluffy, then add 1 cup flour, 1 tsp baking powder, and 1/4 cup milk. Bake in a greased 9×13-inch pan for 20-25 minutes. Cool, then frost with 2 cups powdered sugar mixed with 1/4 cup milk and pink food coloring. Add sprinkles. For a two-layer version, split the cake, spread strawberry jam, and reassemble. Yields 12 servings; total time is 45 minutes. (96 words)
How do you store and freeze cortadillo bread?
Store cortadillo in the refrigerator covered with plastic wrap or foil to stay moist; it lasts up to 4 days. For freezing, cool completely, wrap pieces tightly in plastic wrap then foil, and place in a freezer bag. Label with the date and freeze for 2-3 months max to avoid quality loss. Thaw at room temperature for 2-3 hours or overnight in the fridge. Avoid refreezing thawed cake. This method preserves the fluffy texture and pink frosting perfectly. (89 words)
What are common ways to serve cortadillo?
Serve cortadillo fresh as a snack with cold milk, hot coffee, or Mexican hot chocolate for a classic pairing. Cut into squares for parties or birthdays—it’s kid-friendly and festive. For variety, toast slices lightly and top with whipped cream and fresh strawberries. At breakfast, pair with scrambled eggs or fruit. One loaf (about 1.5 lbs) serves 8-12 people. If you’re watching calories, note a slice has around 250 calories; enjoy in moderation. Links to our pan dulce recipes for more ideas. (92 words)

Cortadillo
🎂 Fluffy cortadillo Mexican pink cake infused with fresh orange zest—festive, moist delight for celebrations!
🌸 Vibrant pink icing and sprinkles make it party-ready; simple bake yields 12 slices of sweet tradition!
- Total Time: 1 hour 30 minutes
- Yield: 12 servings
Ingredients
– 3.5 cups flour
– 1.5 cups sugar
– 1.5 cups cooking oil
– 1.5 cups milk
– 6 eggs
– 2 tablespoons baking powder
– 2 tablespoons vanilla extract
– 1 pinch salt
– 2 tablespoons orange zest
– 3 to 4 drops yellow food coloring, optional
– 3.5 cups confectioner’s sugar
– 7 tablespoons milk
– 3 drops neon pink food coloring
Instructions
1-First Step: Get the pan and oven ready Preheat your oven to 350°F and grease a 9×13-inch baking pan well. If you want easier release, dust the pan lightly with flour too. This step matters because the cake bakes into a tender sheet, and a good pan setup helps it lift out cleanly after cooling. Set out all your ingredients before you begin. Since the batter comes together quickly, having everything measured first makes the whole process smoother. This is especially helpful for busy parents and first-time bakers.
2-Second Step: Mix the dry ingredients Sift the flour into a medium bowl. Add the baking powder and salt, then whisk them together so the leavening is evenly distributed. Sifting also helps break up lumps, which gives the cake a finer texture. Keep this bowl nearby, because you will add it in stages. That gradual method helps prevent over-mixing, which is one of the biggest mistakes in a traditional Mexican cortadillo cake.
3-Third Step: Build the wet mixture In a large mixing bowl, combine the eggs, vanilla extract, sugar, and orange zest. Mix on low speed for about 2 minutes until the mixture looks well blended and slightly lighter. Then pour in the cooking oil and mix for about 30 seconds more. If you are using the optional yellow food coloring, add 3 to 4 drops at this stage. The batter should have a soft golden tint, but the color is only for appearance. The flavor comes mostly from the vanilla and fresh orange zest, so using fresh zest gives the best result.
4-Fourth Step: Add the flour and milk in stages Add half of the flour mixture to the wet ingredients and mix just until combined. Pour in the milk, then add the remaining flour mixture. Stir until the batter is smooth, but stop as soon as the ingredients are blended. Do not over-mix. A gentle hand keeps the crumb fluffy and soft instead of dense. If you are measuring flour by volume, spoon it into the cup and level it off rather than scooping straight from the bag.
5-Fifth Step: Bake the cake Transfer the batter into the prepared pan and spread it evenly with a spatula. Place the pan on the middle rack of the oven and bake for about 45 minutes. The cake is ready when a toothpick inserted in the center comes out clean. Ovens can vary, so start checking near the end of baking time. If the top is browning too quickly, keep an eye on it during the last 10 minutes. The finished cake should be set, lightly golden, and spring back when touched.
6-Sixth Step: Cool before frosting Let the cake cool completely in the pan. This is important because warm cake can melt the icing and make it run off the sides. Cooling also helps the crumb settle, which makes cutting easier later. If you are in a hurry, place the pan on a wire rack to speed things up. Still, give it enough time so the top feels cool to the touch before you move to the frosting stage.
7-Seventh Step: Make the icing In a bowl, mix the confectioner’s sugar, milk, and neon pink food coloring until smooth. You want a spreadable icing that is thick enough to stay in place but soft enough to glide across the cake. If it looks too thick, add a little more milk, one teaspoon at a time. For a slightly less sweet frosting, add a tiny splash of citrus juice or reduce the sugar a bit. That small change gives the icing a brighter edge without changing the classic look too much.
8-Eighth Step: Frost, decorate, and slice Spread the icing over the cooled cake while it is still in the pan. Sprinkle your decorations on top while the icing is wet so they stick well. Let the icing set for about 30 minutes before cutting into squares. That resting time helps the frosting firm up and makes cleaner slices. Serve your cortadillo cake with milk, coffee, or hot chocolate for the most classic pairing.
Last Step:
Please leave a rating and comment letting us know how you liked this recipe! This helps our business to thrive and continue providing free, high-quality recipes for you.Notes
🥄 Avoid over-mixing batter to ensure a light, fluffy texture.
🧂 Use fresh baking powder and measure flour accurately for perfect rise.
📦 Frost directly in the pan for easy serving and clean slices.
- Prep Time: 15 minutes
- Set: 30 minutes
- Cook Time: 45 minutes
- Category: Dessert
- Method: Bake
- Cuisine: Mexican
- Diet: Vegetarian
Nutrition
- Serving Size: 1/12 recipe
- Calories: 677 calories
- Sugar: 62 grams
- Sodium: 53 milligrams
- Fat: 32 grams
- Saturated Fat: 4 grams
- Unsaturated Fat: 27 grams
- Trans Fat: 0.1 grams
- Carbohydrates: 91 grams
- Fiber: 1 gram
- Protein: 8 grams
- Cholesterol: 87 milligrams





