

Why You’ll Love This Cookie Butter
Hey there, fellow food lovers! If you’re on the hunt for a delicious cookie butter recipe that’s simple to whip up at home, you’re in for a treat. This homemade cookie butter stands out because it’s packed with flavor and so easy to make that even beginners can nail it on the first try. Let’s talk about why you’ll want to add this to your kitchen routine right away.
- Ease of preparation: You only need a few basic items and about 15 minutes of active time, making it perfect for busy parents or students. Imagine turning simple cookies into a creamy spread without any fancy tools just stir things together and let it chill! This means more time enjoying the results rather than stressing in the kitchen, which makes cookie butter a go-to for quick homemade treats.
- Health benefits: While it’s indulgent, this cookie butter offers a nice boost of calcium and iron from the ingredients, supporting bone health and energy levels. Plus, you can tweak it for dietary needs, like using coconut oil instead of butter for a lighter option that might appeal to diet-conscious folks. It’s a fun way to sneak in nutrients while satisfying those sweet cravings!
- Versatility: This spread works wonders in so many ways slather it on toast, mix it into smoothies, or even use it as a dip for fruits! It’s adaptable for different diets, from vegan swaps to gluten-free choices, so baking enthusiasts and party hosts can customize it easily. Whether you’re a traveler needing a portable snack or a senior looking for simple joys, this recipe fits right in.
- Distinctive flavor: What sets this homemade cookie butter apart is its rich, buttery taste that’s way better than anything from the store think deep cookie notes with just the right sweetness! You’ll love how it beats store-bought versions by using fresh ingredients for that authentic, comforting vibe. It’s like capturing the essence of your favorite cookies in a jar, perfect for food enthusiasts everywhere.
Making your own cookie butter lets you control the ingredients, so it’s not only tasty but also tailored to what you enjoy most. Dive into this easy recipe and see how it can elevate your snacking game without much effort at all!
Jump to:
- Why You’ll Love This Cookie Butter
- Essential Ingredients for Cookie Butter
- How to Prepare the Perfect Cookie Butter: Step-by-Step Guide
- First Step: Prepare Your Cookie Crumbs
- Second Step: Melt the Butter
- Third Step: Mix the Liquids
- Fourth Step: Combine with Crumbs
- Fifth Step: Chill the Mixture
- Sixth Step: Adjust for Texture
- Final Step: Store and Serve
- Dietary Substitutions to Customize Your Cookie Butter
- Protein and Main Component Alternatives
- Vegetable, Sauce, and Seasoning Modifications
- Mastering Cookie Butter: Advanced Tips and Variations
- Pro Cooking Techniques
- Flavor Variations
- Presentation Tips
- Make-Ahead Options
- How to Store Cookie Butter: Best Practices
- FAQs: Frequently Asked Questions About Cookie Butter
- Cookie Butter
- Ingredients
- Instructions
- Last Step:
- Notes
- Nutrition
- Did you make this recipe?
Essential Ingredients for Cookie Butter
Gathering the right ingredients is key to creating the best cookie butter, and I’ve got everything laid out for you in a simple list. Each one plays a role in making that creamy, dreamy spread you’ll love. Let’s break it down so you know exactly what to grab and why it matters.
- 2 cups cookie crumbs – These form the base of your cookie butter, providing that classic cookie flavor and texture; use processed cookies for a fine, even mix that blends smoothly.
- 1/2 stick butter – This adds richness and helps bind everything together, melting down to create a luscious consistency; it’s essential for that creamy finish, but you can swap for other options if needed.
- 1/2 cup sweetened condensed milk – Sweetens the mix and gives it a thick, velvety feel, making your homemade cookie butter extra indulgent and irresistible.
- 1/4 cup evaporated milk – This contributes to the smooth texture and adds a subtle creaminess; it works with the other ingredients to achieve the perfect spreadable consistency.
- Water as needed – Used to adjust the thickness after chilling, ensuring your cookie butter reaches just the right smoothness without making it too runny.
For special dietary options, let’s make this cookie butter work for everyone:
- Vegan: Swap the butter for coconut oil to keep things plant-based, which maintains the creamy texture while fitting dairy-free diets.
- Gluten-free: Choose gluten-free cookies for the crumbs to ensure the whole recipe is safe for those with sensitivities.
- Low-calorie: Reduce the sweetened condensed milk slightly and use a low-fat alternative for the butter to lighten up this treat without losing flavor.
Using these ingredients means you’re set for a straightforward cookie butter recipe that’s full of possibilities. Remember, fresh choices can make your DIY cookie butter taste even better than store-bought ones!
How to Prepare the Perfect Cookie Butter: Step-by-Step Guide
Ready to dive into making your own cookie butter? This guide walks you through every step of this easy cookie butter recipe, so you can create something amazing at home. We’ll keep it simple and fun, just like chatting with a friend in the kitchen. Start with fresh ingredients and follow along for the best results!
First Step: Prepare Your Cookie Crumbs
Begin by processing your dry cookies in a food processor until they turn into fine crumbs. If you’re using sandwich cookies, scrape out the creamy filling first to avoid a too-sweet mix. This step ensures your base is ready and helps achieve that smooth texture we all love in cookie butter.
Second Step: Melt the Butter
Next, melt 1/2 stick of butter in a saucepan over low heat, stirring gently until it’s fully liquid. This only takes a minute or two, so keep an eye on it to prevent burning. Once melted, you’re set to combine it with the other liquids for that rich flavor foundation.
Third Step: Mix the Liquids
Stir in 1/2 cup sweetened condensed milk and 1/4 cup evaporated milk into the melted butter until everything is well combined. This creates a creamy base that binds with the crumbs aim for a smooth mixture that coats your spoon nicely. For dietary tweaks, use coconut oil instead of butter if you’re going vegan.
Fourth Step: Combine with Crumbs
Gradually add about 1/2 cup of this liquid mixture to your 2 cups of cookie crumbs, stirring until just moistened. Depending on how dry your cookies are, you might need to adjust the liquid amount to get the right consistency. This part is key for a homemade cookie butter that’s not too thick or too thin, and it’s easy to adapt for different tastes.
Fifth Step: Chill the Mixture
Once mixed, pop the whole thing into the fridge for 1-2 hours to let it firm up. This chilling time, which takes about 1 hour 15 minutes to 2 hours 15 minutes total including prep, helps develop the flavors and makes it easier to work with later. It’s a great time to relax or prep other snacks!
Sixth Step: Adjust for Texture
After chilling, check the texture and add water in 1/8 teaspoon increments, stirring vigorously until you reach your desired smoothness. This fine-tunes your cookie butter to be perfectly spreadable, especially if it feels a bit dry. Remember, this step keeps things flexible for various preferences, like making a creamy cookie butter recipe that’s just right for you.
Final Step: Store and Serve
Give it another quick chill before storing, and you’re done your homemade cookie butter is ready to enjoy! It’s delicious on toast or as a dip, and the whole process only requires 15 minutes of active work. For more baking ideas, check out our banana chocolate chip muffins recipe to pair with it.
Nutritional highlights per 1 cup serving include 1307 calories, 76g total fat (117% DV), and 17g protein (34% DV), so keep portions in mind for balanced eating. This how to make cookie butter from scratch method is not only straightforward but also lets you customize for dietary needs along the way!

Dietary Substitutions to Customize Your Cookie Butter
Protein and Main Component Alternatives
If you want to tweak the main elements of your cookie butter, try swapping cookie types based on what you have on hand. For instance, use almond flour-based cookies instead of regular ones for a nuttier flavor that works well for gluten-free diets. This keeps your homemade cookie butter recipe adaptable and delicious for everyone at the table.
Vegetable, Sauce, and Seasoning Modifications
For a fresher twist, add a dash of vanilla extract as a seasoning to enhance the flavors without overwhelming the mix. If you’re looking for lighter options, reduce the sweetened condensed milk and use fruit purees as a natural sweetener for low-calorie versions. These changes make your cookie butter versatile for different seasons or restrictions, like opting for plant-based milks in sauces.
Mastering Cookie Butter: Advanced Tips and Variations
Pro Cooking Techniques
To get the best results with your cookie butter, always remove creamy fillings from sandwich cookies before processing they can make the mix too sticky. For a smoother blend, stir vigorously when adding water, and remember that buttery cookies need less liquid than drier ones. These tips help you perfect your DIY cookie butter every time you make it.
Flavor Variations
Experiment with additions like cinnamon for a warm twist or mix in nuts for extra crunch in your cookie butter recipe. If you want something that tastes like traditional options, try using homemade cookies as suggested in our vanilla latte protein smoothie guide for inspiration. These variations keep your homemade cookie butter exciting and tailored to your tastes.
Presentation Tips
Make your cookie butter look amazing by serving it in a cute jar with fresh fruit on the side. For gifting, pair it with pretzels or apple slices to create a fun platter that wows your friends. A little extra effort here turns your easy cookie butter recipe into a standout treat for parties.
Make-Ahead Options
Prep your mixture ahead and store it for 1-2 weeks in the fridge, making it ideal for busy schedules. Warm it slightly if it hardens, and you’ll have a quick snack ready when you need it. This approach fits perfectly into meal prep routines for working professionals and more.
How to Store Cookie Butter: Best Practices
Keeping your homemade cookie butter fresh is simple with the right methods. Let’s cover how to handle refrigeration, freezing, and more so your spread stays tasty. Start by always using clean containers to avoid any spoilage.
- Refrigeration: Store your cookie butter in an airtight jar in the fridge for up to 1-2 weeks to keep it fresh and creamy.
- Freezing: For longer storage, freeze portions in sealed bags; this works great for up to a month and maintains the texture when thawed.
- Reheating: If it firms up, warm it gently in the microwave for a few seconds to restore that spreadable consistency without losing flavor.
- Meal Prep Considerations: Batch make and divide into smaller containers for easy grab-and-go options during your busy weeks.
This way, your cookie butter stays a reliable favorite. For more storage tips on similar treats, check out resources like homemade cookie butter variations.
FAQs: Frequently Asked Questions About Cookie Butter
Print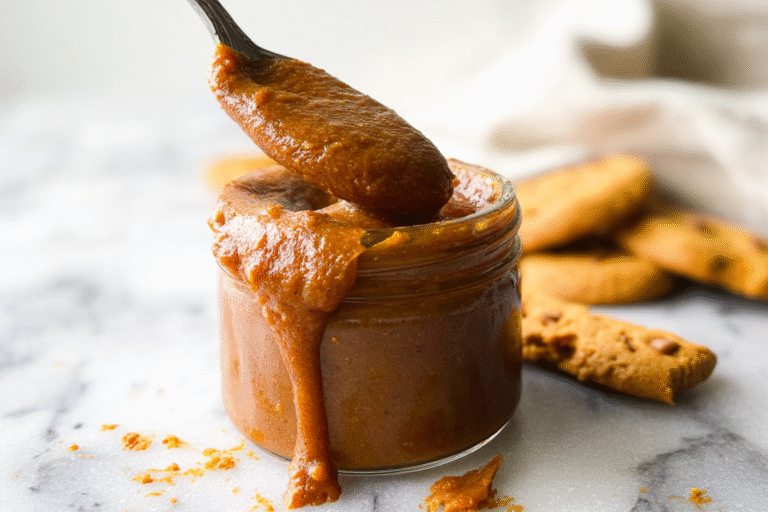
Cookie Butter
🍪 Create a rich, creamy spread that transforms ordinary cookies into an irresistible treat perfect for dipping, spreading, or gifting.
✨ Save money while enjoying superior flavor and texture compared to expensive store-bought versions with this simple homemade recipe.
- Total Time: 1 hour 15 minutes to 2 hours 15 minutes
- Yield: About 2 cups
Ingredients
– 2 cups cookie crumbs for base flavor and texture
– 1/2 stick butter for richness and binding
– 1/2 cup sweetened condensed milk for sweetness and thickness
– 1/4 cup evaporated milk for smooth texture and creaminess
– Water as needed for adjusting thickness
Instructions
1-First Step: Prepare Your Cookie Crumbs Begin by processing your dry cookies in a food processor until they turn into fine crumbs. If you’re using sandwich cookies, scrape out the creamy filling first to avoid a too-sweet mix. This step ensures your base is ready and helps achieve that smooth texture we all love in cookie butter.
2-Second Step: Melt the Butter Next, melt 1/2 stick of butter in a saucepan over low heat, stirring gently until it’s fully liquid. This only takes a minute or two, so keep an eye on it to prevent burning. Once melted, you’re set to combine it with the other liquids for that rich flavor foundation.
3-Third Step: Mix the Liquids Stir in 1/2 cup sweetened condensed milk and 1/4 cup evaporated milk into the melted butter until everything is well combined. This creates a creamy base that binds with the crumbs aim for a smooth mixture that coats your spoon nicely. For dietary tweaks, use coconut oil instead of butter if you’re going vegan.
4-Fourth Step: Combine with Crumbs Gradually add about 1/2 cup of this liquid mixture to your 2 cups of cookie crumbs, stirring until just moistened. Depending on how dry your cookies are, you might need to adjust the liquid amount to get the right consistency. This part is key for a homemade cookie butter that’s not too thick or too thin, and it’s easy to adapt for different tastes.
5-Fifth Step: Chill the Mixture Once mixed, pop the whole thing into the fridge for 1-2 hours to let it firm up. This chilling time, which takes about 1 hour 15 minutes to 2 hours 15 minutes total including prep, helps develop the flavors and makes it easier to work with later. It’s a great time to relax or prep other snacks!
6-Sixth Step: Adjust for Texture After chilling, check the texture and add water in 1/8 teaspoon increments, stirring vigorously until you reach your desired smoothness. This fine-tunes your cookie butter to be perfectly spreadable, especially if it feels a bit dry. Remember, this step keeps things flexible for various preferences, like making a creamy cookie butter recipe that’s just right for you.
7-Final Step: Store and Serve Give it another quick chill before storing, and you’re done your homemade cookie butter is ready to enjoy! It’s delicious on toast or as a dip, and the whole process only requires 15 minutes of active work. For more baking ideas, check out our banana chocolate chip muffins recipe to pair with it.
Last Step:
Please leave a rating and comment letting us know how you liked this recipe! This helps our business to thrive and continue providing free, high-quality recipes for you.Notes
🍪 Remove creamy fillings from sandwich cookies before processing to prevent the mixture from becoming too sweet and sticky.
💧 Adjust water gradually for a smoother texture after the initial chilling period – this is the secret to perfect consistency.
🎁 Package in decorative jars and gift with pretzels or apple slices for a thoughtful homemade present.
- Prep Time: 15 minutes
- Chilling Time: 1-2 hours
- Cook Time: 5 minutes
- Category: Spread
- Method: Food Processor
- Cuisine: International
- Diet: Vegetarian
Nutrition
- Serving Size: 1 cup
- Calories: 1307
- Sugar: 86g
- Sodium: 858mg
- Fat: 76g
- Saturated Fat: 37g
- Unsaturated Fat: 39g
- Trans Fat: 0g
- Carbohydrates: 142g
- Fiber: 4g
- Protein: 17g
- Cholesterol: 121mg





