

Why You’ll Love This Chocolate Dirt Pie Cups
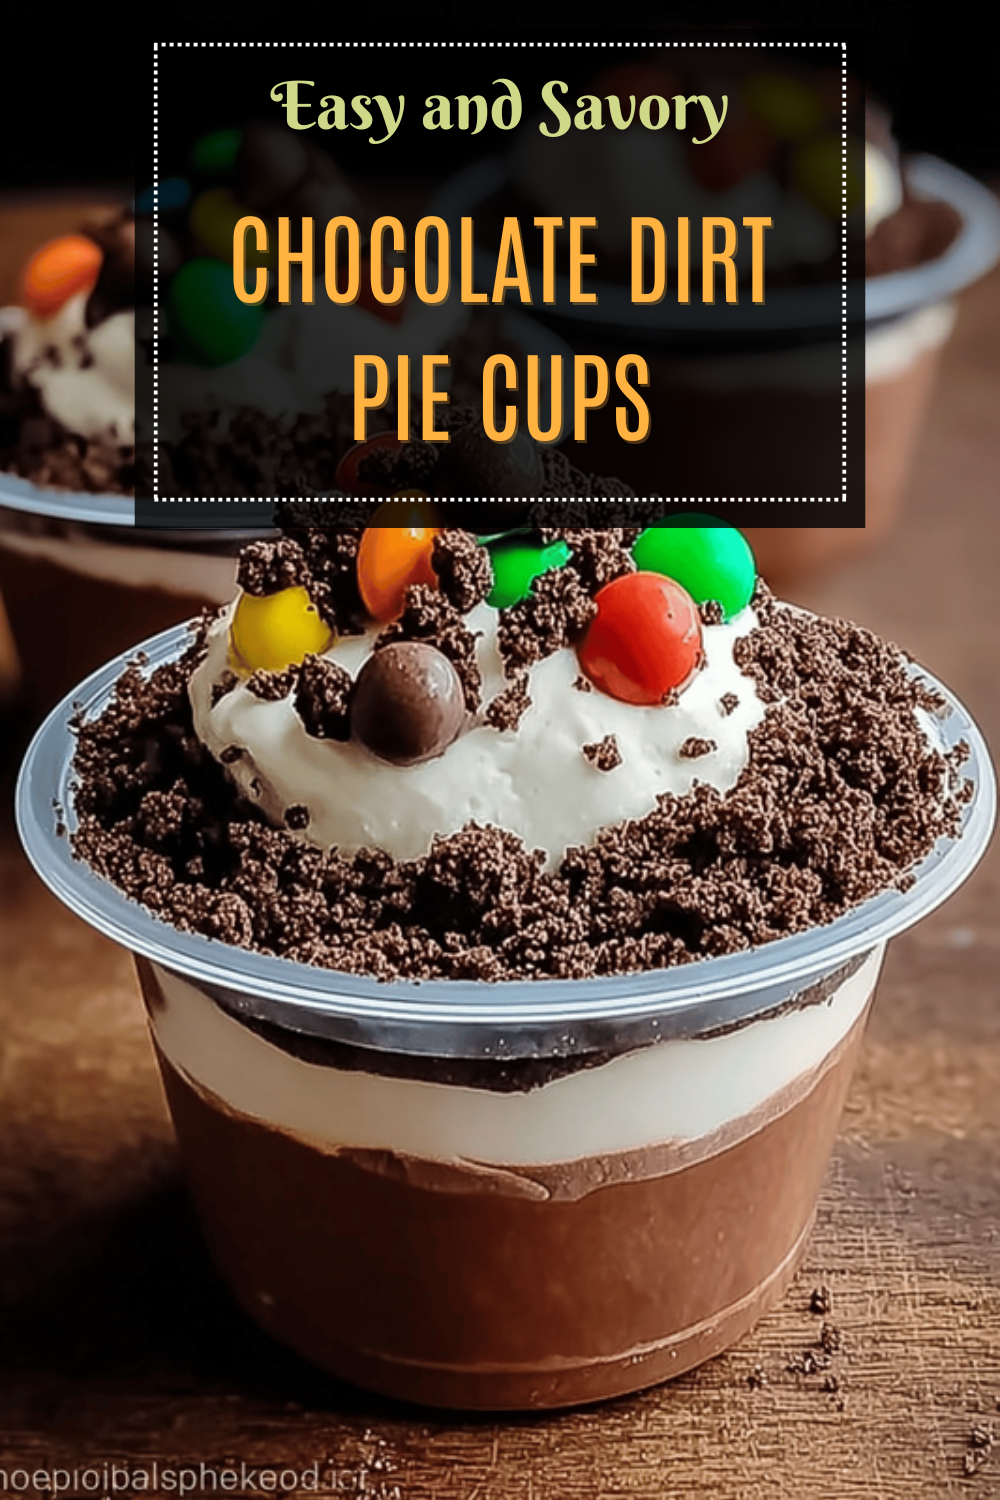
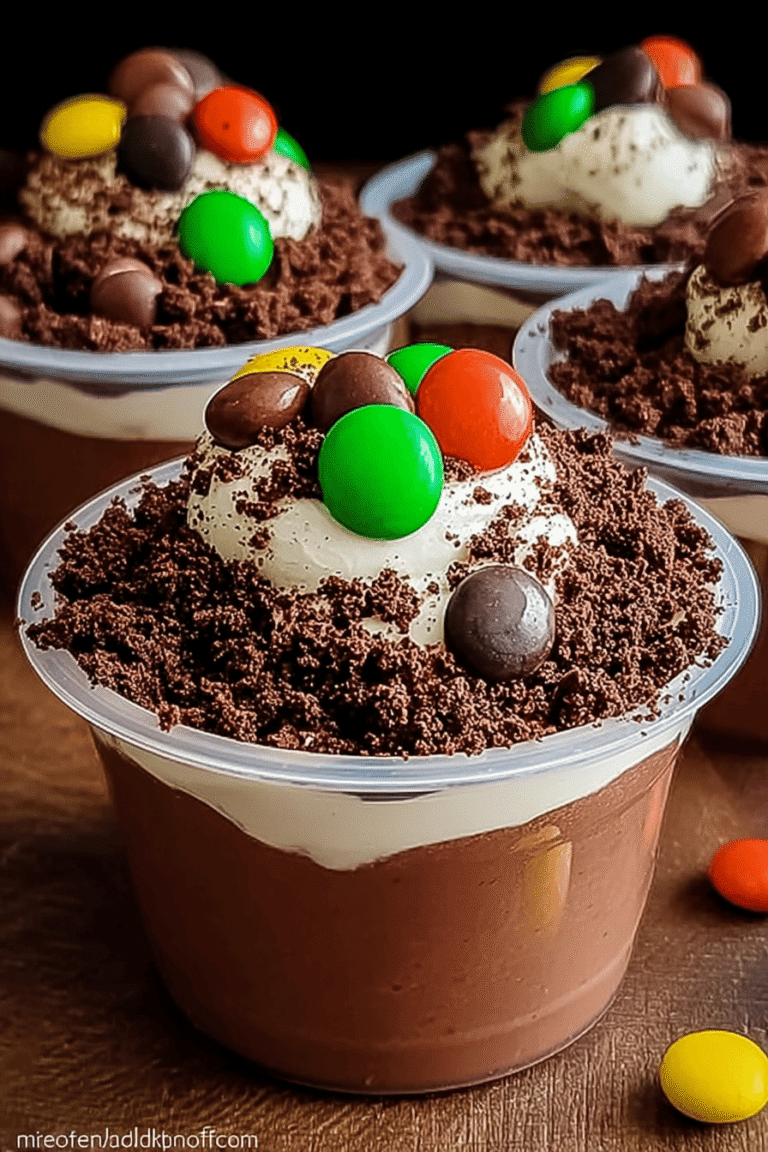
These Chocolate Dirt Pie Cups bring fun and flavor to your table, making them a hit for family gatherings or quick treats after dinner. Picture layers of smooth chocolate pudding mixed with whipped topping, topped with crushed chocolate sandwich cookies and playful gummy worms that kids adore. Not only is this recipe simple enough for beginners, but it also offers health perks from ingredients like cocoa, which has antioxidants to support your wellness.
One reason to try these cups is their ease of preparation, taking just about 40 minutes total with minimal steps, ideal for busy parents and home cooks. You’ll appreciate how they can be adapted for various diets, from vegan to gluten-free, while still delivering a rich taste that feels special. Whether you’re serving them at a party or as a midweek surprise, this easy chocolate dirt pie cups recipe with creamy layers adds joy to everyday moments.
Beyond the fun theme, these cups provide a balanced dessert option with nutrients like protein from milk and fiber from cookies. For more ideas on chocolate-based recipes, check out our guide on chocolate zucchini bread for another tasty twist. This makes Chocolate Dirt Pie Cups a versatile choice that fits into many lifestyles, from students grabbing a quick bite to seniors enjoying a light treat.
Jump to:
- Why You’ll Love This Chocolate Dirt Pie Cups
- Essential Ingredients for Chocolate Dirt Pie Cups
- Main Ingredients List
- How to Prepare the Perfect Chocolate Dirt Pie Cups: Step-by-Step Guide
- Gather and Prepare Ingredients
- Mix the Pudding Base
- Combine and Layer
- Dietary Substitutions to Customize Your Chocolate Dirt Pie Cups
- Protein and Main Component Alternatives
- Veggie and Flavor Modifications
- Mastering Chocolate Dirt Pie Cups: Advanced Tips and Variations
- Pro Techniques for Better Results
- Flavor and Presentation Ideas
- How to Store Chocolate Dirt Pie Cups: Best Practices
- FAQs: Frequently Asked Questions About Chocolate Dirt Pie Cups
- How many Chocolate Dirt Pie Cups does this recipe make?
- Should I remove the frosting from the Oreo cookies when making the chocolate dirt layer?
- How can I prevent my instant pudding from becoming grainy when making Chocolate Dirt Pie Cups?
- How far in advance can I prepare Chocolate Dirt Pie Cups without compromising freshness?
- What are some ingredient substitutions for making Chocolate Dirt Pie Cups suitable for different dietary needs?
- Chocolate Dirt Pie Cups
- Ingredients
- Instructions
- Last Step:
- Notes
- Nutrition
- Did you make this recipe?
Essential Ingredients for Chocolate Dirt Pie Cups
Gathering the right ingredients is key to making delicious Chocolate Dirt Pie Cups that everyone will love. This no-bake dessert relies on simple items you likely have on hand or can easily find at the store. Below, I’ll break down the main ingredients with their exact measurements to help you prepare without any guesswork.
Main Ingredients List
- 4 cups milk
- 2 boxes instant chocolate pudding mix (3.4 oz each)
- 8 ounces whipped topping or whipped cream (softened if frozen)
- 12 chocolate sandwich cookies, crushed
- 24 gummy worms (3-5 per cup)
This list covers everything needed for the recipe, ensuring you create the perfect creamy layers with a fun dirt topping. For special touches, consider how these ingredients work together to form a dessert that’s both indulgent and straightforward.
If you’re looking for more dessert ideas, our recipe for banana chocolate chip muffins offers a similar chocolate vibe with added fruit. Remember, using fresh ingredients like cold milk helps the pudding set up nicely, making your Chocolate Dirt Pie Cups even better.
How to Prepare the Perfect Chocolate Dirt Pie Cups: Step-by-Step Guide
Getting started with Chocolate Dirt Pie Cups is as easy as mixing a few items and letting them chill. This no-bake recipe lets you whip up a tasty treat in no time, perfect for busy afternoons with the family. Follow these steps to create creamy layers that will wow your guests.
Gather and Prepare Ingredients
First, pull together all your ingredients and get them ready. That means crushing the chocolate sandwich cookies into fine crumbs, either by hand or with a tool, and making sure your milk is cold for the best pudding texture.
Mix the Pudding Base
Next, whisk the instant chocolate pudding mix with 4 cups of cold milk in a large bowl until it’s smooth and starting to thicken. For tips on avoiding lumps, check out this resource on smooth instant pudding to keep things easy and fun.
Combine and Layer
Then, fold in the softened whipped topping to make a light, fluffy mixture. Divide it into clear cups for a pretty look, and top with the crushed cookies and gummy worms. Chill everything for about 30 minutes so the flavors blend just right.
This process, from start to finish, takes only 40 minutes, including prep and chill time. Once you’re done, you’ll have a dessert that’s not just delicious but also customizable with extras like fresh strawberries for a fruity twist.

Dietary Substitutions to Customize Your Chocolate Dirt Pie Cups
Making Chocolate Dirt Pie Cups work for everyone is simple with a few smart swaps. Whether you’re dealing with allergies or preferences, these changes keep the fun and flavor intact. Let’s look at options for protein, veggies, and more to fit your needs.
Protein and Main Component Alternatives
- Use silken tofu blended with cocoa powder instead of traditional pudding for a protein boost and vegan option.
- Swap regular milk with almond or soy milk to handle lactose issues while keeping the creamy texture.
Veggie and Flavor Modifications
- Add mashed avocado for extra creaminess and nutrients, blending it into the pudding mix.
- Incorporate spices like cinnamon for a warm kick or try fruit sauces for a fresh variation.
These tweaks make your chocolate dirt pie even more inclusive, perfect for diet-conscious folks or families with varied tastes. By trying these, you can enjoy the same easy recipe with a personal touch.
Mastering Chocolate Dirt Pie Cups: Advanced Tips and Variations
Once you nail the basics of Chocolate Dirt Pie Cups, it’s time to get creative and add some flair. These tips will help you improve texture, flavor, and presentation for a standout dessert. From pro techniques to fun twists, you’ll love experimenting with this recipe.
Pro Techniques for Better Results
Use chilled bowls and utensils when mixing to keep the whipped topping airy and prevent any melting issues. For the smoothest pudding, stir thoroughly and add milk gradually as suggested in the tips.
Flavor and Presentation Ideas
Try different cookies for variety, like mint-flavored ones, or mix in espresso powder for a mocha spin. Serve in clear cups or even cleaned flower pots for a themed look, and don’t forget garnishes like edible flowers to make it pop.
| Variation | Description |
|---|---|
| Beach Theme | Add blue food coloring to pudding and use crushed cookies as “sand”. |
| Halloween Version | Incorporate plastic toys and more gummy worms for a spooky feel. |
Pudding can be prepped 2 to 3 days ahead if covered well. These advanced ideas, including adding crumbled chocolate cake for extra texture, keep the essence of chocolate dirt pie while making it your own.
How to Store Chocolate Dirt Pie Cups: Best Practices
Keeping your Chocolate Dirt Pie Cups fresh is easy with the right storage methods. This helps maintain that creamy texture and crunchy topping for as long as possible. Follow these steps to enjoy your dessert without any waste.
For refrigeration, place the cups in airtight containers and keep them in the fridge for up to 3 days. If you want to freeze them, do so without the cookie topping and add it after thawing to keep the crunch.
Meal prep is a breeze make the pudding ahead and assemble when needed. This way, it’s perfect for busy schedules, ensuring you always have a quick treat on hand. Remember, serving them chilled keeps the flavors at their best.
FAQs: Frequently Asked Questions About Chocolate Dirt Pie Cups
How many Chocolate Dirt Pie Cups does this recipe make?
This recipe yields 8 servings of Chocolate Dirt Pie Cups. Each serving is designed to satisfy a single person, making it perfect for small gatherings or family treats.
Should I remove the frosting from the Oreo cookies when making the chocolate dirt layer?
Keep the white frosting in the center of the Oreo cookies when crushing them for the dirt layer. The frosting adds extra sweetness and helps the crumbs stick together, creating the classic “dirt” texture for the pie cups.
How can I prevent my instant pudding from becoming grainy when making Chocolate Dirt Pie Cups?
To avoid a grainy texture in instant pudding, first scrape the bottom of the mixing bowl to incorporate any undissolved powder. Mix half the milk with the pudding mix thoroughly before adding the rest of the milk and mixing again. Using a fresh instant pudding packet and stirring quickly helps achieve a smooth, creamy consistency.
How far in advance can I prepare Chocolate Dirt Pie Cups without compromising freshness?
You can prepare the chocolate pudding portion 2 to 3 days ahead, covering it tightly with plastic wrap to prevent a skin from forming. Add the Oreo crumb topping no more than 24 hours before serving to keep it crunchy and avoid it becoming soggy.
What are some ingredient substitutions for making Chocolate Dirt Pie Cups suitable for different dietary needs?
For a dairy-free option, use coconut milk or almond milk pudding mix and dairy-free whipped topping. Gluten-free Oreos or chocolate cookies can replace regular Oreos for those with gluten sensitivities. These substitutions help accommodate dietary restrictions while keeping the flavor and texture close to the original.
Chocolate Dirt Pie Cups
🍫 Enjoy the rich, creamy layers of this Easy Chocolate Dirt Pie Cups recipe that’s perfect for quick, no-bake desserts.
🐛 With fun gummy worm decorations and a chocolatey crunch, it’s a delightful treat for all ages.
- Total Time: 40 minutes
- Yield: 8 servings 1x
Ingredients
4 cups milk
2 boxes instant chocolate pudding mix (3.4 oz each)
8 ounces whipped topping or whipped cream (softened if frozen)
12 chocolate sandwich cookies, crushed
24 gummy worms (3–5 per cup)
Instructions
1-Gather and Prepare Ingredients: First, pull together all your ingredients and get them ready. That means crushing the chocolate sandwich cookies into fine crumbs, either by hand or with a tool, and making sure your milk is cold for the best pudding texture.
2-Mix the Pudding Base: Next, whisk the instant chocolate pudding mix with 4 cups of cold milk in a large bowl until it’s smooth and starting to thicken. For tips on avoiding lumps, check out this resource on smooth instant pudding to keep things easy and fun.
3-Combine and Layer: Then, fold in the softened whipped topping to make a light, fluffy mixture. Divide it into clear cups for a pretty look, and top with the crushed cookies and gummy worms. Chill everything for about 30 minutes so the flavors blend just right.
Last Step:
Please leave a rating and comment letting us know how you liked this recipe! This helps our business to thrive and continue providing free, high-quality recipes for you.Notes
🥄 Use instant pudding mix for a fast, hassle-free dessert.
🍫 Crush cookies just before serving to keep the “dirt” crunchy, preventing sogginess.
🎉 Customize with fun layers or themed decorations to suit any occasion or party theme.
- Prep Time: 10 minutes
- Chill time: 30 minutes
- Cook Time: 0 minutes
- Category: Dessert
- Method: No-Bake, Mixing
- Cuisine: American
- Diet: Vegetarian
Nutrition
- Serving Size: 9 ounces (1 cup)
- Calories: 285 kcal
- Sugar: 31 g
- Sodium: 145 mg
- Fat: 9 g
- Saturated Fat: 5 g
- Trans Fat: 0 g
- Carbohydrates: 46 g
- Fiber: 1 g
- Protein: 6 g
- Cholesterol: 7 mg





