

Why You’ll Love This Cheesy Bacon Cavatappi
Hey there, fellow food lovers! If you’re craving a meal that’s quick, tasty, and oh-so-comforting, this Cheesy Bacon Cavatappi is just what you need. It’s one of those dishes that comes together with simple steps, making it ideal for busy parents or students who want something homemade without spending hours in the kitchen. What really sets this recipe apart is how it balances rich flavors with options for healthier tweaks.
This Cheesy Bacon Cavatappi recipe is straightforward and quick to prepare, perfect for busy weeknights. With minimal ingredients and simple cooking steps, you can have a delicious meal ready in under 30 minutes. Despite its indulgent flavor, this dish can be made with nutritious ingredients like whole grain pasta and lean bacon options, providing a balanced portion of protein, calcium from cheese, and essential vitamins.
Plus, it’s highly adaptable to meet dietary preferences such as vegetarian or gluten-free choices without losing that amazing taste. The combination of smoky bacon, creamy cheese sauce, and perfectly cooked cavatappi pasta delivers a rich and unique experience that makes every bite feel special. Whether you’re a working professional looking for an easy dinner or a party host wanting to impress, this recipe has got you covered.
To keep things exciting, remember that enjoying recipes like this can tie into fun family moments, much like sharing a simple treat from our blog. For instance, if you’re exploring more baked delights, check out our guide on healthy chocolate chip cookies for a sweet sidekick to your meal.
Jump to:
- Why You’ll Love This Cheesy Bacon Cavatappi
- Essential Ingredients for Cheesy Bacon Cavatappi
- How to Prepare the Perfect Cheesy Bacon Cavatappi: Step-by-Step Guide
- Dietary Substitutions to Customize Your Cheesy Bacon Cavatappi
- Mastering Cheesy Bacon Cavatappi: Advanced Tips and Variations
- Quick Variation Ideas
- How to Store Cheesy Bacon Cavatappi: Best Practices
- FAQs: Frequently Asked Questions About Cheesy Bacon Cavatappi
- How do I make Cheesy Bacon Cavatappi from scratch?
- What type of cheese works best in Cheesy Bacon Cavatappi?
- Can I prepare Cheesy Bacon Cavatappi ahead of time and reheat it later?
- How can I make Cheesy Bacon Cavatappi healthier without losing flavor?
- What are some common mistakes to avoid when making Cheesy Bacon Cavatappi?
- Cheesy Bacon Cavatappi
- Ingredients
- Instructions
- Last Step:
- Notes
- Nutrition
- Did you make this recipe?
Essential Ingredients for Cheesy Bacon Cavatappi
Let’s dive into what makes this Cheesy Bacon Cavatappi so irresistible it’s all about the ingredients! I’ve always believed that great recipes start with quality items, and this one is no exception. You’ll find a mix of everyday pantry staples and a few special touches that create that creamy, cheesy magic.
Based on my own kitchen experiments, using fresh seasonings and real cheese really amps up the flavor. Now, here’s the full list of everything you’ll need, pulled straight from the recipe details to make sure you’re set for success.
- 2 cups milk
- 1 tablespoon onion powder
- 1 tablespoon garlic powder
- 1 teaspoon black pepper
- 1 teaspoon salt
- 1 cup shredded mozzarella cheese
- 1 cup shredded Parmesan cheese
- ½ cup real bacon bits
- Cooked cavatappi noodles (amount cooked according to package directions)
For special tweaks, you can easily swap in options like plant-based cheese for a vegan version or gluten-free pasta if that’s your preference. I love how flexible this makes the recipe for different diets, so everyone at your table can enjoy it just as much as you do.
How to Prepare the Perfect Cheesy Bacon Cavatappi: Step-by-Step Guide
Alright, friends, it’s time to get cooking! This step-by-step guide walks you through making Cheesy Bacon Cavatappi in a way that’s simple and fun, just like whipping up your favorite drink on a hot day. I’ll share tips along the way to help you avoid any hiccups and ensure your dish turns out creamy and delicious every single time.
First, preheat your oven to 400°F (200°C) to get that perfect bubbly finish. Cook the cavatappi noodles according to package directions until they’re just right, then drain them and set aside for a moment. In a large saucepan, combine 2 cups of milk with cream of bacon soup and stir well to blend everything smoothly.
Bring that mixture to a boil, then take it off the heat to keep things from overcooking. Add the cooked noodles to the saucepan and give it a good stir to coat them evenly. Next, mix in 1 tablespoon onion powder, 1 tablespoon garlic powder, 1 teaspoon black pepper, 1 teaspoon salt, 1 cup shredded mozzarella cheese, and 1 cup shredded Parmesan cheese until the cheese melts and everything is nicely coated.
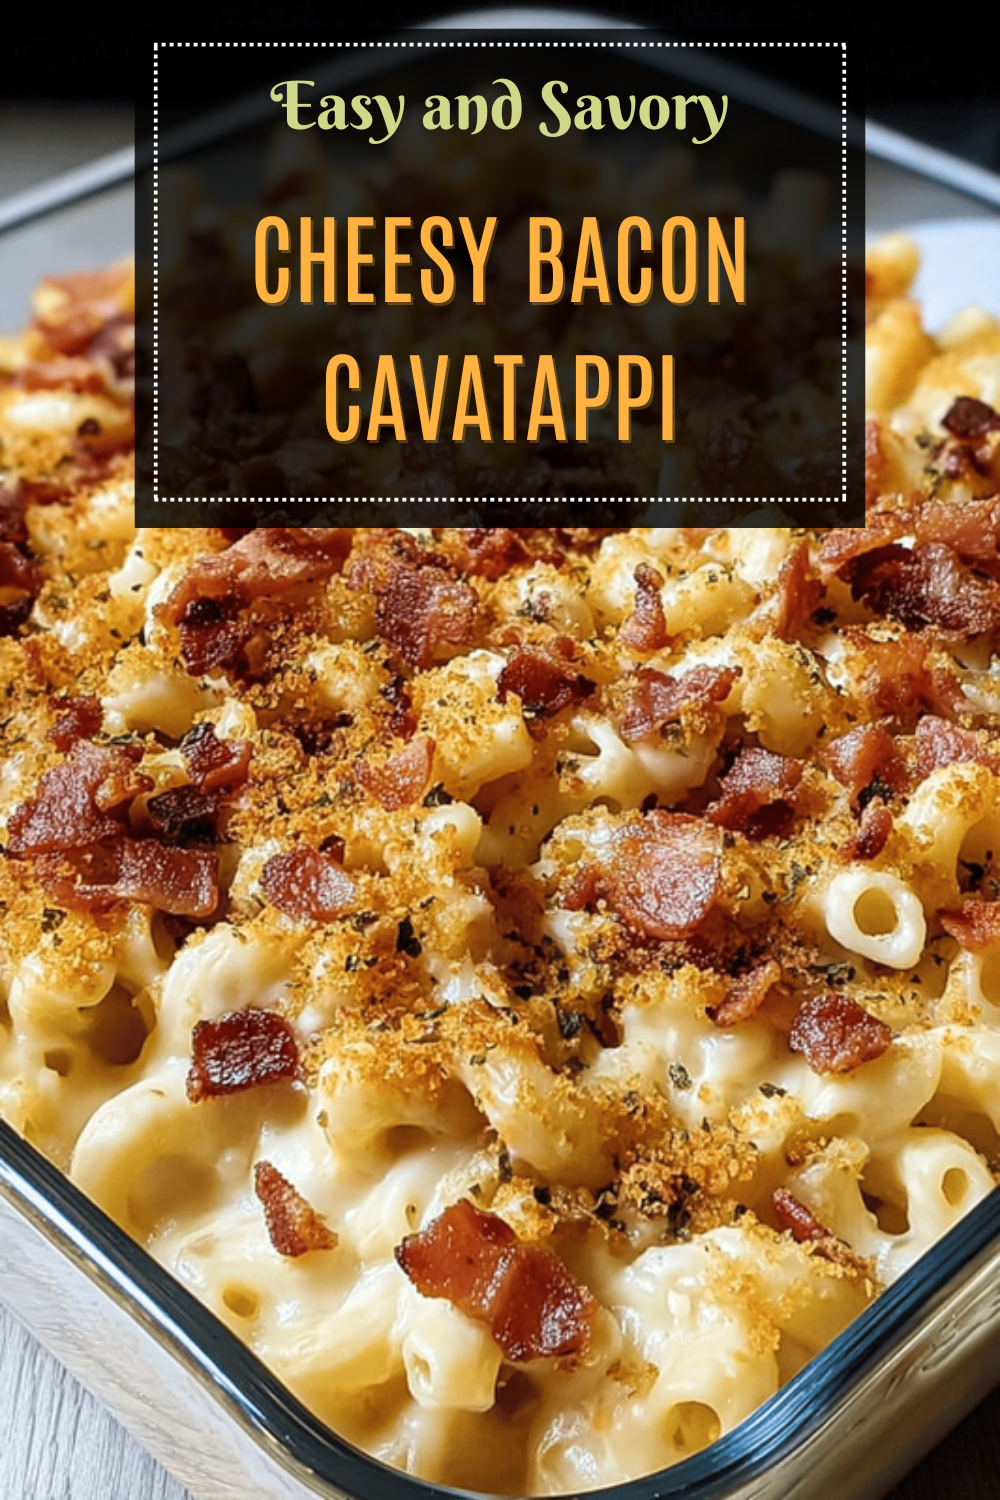
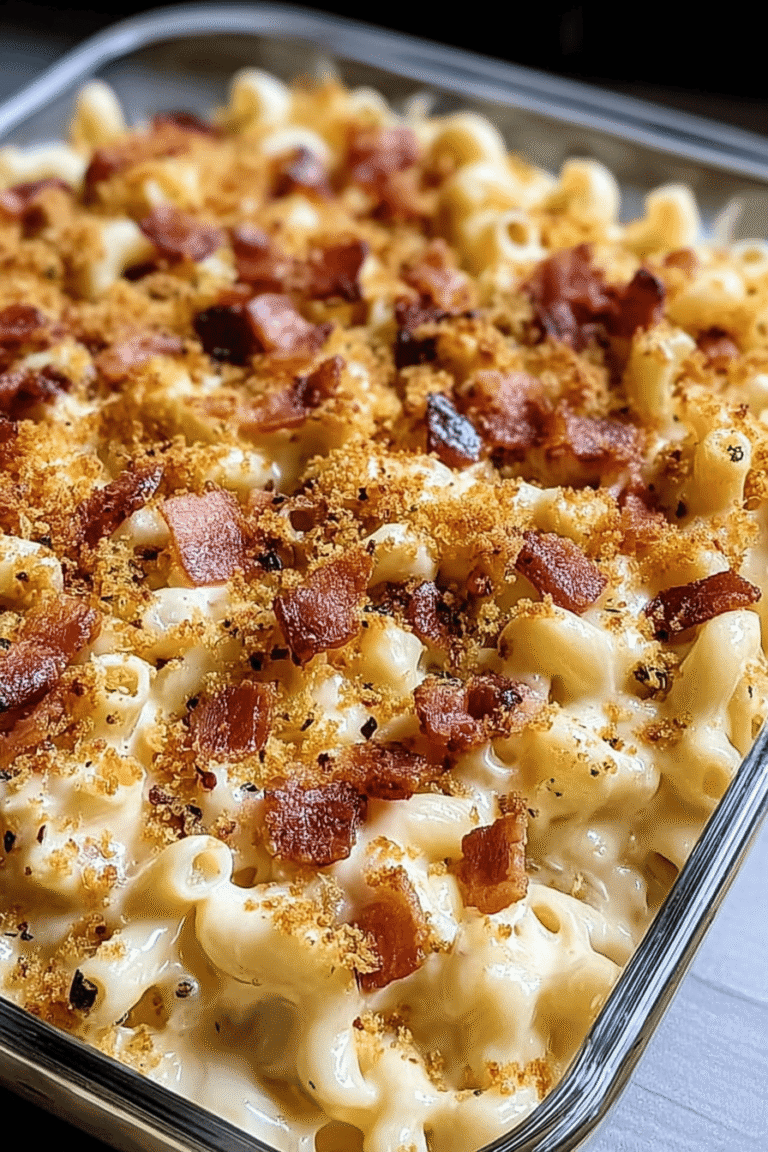
Pour the pasta mixture into a greased 9×13 inch baking dish and spread it out evenly. Top it with additional shredded Parmesan cheese, shredded mozzarella cheese, and the ½ cup real bacon bits, making sure to distribute them evenly for that crispy, cheesy layer. Pop it in the oven and bake for 14 to 16 minutes, or until the cheese on top is fully melted and bubbly. Serve it hot, and watch it disappear!
If you’re curious about more oven-baked favorites, our recipe for apple crisp offers a sweet contrast to this savory dish and is just as easy to prepare.

Dietary Substitutions to Customize Your Cheesy Bacon Cavatappi
One of the best parts about Cheesy Bacon Cavatappi is how easy it is to make it your own! Whether you’re watching your calories or following a specific diet, these swaps keep the flavor front and center. I often experiment with these in my kitchen, and they never disappoint.
For protein and main component alternatives, substitute the bacon with turkey bacon for a leaner option or use smoked tempeh for a vegan twist. You can also replace the cheeses with nutritional yeast or vegan alternatives to keep things dairy-free. When it comes to vegetable, sauce, and seasoning modifications, add steamed broccoli or spinach for extra nutrients and a pop of color.
Try using almond or oat milk instead of regular milk if you’re dealing with lactose intolerance, and play around with seasonings like garlic powder or smoked paprika to add your personal flair. These changes make the dish versatile for everyone, from diet-conscious folks to baking enthusiasts hosting a gathering.
Mastering Cheesy Bacon Cavatappi: Advanced Tips and Variations
Once you’ve nailed the basics of Cheesy Bacon Cavatappi, let’s level up! I’ve picked up a few tricks over time that take this dish from good to absolutely amazing. For pro cooking techniques, add the cheese slowly off the heat to avoid clumping and get that ultra-smooth sauce we all love.
Crisp the bacon on a wire rack to cut down on grease, making the final product lighter and tastier. When it comes to flavor variations, blend smoked gouda with your cheeses or toss in caramelized onions for extra depth. For presentation tips, garnish with fresh herbs like chives and serve in individual ramekins for a fancy touch that impresses your guests.
Make-ahead options are a game-changer for busy days prep the cheese sauce and pasta separately, then combine and bake later. This way, you can enjoy homemade meals even when life gets hectic, much like prepping ahead for a quick dessert from our site.
Quick Variation Ideas
- Add spicy elements like chili flakes for a kick.
- Incorporate veggies for a nutrient boost.
- Experiment with different pasta shapes if cavatappi isn’t handy.
How to Store Cheesy Bacon Cavatappi: Best Practices
Don’t let leftovers go to waste with the right storage tips, your Cheesy Bacon Cavatappi can stay fresh and tasty for days. I always make a big batch and save some for later, and these methods have become my go-to. Proper storage keeps that creamy texture intact so you can enjoy it again and again.
For refrigeration, store leftovers in an airtight container in the fridge for up to 3 days to keep the flavors just right. If you want to freeze it, portion into freezer-safe containers and store for up to 2 months; thaw overnight in the fridge before reheating. When reheating, warm it gently on the stove or in the microwave, adding a splash of milk to bring back that creamy goodness.
Meal prep is super easy too just divide into individual servings after cooking for quick grab-and-go options during the week. This approach works great for working professionals or seniors looking for convenient meals.
FAQs: Frequently Asked Questions About Cheesy Bacon Cavatappi
How do I make Cheesy Bacon Cavatappi from scratch?
To make Cheesy Bacon Cavatappi, start by boiling 12 ounces of cavatappi pasta until al dente. While the pasta cooks, fry 6 slices of bacon until crisp, then crumble. In a separate pan, prepare a cheese sauce by melting 3 tablespoons of butter, stirring in 3 tablespoons of flour to form a roux, then gradually whisking in 2 cups of milk. Cook until thickened, then add 2 cups of shredded cheddar cheese and ½ teaspoon of garlic powder. Combine the drained pasta, cheese sauce, and bacon, stirring well. Optionally, bake the mixture at 350°F for 15 minutes with extra cheese on top for a bubbly finish.
What type of cheese works best in Cheesy Bacon Cavatappi?
Cheddar cheese is the most popular choice for Cheesy Bacon Cavatappi due to its sharp flavor and smooth melting properties. For a richer taste, you can blend sharp cheddar with mozzarella or Monterey Jack for extra creaminess. Avoid pre-shredded cheeses with anti-caking agents, as they may prevent smooth melting. Using freshly shredded cheese ensures a silky texture in your sauce.
Can I prepare Cheesy Bacon Cavatappi ahead of time and reheat it later?
Yes, you can prepare Cheesy Bacon Cavatappi a day in advance. Store it in an airtight container in the refrigerator for up to 2 days. When reheating, cover it with foil and warm in the oven at 350°F for 15-20 minutes to evenly heat it without drying out. Adding a splash of milk before reheating can help maintain the sauce’s creamy texture.
How can I make Cheesy Bacon Cavatappi healthier without losing flavor?
To make a lighter version, use whole-grain cavatappi pasta for added fiber and reduce the amount of bacon or substitute with turkey bacon. Swap heavy cream for low-fat milk in the cheese sauce and select reduced-fat cheddar. Adding steamed vegetables like broccoli or spinach can boost nutrition and add color, balancing indulgence with wholesome ingredients.
What are some common mistakes to avoid when making Cheesy Bacon Cavatappi?
Common mistakes include overcooking the pasta, which leads to mushiness, and not cooking the roux long enough, resulting in a grainy sauce. Also, adding cheese directly to hot milk without a roux can cause clumping or separation. Another error is skipping seasoning; be sure to taste and adjust salt and pepper after mixing all ingredients to balance the flavors. Finally, avoid using bacon that’s too greasy without draining excess fat to prevent a heavy dish.
Cheesy Bacon Cavatappi
🧀 Experience the creamy, cheesy comfort of this hearty bacon cavatappi pasta that’s perfect for any occasion.
🥓 Rich with bacon flavor and melted cheeses, this dish is sure to please both family and guests with its satisfying taste.
- Total Time: 36 minutes
- Yield: 6 servings
Ingredients
– 2 cups milk
– 1 tablespoon onion powder
– 1 tablespoon garlic powder
– 1 teaspoon black pepper
– 1 teaspoon salt
– 1 cup shredded mozzarella cheese
– 1 cup shredded Parmesan cheese
– ½ cup real bacon bits
– Cooked cavatappi noodles (amount cooked according to package directions)
Instructions
1-First, preheat your oven to 400°F (200°C) to get that perfect bubbly finish. Cook the cavatappi noodles according to package directions until they’re just right, then drain them and set aside for a moment.
2-In a large saucepan, combine 2 cups of milk with cream of bacon soup and stir well to blend everything smoothly.
3-Bring that mixture to a boil, then take it off the heat to keep things from overcooking. Add the cooked noodles to the saucepan and give it a good stir to coat them evenly. Next, mix in 1 tablespoon onion powder, 1 tablespoon garlic powder, 1 teaspoon black pepper, 1 teaspoon salt, 1 cup shredded mozzarella cheese, and 1 cup shredded Parmesan cheese until the cheese melts and everything is nicely coated.
4-Pour the pasta mixture into a greased 9×13 inch baking dish and spread it out evenly. Top it with additional shredded Parmesan cheese, shredded mozzarella cheese, and the ½ cup real bacon bits, making sure to distribute them evenly for that crispy, cheesy layer. Pop it in the oven and bake for 14 to 16 minutes, or until the cheese on top is fully melted and bubbly. Serve it hot, and watch it disappear!
Last Step:
Please leave a rating and comment letting us know how you liked this recipe! This helps our business to thrive and continue providing free, high-quality recipes for you.Notes
🧂 Use cream of bacon soup to create a rich, creamy sauce base.
🧀 Stir well after adding cheese to coat noodles thoroughly for an even flavor.
🥓 Evenly spread cheese and bacon topping before baking for best results and a delicious crust.
- Prep Time: 20 minutes
- Cook Time: 16 minutes
- Category: Main Course
- Method: Baking
- Cuisine: American
- Diet: Non-vegetarian
Nutrition
- Serving Size: 1 serving
- Calories: 667 kcal per serving
- Sugar: 3 g per serving (estimate)
- Sodium: 700 mg per serving (estimate)
- Fat: 38 g per serving (estimate)
- Saturated Fat: 18 g per serving (estimate)
- Unsaturated Fat: 15 g per serving (estimate)
- Trans Fat: 0.5 g per serving (estimate)
- Carbohydrates: 48 g per serving (estimate)
- Fiber: 2 g per serving (estimate)
- Protein: 28 g per serving (estimate)
- Cholesterol: 90 mg per serving (estimate)





