

Why You’ll Love This Buttermilk Cake
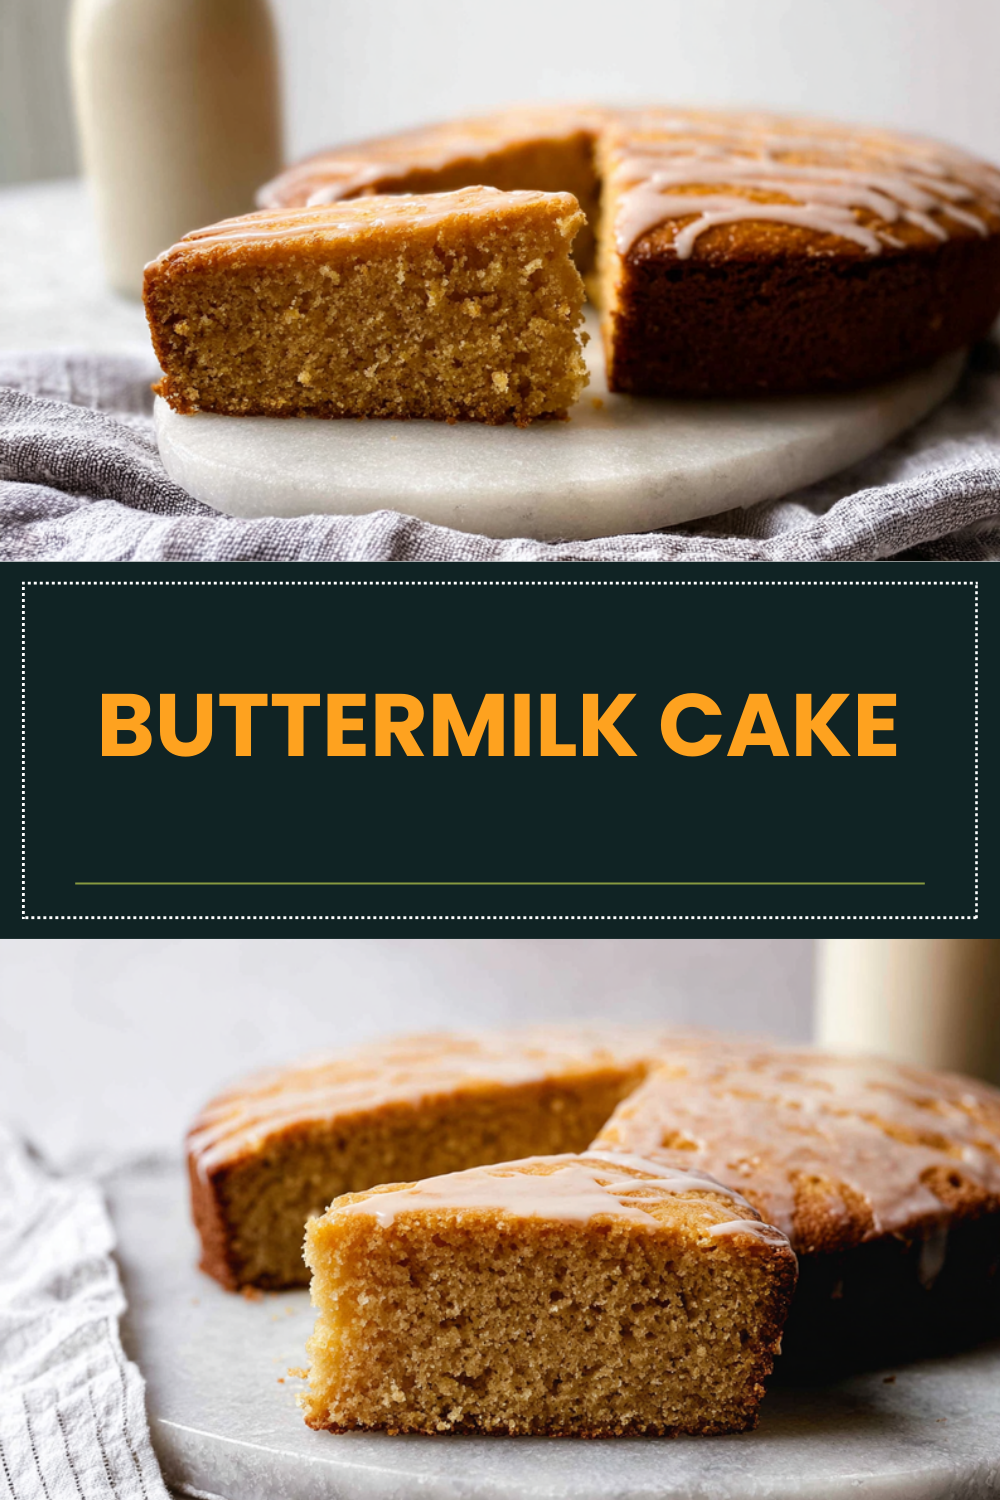
This Buttermilk Cake is one of those desserts that will quickly become your go-to recipe for family gatherings. It comes together with simple steps that even beginners can handle, making it perfect for busy days. Let me share why it’s such a hit in my kitchen and why you’ll want to bake it soon.
First, it’s incredibly easy to prepare. With just a few basic items from your pantry and about 45 minutes of baking time, you can have a fresh cake ready without spending the whole afternoon in the kitchen. The straightforward mixing method ensures you won’t deal with complicated techniques, so even if you’re new to baking, this fluffy cake will turn out great every time. Plus, the total prep and cook time is only around 1 hour and 30 minutes, leaving you more time to enjoy with loved ones.
Next, it offers some health benefits that make it a smarter choice for treats. Each serving has about 466 calories and includes nutrients like 4g of protein and 1g of fiber, which can help keep you satisfied longer. It’s not overly heavy on sugar or fat compared to other desserts, and the buttermilk adds a touch of calcium and potassium without a strong taste. This makes it a nice option for those watching their diet, like students or working professionals looking for a balanced sweet snack.
- Ease of preparation: The recipe is simple and quick, with just basic whisking and mixing that takes about 45 minutes of prep, making it ideal for busy parents and baking enthusiasts who want a homemade dessert without fuss.
- Health benefits: Packed with 65g of carbs for energy and only 227mg of sodium per serving, it’s a moist cake that provides essential nutrients like calcium and vitamin A, appealing to diet-conscious individuals and seniors.
- Versatility: You can adapt it to various dietary needs, such as using low-fat buttermilk, and it serves 15 people, perfect for parties or family meals where travelers or newlyweds might need a flexible recipe.
- Distinctive flavor: The vanilla extract and buttermilk create a tender, moist texture that’s not too sweet, setting this fluffy cake apart from others and delighting food enthusiasts with its subtle, comforting taste.
All in all, this Buttermilk Cake brings joy to any table with its reliable results and adaptable nature. Whether you’re hosting a gathering or just craving something homemade, it’s a recipe you’ll come back to again and again. For more baking ideas, check out our guide to buttermilk substitutes if you need alternatives on hand.
Jump to:
- Why You’ll Love This Buttermilk Cake
- Essential Ingredients for Buttermilk Cake
- Main Ingredients for the Cake
- Ingredients for the Glaze
- Special Dietary Options
- How to Prepare the Perfect Buttermilk Cake: Step-by-Step Guide
- First Step: Preheat and Prep Your Pan
- Second Step: Mix the Dry Ingredients
- Third Step: Combine the Wet Ingredients
- Fourth Step: Incorporate the Butter
- Fifth Step: Add the Wet Mixture
- Sixth Step: Bake the Cake
- Seventh Step: Make the Glaze
- Final Step: Apply Glaze and Serve
- Dietary Substitutions to Customize Your Buttermilk Cake
- Mastering Buttermilk Cake: Advanced Tips and Variations
- Pro Cooking Techniques
- Flavor Variations
- How to Store Buttermilk Cake: Best Practices
- FAQs: Frequently Asked Questions About Buttermilk Cake
- Buttermilk Cake
- Ingredients
- Instructions
- Last Step:
- Notes
- Nutrition
- Did you make this recipe?
Essential Ingredients for Buttermilk Cake
Gathering the right ingredients is the first step to making a perfect Buttermilk Cake. This section breaks down everything you need for both the cake and the glaze, with exact measurements to make shopping and prep easy. I’ll explain why each one matters, so you understand how they create that moist, fluffy texture we all love.
Main Ingredients for the Cake
- 2 ¾ cups all-purpose flour – This forms the base of the cake, giving it structure while keeping it light and tender.
- 2 cups sugar – Adds just the right sweetness to balance the flavors and helps create a golden brown crust.
- 1 teaspoon salt – Enhances the overall taste without making it salty, bringing out the vanilla notes.
- 2 teaspoons baking powder – Provides lift to make the cake fluffy; it’s key for that airy feel.
- ½ teaspoon baking soda – Works with the buttermilk to add extra tenderness and moisture.
- 1 ½ cups buttermilk (full fat preferred, but low fat works) – Adds moisture and a slight tang that keeps the cake soft; it’s what makes this dessert stand out as a classic Buttermilk Cake.
- 3 large whole eggs – These bind the ingredients and add richness for a better rise and texture.
- 1 egg yolk – Boosts the moisture and gives a deeper golden color to the baked cake.
- 2 teaspoons vanilla extract – Infuses a warm, comforting flavor that makes this a true vanilla Buttermilk Cake.
- 2 tablespoons vegetable oil – Helps keep the cake moist and adds a subtle richness without overwhelming the taste.
- 1 cup unsalted butter (2 sticks, room temperature) – Creates a creamy base for mixing, ensuring the cake is tender and flavorful; make sure it’s soft for the best results.
Ingredients for the Glaze
- ½ cup unsalted butter (1 stick) – Melts down to form a smooth base for the glaze, soaking into the cake for extra moisture.
- ¼ cup packed brown sugar (dark or light) – Gives a caramel-like sweetness that pairs perfectly with the cake’s flavor.
- 1 teaspoon vanilla – Adds a hint of warmth to the glaze, enhancing the overall vanilla Buttermilk Cake experience.
- ¼ cup buttermilk – Helps the glaze spread easily and absorb into the cake for that signature moist finish.
- 2 cups confectioner’s sugar – Makes the glaze silky and sweet, creating a beautiful topping that sets quickly.
Special Dietary Options
For those with specific needs, here are some easy swaps. For a vegan version, use plant-based milk mixed with 1 tablespoon lemon juice instead of buttermilk, and replace butter with a vegan alternative like margarine. If you’re going gluten-free, swap the all-purpose flour for a gluten-free blend to keep the cake fluffy. For a low-calorie option, reduce the sugar slightly or opt for a sugar substitute, though this might change the texture a bit.
| Ingredient Type | Standard | Dietary Swap |
|---|---|---|
| Flour | 2 ¾ cups all-purpose flour | Gluten-free blend for gluten-free diets |
| Buttermilk | 1 ½ cups buttermilk | Plant-based milk with acid for vegan options |
| Sugar | 2 cups sugar | Reduced amount or substitute for low-calorie |
How to Prepare the Perfect Buttermilk Cake: Step-by-Step Guide
Baking a Buttermilk Cake is simpler than you might think, and I’m excited to walk you through it. This guide uses the reverse creaming method for a tender result, so let’s get started with the basics. You’ll need a 13×9 inch glass pan and some common tools like bowls and a mixer.
First Step: Preheat and Prep Your Pan
Start by preheating your oven to 325°F and greasing or spraying a 13×9 inch glass pan. This ensures even baking and easy removal later. Take a moment to set out your ingredients so everything’s ready to go.
Second Step: Mix the Dry Ingredients
In a large bowl, whisk together 2 ¾ cups all-purpose flour, 2 cups sugar, 1 teaspoon salt, 2 teaspoons baking powder, and ½ teaspoon baking soda. This step blends the dry elements evenly, setting the foundation for your fluffy cake. Set this mixture aside for now.
Third Step: Combine the Wet Ingredients
In another bowl, whisk 1 ½ cups buttermilk, 3 large whole eggs, 1 egg yolk, 2 teaspoons vanilla extract, and 2 tablespoons vegetable oil. This creates a smooth liquid base that will add moisture and flavor. Make sure your eggs are fresh for the best results.
Fourth Step: Incorporate the Butter
Cut 1 cup of room temperature unsalted butter into pieces and add it to the dry mixture. Mix on medium speed until it becomes crumbly, about 1-2 minutes. This is where the magic happens for that tender texture we’re aiming for.
Fifth Step: Add the Wet Mixture
Pour in half of the liquid mixture and mix just until incorporated, then add the rest and mix briefly for another 30 seconds. Overmixing can make the cake tough, so keep it light and airy here. Your batter should be smooth and ready to bake.
Sixth Step: Bake the Cake
Pour the batter into your prepared pan and bake at 325°F for 45 minutes. Check for doneness by inserting a toothpick; it should come out with moist crumbs. Let the cake cool on a wire rack for 15 minutes while you prepare the glaze.
Seventh Step: Make the Glaze
While the cake is warm, melt ½ cup unsalted butter over low to medium heat. Turn off the heat, stir in ¼ cup packed brown sugar, 1 teaspoon vanilla, and ¼ cup buttermilk until the sugar dissolves. Add 2 cups confectioner’s sugar and stir until smooth, then set aside briefly.
Final Step: Apply Glaze and Serve
Poke holes in the warm cake with a skewer, pour the warm glaze over it, and let it soak for 30 minutes. This step makes the cake extra moist and flavorful. Slice and serve warm for the best experience, and enjoy with family or friends.
The total time is about 1 hour and 30 minutes, with 15 servings to share. For more ideas on similar bakes, try our maple gingerbread coffee cake for a cozy twist.

Dietary Substitutions to Customize Your Buttermilk Cake
If you want to tweak this Buttermilk Cake for your needs, there are simple swaps you can make. Let’s look at options for different preferences, like using other ingredients based on what you have on hand. This keeps the cake moist and fluffy no matter your diet.
- For vegan diets, replace buttermilk with a mix of plant-based milk and lemon juice, and use vegan butter instead of regular.
- If you’re gluten-free, swap the flour for a gluten-free version to maintain that light texture.
- For lower calories, cut back on sugar or use a substitute, though it might alter the glaze a bit.
Mastering Buttermilk Cake: Advanced Tips and Variations
Once you’re comfortable with the basics, try these pro tips to elevate your Buttermilk Cake. I’ll share ways to experiment and make it your own. Remember, the reverse creaming method is what gives this recipe its tender crumb.
Pro Cooking Techniques
Ensure your butter is at room temperature for easy mixing, and don’t skip poking holes for glaze absorption. For the best results, use both baking powder and baking soda as specified.
Flavor Variations
- Add chocolate chips for a fun twist on this moist cake.
- Use different extracts like almond for a new flavor profile.
How to Store Buttermilk Cake: Best Practices
Proper storage keeps your Buttermilk Cake fresh and tasty. Let’s cover the essentials so you can enjoy leftovers without worry. It’s best served warm, but here’s how to handle it later.
- Refrigeration: Cover the cake and store in the fridge for up to 3 days to keep it moist.
- Freezing: Wrap slices tightly and freeze for up to 2 months for later use.
- Reheating: Warm slices in the microwave for 25 seconds to restore that fresh-baked feel.
- Meal Prep: Bake in advance and store for busy weeks, making it ideal for working professionals.
FAQs: Frequently Asked Questions About Buttermilk Cake
Print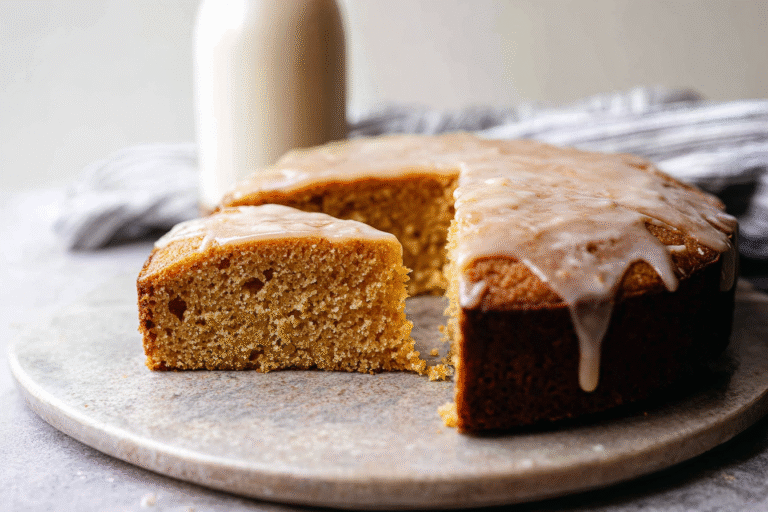
Buttermilk Cake
🍰 This vanilla buttermilk cake delivers moist, fluffy perfection with a sweet vanilla glaze that melts in your mouth.
🧁 Create bakery-quality dessert at home with this simple recipe that guarantees tender crumbs and rich vanilla flavor in every bite.
- Total Time: 1 hour 45 minutes
- Yield: 15 servings
Ingredients
– 2 ¾ cups all-purpose flour for forming the base of the cake
– 2 cups sugar for adding sweetness
– 1 teaspoon salt for enhancing the overall taste
– 2 teaspoons baking powder for providing lift
– ½ teaspoon baking soda for adding extra tenderness and moisture
– 1 ½ cups buttermilk for adding moisture and a slight tang
– 3 large whole eggs for binding the ingredients and adding richness
– 1 egg yolk for boosting moisture and giving a deeper golden color
– 2 teaspoons vanilla extract for infusing a warm, comforting flavor
– 2 tablespoons vegetable oil for keeping the cake moist and adding subtle richness
– 1 cup unsalted butter for creating a creamy base for mixing
– ½ cup unsalted butter for forming a smooth base for the glaze
– ¼ cup packed brown sugar for giving a caramel-like sweetness
– 1 teaspoon vanilla for adding a hint of warmth
– ¼ cup buttermilk for helping the glaze spread easily
– 2 cups confectioner’s sugar for making the glaze silky and sweet
Instructions
1-First Step: Preheat and Prep Your Pan Start by preheating your oven to 325°F and greasing or spraying a 13×9 inch glass pan. This ensures even baking and easy removal later. Take a moment to set out your ingredients so everything’s ready to go.
2-Second Step: Mix the Dry Ingredients In a large bowl, whisk together 2 ¾ cups all-purpose flour, 2 cups sugar, 1 teaspoon salt, 2 teaspoons baking powder, and ½ teaspoon baking soda. This step blends the dry elements evenly, setting the foundation for your fluffy cake. Set this mixture aside for now.
3-Third Step: Combine the Wet Ingredients In another bowl, whisk 1 ½ cups buttermilk, 3 large whole eggs, 1 egg yolk, 2 teaspoons vanilla extract, and 2 tablespoons vegetable oil. This creates a smooth liquid base that will add moisture and flavor. Make sure your eggs are fresh for the best results.
4-Fourth Step: Incorporate the Butter Cut 1 cup of room temperature unsalted butter into pieces and add it to the dry mixture. Mix on medium speed until it becomes crumbly, about 1-2 minutes. This is where the magic happens for that tender texture we’re aiming for.
5-Fifth Step: Add the Wet Mixture Pour in half of the liquid mixture and mix just until incorporated, then add the rest and mix briefly for another 30 seconds. Overmixing can make the cake tough, so keep it light and airy here. Your batter should be smooth and ready to bake.
6-Sixth Step: Bake the Cake Pour the batter into your prepared pan and bake at 325°F for 45 minutes. Check for doneness by inserting a toothpick; it should come out with moist crumbs. Let the cake cool on a wire rack for 15 minutes while you prepare the glaze.
7-Seventh Step: Make the Glaze While the cake is warm, melt ½ cup unsalted butter over low to medium heat. Turn off the heat, stir in ¼ cup packed brown sugar, 1 teaspoon vanilla, and ¼ cup buttermilk until the sugar dissolves. Add 2 cups confectioner’s sugar and stir until smooth, then set aside briefly.
8-Final Step: Apply Glaze and Serve Poke holes in the warm cake with a skewer, pour the warm glaze over it, and let it soak for 30 minutes. This step makes the cake extra moist and flavorful. Slice and serve warm for the best experience, and enjoy with family or friends.
Last Step:
Please leave a rating and comment letting us know how you liked this recipe! This helps our business to thrive and continue providing free, high-quality recipes for you.Notes
🧁 Use reverse creaming method – adding butter to dry ingredients first creates tender, moist texture that lasts.
🌡 Keep butter at room temperature – cold butter won’t incorporate properly and affects final cake consistency.
🍰 Pour warm glaze over warm cake – this allows maximum absorption for that signature moist, sweet coating everyone loves.
- Prep Time: 45 minutes
- Cooling Time: 15 minutes
- Cook Time: 45 minutes
- Category: Dessert
- Method: Baking
- Cuisine: American
- Diet: Regular
Nutrition
- Serving Size: 1 slice
- Calories: 466
- Sugar: 47
- Sodium: 227
- Fat: 22
- Saturated Fat: 14
- Unsaturated Fat: 8
- Trans Fat: 0
- Carbohydrates: 65
- Fiber: 1
- Protein: 4
- Cholesterol: 65





