

Why You’ll Love This Frosting Recipe
This frosting recipe is a game-changer for anyone new to baking, offering a simple way to create something truly special for your cakes and cupcakes. It uses everyday items you likely have in your kitchen, making it perfect for busy parents or students looking to whip up a treat without much fuss. What makes it stand out is how easy it is to adjust for different tastes and needs, giving you a smooth, creamy result every time.
First, the ease of preparation means you can have this frosting ready in just minutes, ideal for beginners and experienced bakers alike. It relies on straightforward steps that don’t require fancy tools, so you won’t feel overwhelmed if you’re just starting out. Plus, this recipe delivers health benefits by focusing on real ingredients without artificial additives, helping you enjoy a dessert that feels a bit lighter on the waistline.
Its versatility shines through with options to adapt for various diets, like vegan or gluten-free versions, without losing that delicious flavor. And let’s not forget the distinctive flavor profile, where a rich creaminess meets natural hints of vanilla for a taste that keeps everyone coming back for more. If you’re a baking enthusiast or even a party host aiming to impress, this frosting will elevate your creations in a fun, approachable way.
For those exploring more baking ideas, check out our banana nut bread recipe for a perfect pairing with this frosting. This combination can turn a simple snack into a delightful treat that’s hard to resist.
Key Features That Make It Special
One reason you’ll love this is its simple ingredient list, which keeps things fresh and natural. It’s designed for quick prep, taking about 10 minutes total, so it fits into your busy day without stress. Whether you’re a working professional or a senior enjoying some downtime, this recipe fits right in.
Another highlight is how it adapts to dietary preferences, making it a hit for food enthusiasts and diet-conscious folks. You can tweak it for a vegan option or keep it low-calorie, all while maintaining that smooth texture. Imagine adding it to your favorite desserts for family gatherings or travel snacks it’s that flexible.
Finally, the flavor stands out with its creamy vanilla notes, providing a comforting balance that’s not overly sweet. This makes it a go-to for newlyweds hosting dinners or travelers packing homemade goods. In short, it’s a reliable choice that brings joy to every bite.
Jump to:
- Why You’ll Love This Frosting Recipe
- Key Features That Make It Special
- Essential Ingredients for Frosting Recipe
- How to Prepare the Perfect Frosting Recipe: Step-by-Step Guide
- Tips for Smooth Mixing
- Dietary Substitutions to Customize Your Frosting Recipe
- Mastering Frosting Recipe: Advanced Tips and Variations
- More Ideas for Variations
- How to Store Frosting Recipe: Best Practices
- FAQs: Frequently Asked Questions About Frosting Recipe
- Do I need to refrigerate homemade frosting?
- How do I store leftover frosting to keep it fresh?
- What can I do if my frosting is too thick or too thin?
- Can I substitute milk with other liquids in frosting?
- Is this frosting suitable for piping decorations on cakes and cupcakes?
- Frosting Recipe
- Ingredients
- Instructions
- Last Step:
- Notes
- Did you make this recipe?
Essential Ingredients for Frosting Recipe
Getting the ingredients right is key to making this frosting recipe a success, and we’ll break it down clearly so you can follow along without any confusion. Start with fresh, quality items to ensure your frosting turns out smooth and creamy every time. Remember, the primary goal is to achieve that perfect consistency that’s easy to spread or pipe.
- 1 cup slightly softened butter
- 2-3 teaspoons vanilla extract
- 1 pound powdered sugar (which is about 4 cups if you don’t have a food scale)
- 1-2 tablespoons milk (added only as needed to get the right consistency)
These ingredients form the base of our frosting, and they’re chosen for their ability to create a light, fluffy texture. For special dietary options, you can swap in plant-based butter for vegan needs or ensure your powdered sugar is certified gluten-free. This keeps the recipe accessible for busy parents or those watching their calories, letting everyone enjoy a tasty treat.
| Ingredient | Purpose | Dietary Swap |
|---|---|---|
| 1 cup slightly softened butter | Provides creaminess and richness | Use vegan butter for dairy-free |
| 2-3 teaspoons vanilla extract | Enhances flavor | No direct swap needed |
| 1 pound powdered sugar | Gives sweetness and smooth texture | Check for gluten-free certification |
| 1-2 tablespoons milk | Adjusts consistency | Try almond milk for low-calorie options |
This structured list makes it simple to grab what you need, as mentioned in the recipe details. If you’re new to baking, think of it as your shopping guide for whipping up something delicious quickly.
How to Prepare the Perfect Frosting Recipe: Step-by-Step Guide
Ready to dive in? This step-by-step guide will walk you through making the frosting like a pro, starting with gathering your ingredients. It’s all about keeping things simple so you can enjoy the process without any hassle. Follow along, and you’ll have a batch ready in no time.
First, add the slightly softened butter and 2-3 teaspoons of vanilla extract to a mixing bowl. Mix on medium speed for about 2 minutes until everything combines smoothly. Don’t forget to scrape down the sides of the bowl to get it all mixed in evenly.
Next, measure and add 1 pound of powdered sugar to the bowl that’s roughly 4 cups if you’re not using a scale. Start your mixer on the lowest speed for about 30 seconds to blend it without making a mess, then scrape the sides again. Now, crank it up to medium-high and mix for 30-45 seconds until the frosting looks light and fluffy.
If your frosting feels dry or crumbly, add 1 teaspoon of milk and mix it in. Always taste it to check the flavor and consistency, adding more vanilla or milk as needed. For a fun twist, mix in food coloring by hand to brighten things up. This method works great for home cooks aiming for that perfect finish.
Tips for Smooth Mixing
Keep your tools ready, like an electric mixer, to make this easier. If you’re adapting for dietary needs, swap in your substitutes right at the start. Once it’s silky, you can spread it on cakes or pipe it onto cupcakes refrigerate it if you’re not using it right away.
Remember, you can learn more about related recipes in our chocolate zucchini bread guide, which pairs wonderfully with creative frostings. This link adds value by showing how frosting can enhance other baked goods.
For more ideas on buttercream, check out this external resource on Quick and Almost Professional Buttercream Icing to expand your skills.

Dietary Substitutions to Customize Your Frosting Recipe
Customizing this frosting is fun and flexible, letting you tweak it for your needs without losing the magic. Whether you’re dealing with allergies or just want a healthier twist, these swaps keep things tasty. It’s all about making baking enjoyable for everyone, from food enthusiasts to diet-conscious individuals.
For protein and main components, try vegan butter or coconut oil in place of traditional butter to go dairy-free. Adding nut butters can boost nutrients and add a nice flavor, which is great if you’re a busy parent looking for extras.
When it comes to vegetables, sauces, and seasonings, mix in fruit purees or spices like cinnamon for a fresh take. Using plant-based milks such as almond or oat milk helps with lactose intolerance, keeping the frosting creamy and adaptable.
- Use vegan butter for a dairy-free option
- Swap milk with almond milk for lower calories
- Add cinnamon for a warm flavor twist
- Incorporate fruit purees to enhance natural tastes
These changes make the recipe versatile for various diets, ensuring it fits into your lifestyle seamlessly.
Mastering Frosting Recipe: Advanced Tips and Variations
Once you’ve got the basics down, it’s time to level up with some advanced tips that make your frosting even better. Chilling the mixture briefly before piping helps you get those clean designs, and using a stand mixer on medium speed ensures the perfect texture. These tricks are perfect for baking enthusiasts who love experimenting.
Try flavor variations by adding citrus zest, cocoa powder, or espresso to create unique tastes that surprise your guests. For presentation, top your frosting with edible flowers or sprinkles to make it pop at parties. And if you’re prepping ahead, store the frosting in an airtight container to save time on busy days.
This buttercream holds its shape well for piping, making it ideal for detailed decorations don’t hesitate to get creative!
More Ideas for Variations
- Chill for 10 minutes before piping for sharper lines
- Add cocoa for a chocolatey twist
- Use sprinkles for a festive look
- Prepare batches in advance for easy use
The frosting yields about 2 1/2 cups, enough for a 9×13 sheet cake or 24 cupcakes, and it’s great for doubling if needed, though we suggest making separate batches for best results.
How to Store Frosting Recipe: Best Practices
Storing your frosting properly keeps it fresh and ready for your next baking adventure. This recipe doesn’t need refrigeration if you’ll use it within 2-3 days, but covering it at room temperature works fine. For longer storage, pop it in the fridge or freezer to maintain that creamy goodness.
In the fridge, it lasts up to a week in an airtight container, and freezing extends it to 3-4 months. When you’re ready to use it, let it thaw overnight and re-whip for the best texture. This approach is handy for meal prep, letting you portion it out for future treats.
- Store in an airtight container for freshness
- Freeze for up to 3 months and thaw slowly
- Re-whip after thawing to restore creaminess
- Portion into small containers for easy access
If it’s too thick, add milk a teaspoon at a time; if too thin, chill or add more powdered sugar. These tips ensure your frosting stays perfect every time.
FAQs: Frequently Asked Questions About Frosting Recipe
Do I need to refrigerate homemade frosting?
Most homemade frostings, especially buttercream types, don’t require refrigeration if served within 2-3 days and kept covered at room temperature. Refrigeration can help keep the baked goods fresher longer, but frosting tastes best when allowed to come to room temperature before serving. If your frosting contains perishable ingredients like cream cheese or fresh dairy, it’s safest to refrigerate it.
How do I store leftover frosting to keep it fresh?
Store leftover frosting in an airtight container to maintain freshness. In the refrigerator, it will last about a week. For longer storage, you can freeze frosting for up to 3-4 months. When ready to use, let it thaw in the refrigerator overnight and rewhip it before applying to baked goods for the best texture.
What can I do if my frosting is too thick or too thin?
If frosting is too thick, gradually add milk or a milk substitute, one teaspoon at a time, while mixing until you reach your desired consistency. If it’s too thin, chill it in the refrigerator to firm up. If it remains too soft, add more powdered sugar or a little cornstarch, mixing well until it thickens appropriately.
Can I substitute milk with other liquids in frosting?
Yes, you can substitute milk with alternatives like half-and-half, whipping cream, or plant-based options such as almond milk. These substitutes slightly change the texture and flavor but generally work well in frosting recipes. Choose unsweetened versions to avoid altering the frosting’s sweetness.
Is this frosting suitable for piping decorations on cakes and cupcakes?
Yes, this type of frosting is pipeable and holds shapes well, making it perfect for decorating cakes and cupcakes. It has a slightly crusting texture, meaning it firms up on the surface after some time but isn’t as stiff as traditional crusting buttercream. Use your preferred piping tips to create detailed designs with confidence.
Frosting Recipe
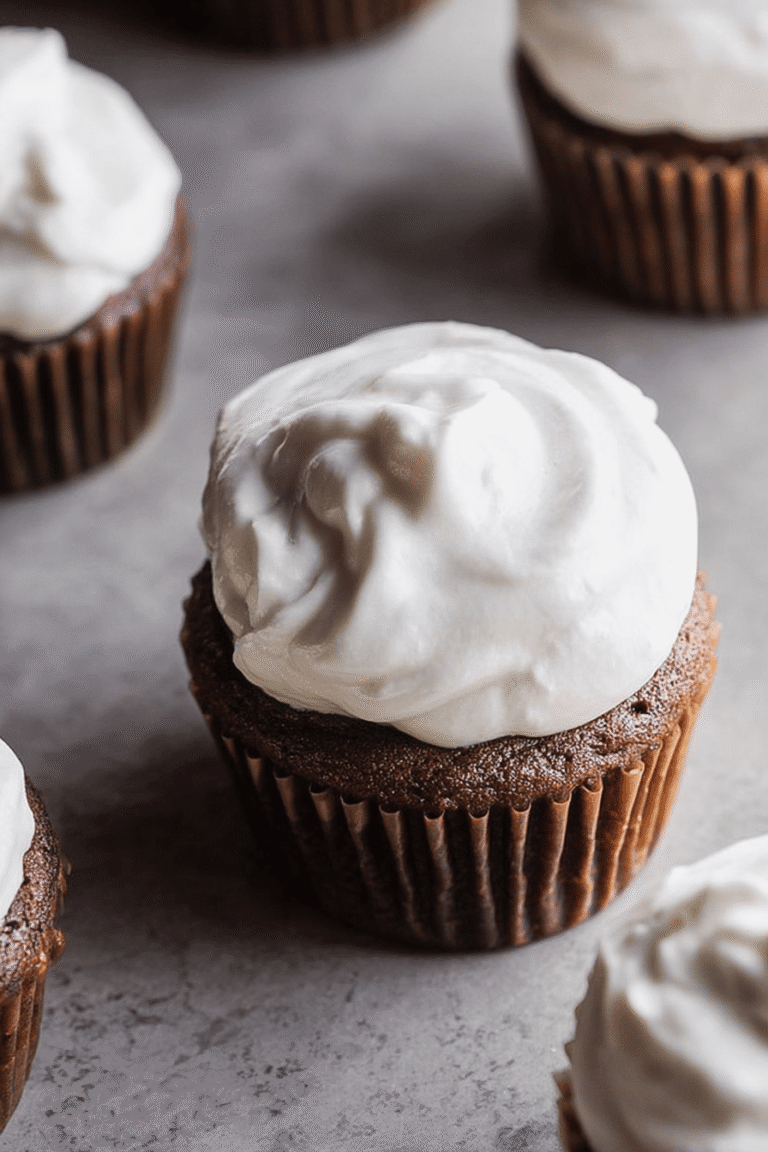
🍰 Experience the perfect balance of smoothness and creaminess with this buttercream frosting recipe, ideal for decorating cakes and cupcakes.
🎂 This frosting is easy to make, adaptable in flavor and consistency, and holds shape beautifully for piping designs.
- Total Time: 10 minutes
- Yield: About 2 1/2 cups frosting
Ingredients
– 1 cup slightly softened butter Provides creaminess and richness
– 2-3 teaspoons vanilla extract Enhances flavor
– 1 pound powdered sugar Gives sweetness and smooth texture
– 1-2 tablespoons milk Adjusts consistency
Instructions
1-First, add the slightly softened butter and 2-3 teaspoons of vanilla extract to a mixing bowl. Mix on medium speed for about 2 minutes until everything combines smoothly. Don’t forget to scrape down the sides of the bowl to get it all mixed in evenly.
2-Next, measure and add 1 pound of powdered sugar to the bowl that’s roughly 4 cups if you’re not using a scale. Start your mixer on the lowest speed for about 30 seconds to blend it without making a mess, then scrape the sides again. Now, crank it up to medium-high and mix for 30-45 seconds until the frosting looks light and fluffy.
3-If your frosting feels dry or crumbly, add 1 teaspoon of milk and mix it in. Always taste it to check the flavor and consistency, adding more vanilla or milk as needed. For a fun twist, mix in food coloring by hand to brighten things up. This method works great for home cooks aiming for that perfect finish.
Last Step:
Please leave a rating and comment letting us know how you liked this recipe! This helps our business to thrive and continue providing free, high-quality recipes for you.Notes
🧈 No need to refrigerate; store covered at room temperature for 2-3 days.
❄️ Leftover frosting keeps up to one week in the fridge or up to 3-4 months frozen.
⚖️ Adjust thickness by adding milk or powdered sugar/cornstarch; refrigerate if too thin to thicken.
- Prep Time: 10 minutes
- Category: Dessert, Frosting, Baking
- Method: Mixing
- Cuisine: American





