

Why You’ll Love This Pear Tart
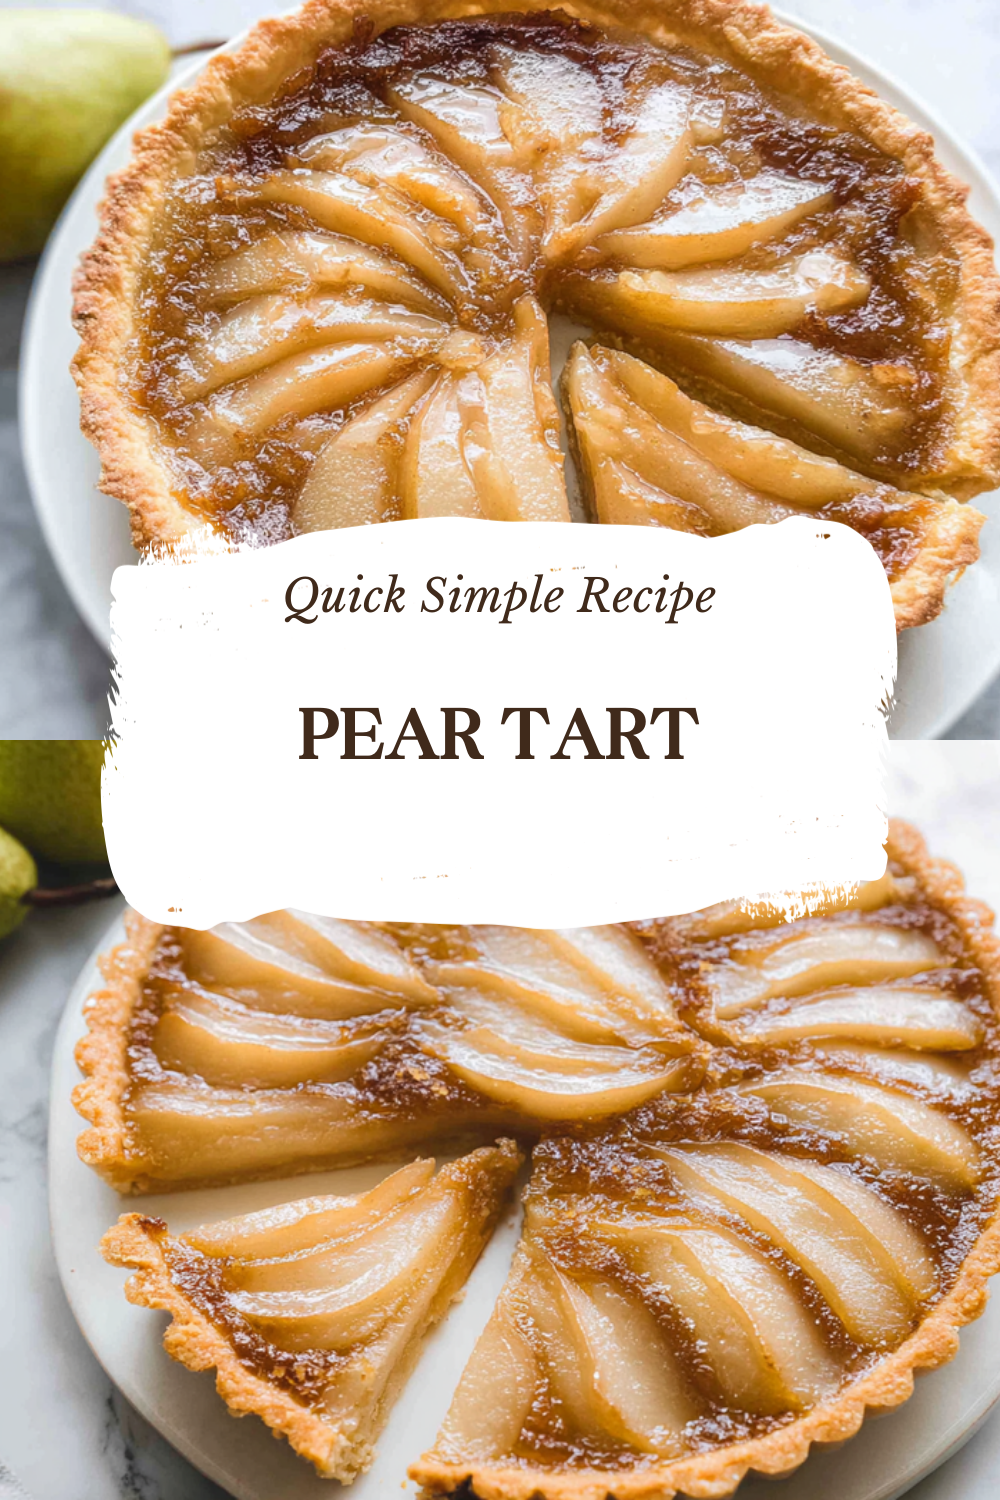
This pear tart recipe is straightforward and perfect for anyone wanting a simple yet impressive dessert. It’s packed with fresh pears that bring natural sweetness and a soft texture, making it a hit for family gatherings or quiet evenings. Plus, the flaky crust and sweet glaze add a touch of elegance that elevates everyday meals without much hassle.
One reason you’ll enjoy this pear tart is its ease of preparation, needing just a few ingredients and a short cooking time for busy schedules or new bakers. It also offers health benefits like dietary fiber and vitamins from the fresh pears, supporting a balanced diet. The recipe’s versatility allows tweaks for vegan, gluten-free, or low-calorie options, all while keeping the great taste. This combination of sweet, juicy pears with a buttery crust creates a dessert that’s truly memorable and adaptable.
Jump to:
- Why You’ll Love This Pear Tart
- Essential Ingredients for Pear Tart
- How to Prepare the Perfect Pear Tart: Step-by-Step Guide
- Dietary Substitutions to Customize Your Pear Tart
- Mastering Pear Tart: Advanced Tips and Variations
- Pro Cooking Techniques
- Flavor Variations
- Presentation Tips
- How to Store Pear Tart: Best Practices
- FAQs: Frequently Asked Questions About Pear Tart
- Can I use a frozen pie crust instead of a homemade crust for a pear tart?
- What is the best type of pear to use for making a pear tart?
- How can I prevent the pear tart from becoming soggy?
- Can I substitute fig preserves with other fruit preserves in a pear tart recipe?
- How should I store leftover pear tart to keep it fresh?
- Pear Tart
- Ingredients
- Instructions
- Last Step:
- Notes
- Nutrition
- Did you make this recipe?
Essential Ingredients for Pear Tart
To make this pear tart, you’ll need a mix of simple ingredients that come together for a delicious result. Fresh pears take center stage, providing natural sweetness and moisture that pair well with the crust. I’ll break down the ingredients into the crust and filling sections to keep things clear and easy to follow.
For the crust:
- 1 1/2 cups all-purpose flour
- 5 tablespoons sugar
- 1/2 teaspoon salt
- 12 tablespoons (3/4 cup) unsalted butter (melted)
For the filling:
- 8 large pears (washed)
- 3 tablespoons unsalted butter
- 1 tablespoon water
- 3/4 cup fig preserves
- 1/4 teaspoon salt
These ingredients form the base of a classic French tart with a flaky crust and sweet glaze. For special dietary needs, you can swap butter with plant-based options for vegan versions or use gluten-free flour to keep it inclusive.
How to Prepare the Perfect Pear Tart: Step-by-Step Guide
Getting started with this pear tart is fun and simple, beginning with preheating your oven. Follow these steps to create a tasty treat that’s sure to impress. The process takes about 1 hour and 20 minutes in total, with 20 minutes for prep and 60 minutes for cooking, and it serves up to 12 people.
- Preheat oven to 350°F (175°C) with one rack in the middle and one at the top.
- In a bowl, combine 1 1/2 cups all-purpose flour, 5 tablespoons sugar, and 1/2 teaspoon salt; add the 12 tablespoons melted butter and mix until a dough forms.
- Press dough evenly onto bottom and rim of a 9-inch tart pan with a removable bottom.
- Bake crust on middle rack for 30 minutes or until golden brown; cool completely.
- Microwave 3/4 cup fig preserves for about 40 seconds, then strain to separate liquid from chunks.
- Slice five pears into 1/2-inch slices, removing cores.
- Heat 1 tablespoon butter in a skillet, add sliced pears and 1 tablespoon water, cover and cook for about 3 minutes over medium heat until slightly tender; remove and cool.
- Slice the remaining three pears similarly.
- Melt 2 tablespoons butter in the skillet, add sliced pears, fig chunks, and 1/4 teaspoon salt; cover and cook on medium, stirring occasionally, for 10 minutes until pears are very tender.
- Mash the pear and fig mix into a puree with a potato masher, cooking for 5-7 minutes more until thickened.
- Spread the pear-fig puree evenly over the cooled crust.
- Arrange the cooled pear slices on top in overlapping circles starting from the outside.
- Bake the tart on the middle rack at 350°F for 30 minutes.
- Warm the strained fig preserve liquid for 20 seconds.
- Brush the pear surface with the warmed fig liquid and broil briefly on the top rack until caramelized, watching carefully to avoid burning.
- Let the tart cool for at least 1.5 hours before removing it from the pan.
- Cut into eight slices and serve.
This guide makes the process smooth, and you can check out similar fruit-based recipes for more ideas. Remember, using a 9-inch tart pan helps with easy removal, and cooking pears in butter keeps them tender yet shaped right.

Dietary Substitutions to Customize Your Pear Tart
Everyone has different needs, so tweaking this pear tart recipe is a great way to make it your own. You can swap ingredients to fit vegan, gluten-free, or other preferences while keeping the flavor intact. Let’s look at some easy changes for the main parts of the recipe.
For protein and main components:
- Replace butter with vegan margarine or coconut oil for a dairy-free option.
- Swap nuts like almonds with seeds such as sunflower or pumpkin for nut-free versions.
- For gluten-free needs, use a certified gluten-free flour mix instead of all-purpose flour.
When it comes to vegetables, sauces, and seasonings:
- Incorporate seasonal fruits such as apples or quince alongside pears for varied flavors.
- Use alternative sweeteners like maple syrup or agave nectar for natural sweetness.
- Experiment with spices like nutmeg or cardamom to complement the pear’s flavor profile.
- Adjust salt content or use salt substitutes to accommodate dietary restrictions.
Making these adjustments is simple and allows for personalization, just like in other fruit crisp recipes on the site.
Mastering Pear Tart: Advanced Tips and Variations
Once you’re comfortable with the basics, try some advanced techniques to improve your pear tart. For a crisp crust, blind bake the tart shell first and use chilled ingredients for extra flakiness. You can add fun twists to the flavor by mixing in vanilla or lemon zest.
Pro Cooking Techniques
Blind baking helps keep the base firm, and chilling the dough makes it easier to handle. If you want to speed things up, prepare parts ahead and store them in the fridge.
Flavor Variations
Add ginger or star anise for a spiced kick, or mix in other fruits for new tastes. These changes keep the pear tart fresh and exciting every time.
Presentation Tips
Garnish with fresh herbs or nuts to make it look appealing, and serve with a side like ice cream for extra enjoyment. Experimenting here can turn your tart into a showstopper.
For more inspiration, visit health benefits of pears to learn how this fruit boosts your meals.
How to Store Pear Tart: Best Practices
Keeping your pear tart fresh is key to enjoying it later, so proper storage matters. Here’s a quick table to guide you on the best methods:
| Storage Method | Duration | Tips |
|---|---|---|
| Refrigeration | Up to 3 days | Use an airtight container to keep it fresh. |
| Freezing | Up to 2 months | Wrap tightly and thaw in the fridge before reheating. |
| Reheating | N/A | Warm in a 300°F oven for 10-15 minutes. |
Portion the tart before storing to make meal prep easier. Following these steps ensures your pear tart stays tasty for days.
FAQs: Frequently Asked Questions About Pear Tart
Can I use a frozen pie crust instead of a homemade crust for a pear tart?
Yes, you can use a frozen pie crust for a pear tart, and it will save you prep time. While the texture and flavor might differ slightly from a homemade crust, most frozen pie crusts bake well and provide a sturdy base for the tart. To prevent sogginess, blind bake the frozen crust for about 10 minutes before adding the filling. This helps maintain a crisp bottom and enhances the overall texture of your pear tart.
What is the best type of pear to use for making a pear tart?
Firm, sweet varieties like Bartlett, Bosc, or Anjou pears work best for a pear tart. These pears hold their shape well during baking and offer a balanced sweetness and texture. Avoid overly ripe or soft pears, as they can become mushy and affect the tart’s structure. For the best flavor, choose pears that are ripe but still slightly firm to the touch.
How can I prevent the pear tart from becoming soggy?
To prevent sogginess, use a few simple techniques. First, brush the pie crust with a thin layer of beaten egg white or melted butter before adding the filling; this creates a moisture barrier. Also, consider blind baking the crust before assembling the tart. Lastly, drain or lightly cook the sliced pears to reduce excess moisture before layering them on the crust. These steps help keep the crust crisp and the tart enjoyable.
Can I substitute fig preserves with other fruit preserves in a pear tart recipe?
Yes, you can substitute fig preserves with other fruit preserves such as apricot, raspberry, or peach. Apricot preserves are a popular alternative because their mild sweetness complements pears well. When substituting, use the same quantity as the recipe calls for fig preserves. Keep in mind that different preserves may slightly change the tart’s flavor profile, so choose one that satisfies your taste preferences.
How should I store leftover pear tart to keep it fresh?
Store leftover pear tart in an airtight container at room temperature if you plan to eat it within one day. For longer storage, cover the tart tightly with plastic wrap or aluminum foil and refrigerate it for up to 3 days. Before serving, you can warm it slightly in a low oven (around 300°F or 150°C) for 5–10 minutes to refresh the crust’s texture and flavor. Avoid freezing, as this can affect the tart’s texture and freshness.
Pear Tart
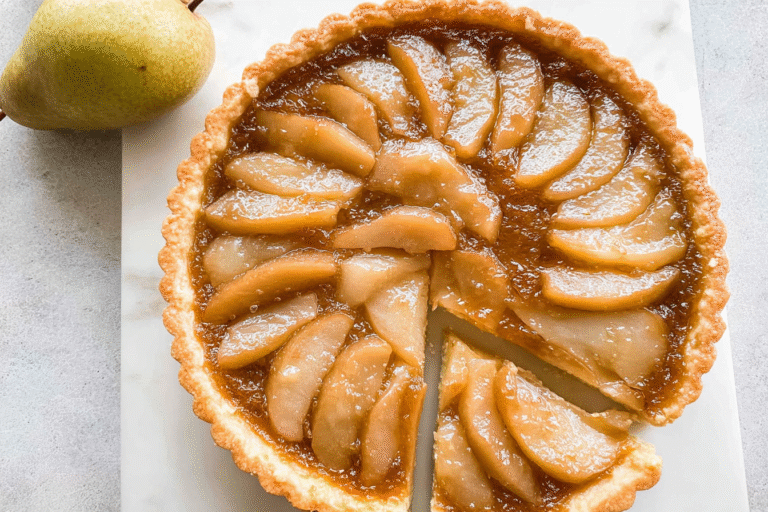
🍐 Enjoy a classic French pear tart with a flaky crust and a luscious sweet glaze that highlights the natural flavors of ripe pears.
🍰 This elegant dessert offers a perfect balance of tender fruit and crisp pastry, making it ideal for special occasions or a delightful treat any time.
- Total Time: 1 hour 20 minutes
- Yield: 8 servings 1x
Ingredients
1 1/2 cups all-purpose flour
5 tablespoons sugar
1/2 teaspoon salt
12 tablespoons (3/4 cup) unsalted butter (melted)
8 large pears (washed)
3 tablespoons unsalted butter
1 tablespoon water
3/4 cup fig preserves
1/4 teaspoon salt
Instructions
1-Preheat oven: to 350°F (175°C) with one rack in the middle and one at the top.
2-In a bowl, combine 1 1/2 cups all-purpose flour, 5 tablespoons sugar, and 1/2 teaspoon salt; add the 12 tablespoons melted butter and mix until a dough forms.
3-Press dough evenly onto bottom and rim of a 9-inch tart pan with a removable bottom.
4-Bake crust on middle rack for 30 minutes or until golden brown; cool completely.
5-Microwave 3/4 cup fig preserves for about 40 seconds, then strain to separate liquid from chunks.
6-Slice five pears into 1/2-inch slices, removing cores.
7-Heat 1 tablespoon butter in a skillet, add sliced pears and 1 tablespoon water, cover and cook for about 3 minutes over medium heat until slightly tender; remove and cool.
8-Slice the remaining three pears similarly.
9-Melt 2 tablespoons butter in the skillet, add sliced pears, fig chunks, and 1/4 teaspoon salt; cover and cook on medium, stirring occasionally, for 10 minutes until pears are very tender.
10-Mash the pear and fig mix into a puree with a potato masher, cooking for 5-7 minutes more until thickened.
11-Spread the pear-fig puree evenly over the cooled crust.
12-Arrange the cooled pear slices on top in overlapping circles starting from the outside.
13-Bake the tart on the middle rack at 350°F for 30 minutes.
14-Warm the strained fig preserve liquid for 20 seconds.
15-Brush the pear surface with the warmed fig liquid and broil briefly on the top rack until caramelized, watching carefully to avoid burning.
16-Let the tart cool for at least 1.5 hours before removing it from the pan.
17-Cut into eight slices and serve.
Last Step:
Please leave a rating and comment letting us know how you liked this recipe! This helps our business to thrive and continue providing free, high-quality recipes for you.Notes
🍴 Use a 9-inch tart pan with a removable bottom for easy removal.
🧈 Melted butter simplifies dough mixing, but cold butter can create a flakier crust.
🍯 Strain preserves to achieve a smooth and glossy glaze for the tart.
- Prep Time: 20 minutes
- Baking and cooling time: 1 hour
- Cook Time: 1 hour
- Category: Dessert
- Method: Baking
- Cuisine: French
Nutrition
- Serving Size: 1 slice





