

Why You’ll Love This Apple Pie Filling
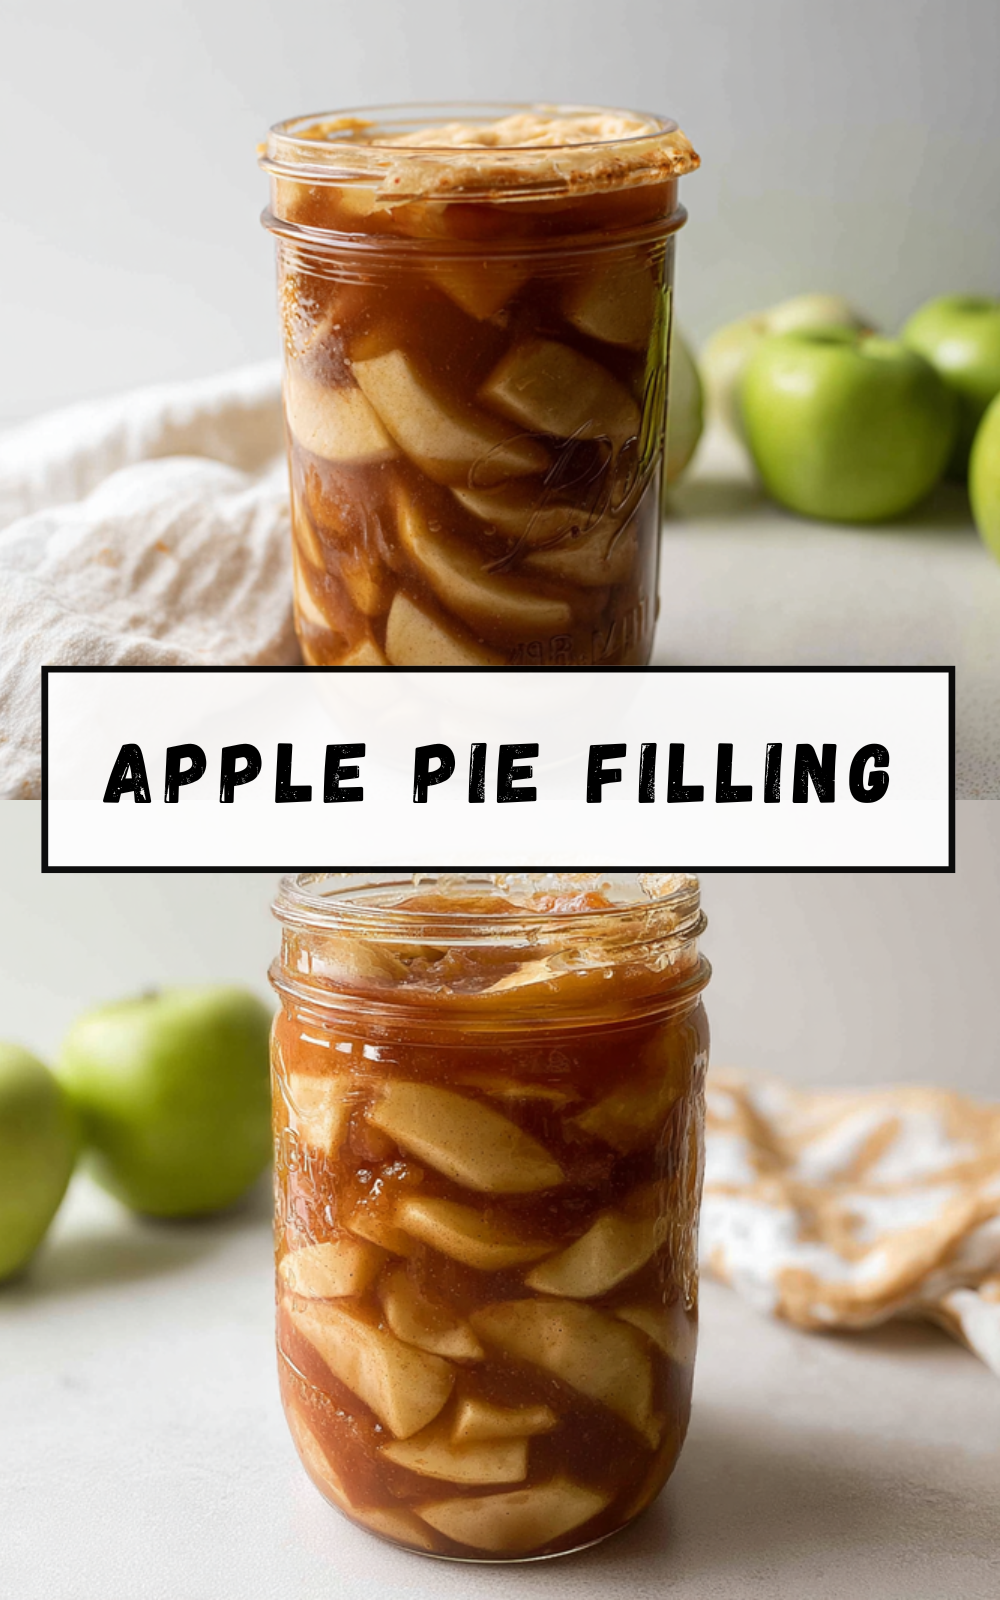
Imagine whipping up a batch of apple pie filling that tastes 1000x better than anything from a can (seriously, it’s that good!). This recipe skips the fuss and delivers a homemade treat that’s as easy as pie perfect for busy parents or students who want something special without spending all day in the kitchen. Let’s dive into why this apple pie filling will become your go-to for everything from pies to breakfast toppings.
- Ease of preparation: You’ll love how simple this is chop a few apples and stir a few ingredients, and you’re done in under 15 minutes. No fancy tools needed, just a pan and basic stuff you probably have on hand, making it ideal for working pros or seniors who want quick wins in the kitchen.
- Health benefits: Fresh apples pack a punch with fiber and vitamins that keep you feeling great, and we sneak in cinnamon for that extra boost (it’s like a hug for your immune system!). For more on how apples support your health, check out this guide on the health benefits of apples. It’s a smart choice for diet-conscious folks who want flavor without the guilt.
- Versatility: This filling works wonders in pies, tarts, or even oatmeal it adapts to whatever you’re craving, whether you’re a baking enthusiast or a party host jazzing up desserts. Plus, it’s easy to tweak for different tastes, making it a hit for food enthusiasts and travelers mixing things up on the go.
- Distinctive flavor: The mix of sweet apples, warm cinnamon, and a touch of sugar creates a taste that’ll make your mouth water it’s homemade magic that stands out from the crowd. Baking lovers will appreciate how it brings that cozy, comforting vibe to any meal, turning ordinary days into something special.
This apple pie filling isn’t just food; it’s a shortcut to smiles, proving that good things come from simple efforts (and it’ll have your family begging for more!). With these benefits, you’ll see why it’s a staple in my kitchen and yours soon enough. Let’s keep the fun going by looking at what makes this recipe tick.
Jump to:
- Why You’ll Love This Apple Pie Filling
- Essential Ingredients for Apple Pie Filling
- Special Dietary Options
- How to Prepare the Perfect Apple Pie Filling: Step-by-Step Guide
- Gathering and Prepping Your Ingredients
- Cooking the Apples
- Finishing and Cooling
- Dietary Substitutions to Customize Your Apple Pie Filling
- Mastering Apple Pie Filling: Advanced Tips and Variations
- Pro Cooking Techniques
- Flavor Variations
- Presentation Tips
- Make-Ahead Options
- How to Store Apple Pie Filling: Best Practices
- FAQs: Frequently Asked Questions About Apple Pie Filling
- Apple Pie Filling
- Ingredients
- Instructions
- Last Step:
- Notes
- Nutrition
- Did you make this recipe?
Essential Ingredients for Apple Pie Filling
Gathering the right ingredients is the secret to nailing this apple pie filling every time (trust me, it’s the foundation of all that deliciousness!). I’ll break it down in a clear list so you can see exactly what you need, with precise measurements and a quick explanation for each. This way, even beginners feel like pros.
- 4 medium apples – These are the stars of the show, providing natural sweetness and texture; choose crisp varieties like Granny Smith for a tangy twist that holds up well during cooking.
- 1/3 cup granulated sugar – This adds just the right sweetness to balance the apples’ tartness, making the filling irresistible without overwhelming other flavors.
- 3 tablespoons water – Helps create steam to soften the apples gently, ensuring they cook evenly and stay juicy.
- 2 tablespoons butter – Melts into the mix for a rich, creamy base that enhances the overall warmth and makes everything taste homemade (way better than store-bought!).
- 1 teaspoon cinnamon – Brings that cozy spice we all crave; it’s like a flavor explosion that pairs perfectly with apples, and for more perks, think about its natural goodness as highlighted in guides on the benefits of cinnamon.
- 4 teaspoons cornstarch – Acts as a thickener to give your filling that perfect gooey consistency without clumping, so your pie slices hold together nicely.
- 2 tablespoons water (for cornstarch mixture) – Mixes with the cornstarch to make a smooth slurry, ensuring it blends seamlessly into the filling for a lump-free result.
Special Dietary Options
- Vegan: Swap the butter for a plant-based alternative like coconut oil to keep things dairy-free while maintaining that rich flavor perfect for diet-conscious individuals.
- Gluten-free: This recipe is naturally gluten-free since all ingredients are basic, but double-check your cornstarch brand to ensure it’s certified gluten-free for those with sensitivities.
- Low-calorie: Reduce the sugar to 1/4 cup or use a sugar substitute like stevia to cut calories, making it lighter for busy parents or health-focused eaters without losing the taste.
How to Prepare the Perfect Apple Pie Filling: Step-by-Step Guide
Ready to make apple pie filling that’s simple and perfect every time? Let’s walk through it step by step it’s easier than you think, and you’ll feel like a kitchen whiz in no time (honestly, it’s fun!). I’ll include timing and tips to help you nail it, whether you’re a student rushing through or a baking enthusiast aiming for perfection.
Gathering and Prepping Your Ingredients
First, start by peeling, coring, and chopping your 4 medium apples into 1/2-inch cubes or 1/4-inch slices. This sets the stage for even cooking and lets the flavors shine take about 5 minutes to get this done for the best texture.
Second, grab a pan and melt 2 tablespoons of butter with 1 teaspoon of cinnamon over medium heat. Stir them together until the butter is fully melted and aromatic, which should take around 1-2 minutes this step infuses everything with that warm, spicy goodness you love.
Cooking the Apples
Third, add the chopped apples, 1/3 cup granulated sugar, and 3 tablespoons water to the pan. Give it all a good stir, then cover and cook for 4-6 minutes until the apples soften just a bit but still have a nice crunch keep an eye on it to avoid mushy results, as this builds the base flavor.
Fourth, in a small bowl, mix 4 teaspoons of cornstarch with 2 tablespoons of water until it’s smooth and lump-free. This slurry is key for thickening, so take your time about 30 seconds to get it right before adding it gradually to the pan while stirring constantly.
Finishing and Cooling
Fifth, continue cooking the mixture over medium heat until the apples turn tender-crisp and the filling thickens up nicely. Let it bubble for about 1 minute to ensure everything blends perfectly, then remove from heat and let it cool this final step, taking 5-10 minutes, makes it safe and easy to use in your favorite recipes.
Final step: Once cooled, your apple pie filling is ready to star in pies, tarts, or even as a topping for breakfast treats like the ones in my maple apple breakfast crisp recipe. Remember, tasting as you go helps adjust sweetness, and this whole process should wrap up in 15-20 minutes total pure kitchen joy!
To make it even more versatile, try pairing it with other ideas from the site, like variations in the berry breakfast crisp. This filling isn’t just for pies; it’s a game-changer for any meal, and with practice, you’ll tweak it to your liking (it’s that flexible!).

Dietary Substitutions to Customize Your Apple Pie Filling
Sometimes you need to mix things up for your diet, and this apple pie filling is super adaptable (it’s like a chameleon in the kitchen!). Let’s cover swaps for the main ingredients, veggies, sauces, and seasonings so everyone can enjoy it, from newlyweds to seniors with specific needs.
- Protein and Main Component Alternatives: If apples aren’t your thing, swap them for pears or peaches for a fresh twist, which works great for travelers seeking seasonal fruits.
- Vegetable Modifications: Add in carrots or rhubarb for extra crunch and nutrition, making it heartier for busy parents.
- Sauce and Seasoning Changes: Use honey instead of sugar for a natural sweetener, or swap cinnamon for nutmeg to cater to different tastes perfect for food enthusiasts experimenting.
For gluten-free options, stick with the original but ensure all add-ins are safe. This keeps it light and fun without any fuss.
Mastering Apple Pie Filling: Advanced Tips and Variations
Pro Cooking Techniques
To take your apple pie filling to the next level, try using a wider pan for even heat distribution it’s a simple trick that makes a big difference (your filling will be flawless!).
Flavor Variations
Experiment with adding vanilla extract for a deeper taste, or mix in nuts for crunch, turning it into something extraordinary for party hosts.
Presentation Tips
Serve it warm with a scoop of ice cream for that wow factor, making it ideal for entertainment enthusiasts at gatherings.
Make-Ahead Options
Prep the filling ahead and store it for up to three days, perfect for working professionals with tight schedules.
How to Store Apple Pie Filling: Best Practices
- Refrigeration: Store in an airtight container for up to 5 days to keep it fresh and tasty.
- Freezing: Freeze in portions for up to 3 months, thawing overnight in the fridge for easy use.
- Reheating: Warm gently on the stove to maintain texture, avoiding microwaves for the best results.
- Meal Prep Considerations: Batch cook for weekly meals, saving time for baking enthusiasts.
FAQs: Frequently Asked Questions About Apple Pie Filling
Print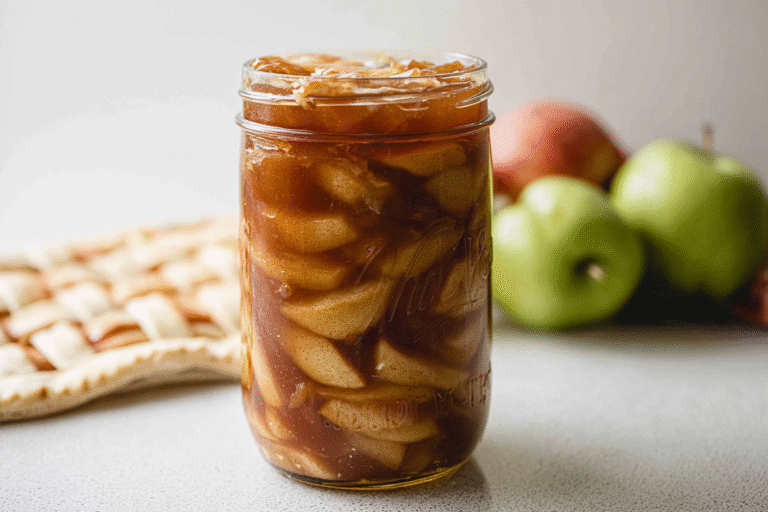
Apple Pie Filling
🍎 Create the perfect homemade apple pie filling with simple ingredients that delivers that classic bakery taste every single time.
🥧 This foolproof recipe ensures a thick, flavorful filling with tender apples and just the right amount of spice for your favorite pies and desserts.
- Total Time: 25 minutes
- Yield: 4 cups 1x
Ingredients
4 medium apples These are the stars of the show, providing natural sweetness and texture
1/3 cup granulated sugar This adds just the right sweetness to balance the apples’ tartness, making the filling irresistible without overwhelming other flavors
3 tablespoons water Helps create steam to soften the apples gently, ensuring they cook evenly and stay juicy
2 tablespoons butter Melts into the mix for a rich, creamy base that enhances the overall warmth and makes everything taste homemade
1 teaspoon cinnamon Brings that cozy spice we all crave; it’s like a flavor explosion that pairs perfectly with apples
4 teaspoons cornstarch Acts as a thickener to give your filling that perfect gooey consistency without clumping, so your pie slices hold together nicely
2 tablespoons water (for cornstarch mixture) Mixes with the cornstarch to make a smooth slurry, ensuring it blends seamlessly into the filling for a lump-free result
Instructions
1-First: First, start by peeling, coring, and chopping your 4 medium apples into 1/2-inch cubes or 1/4-inch slices. This sets the stage for even cooking and lets the flavors shine take about 5 minutes to get this done for the best texture.
2-Second: Second, grab a pan and melt 2 tablespoons of butter with 1 teaspoon of cinnamon over medium heat. Stir them together until the butter is fully melted and aromatic, which should take around 1-2 minutes this step infuses everything with that warm, spicy goodness you love.
3-Third: Third, add the chopped apples, 1/3 cup granulated sugar, and 3 tablespoons of water to the pan. Give it all a good stir, then cover and cook for 4-6 minutes until the apples soften just a bit but still have a nice crunch keep an eye on it to avoid mushy results, as this builds the base flavor.
4-Fourth: Fourth, in a small bowl, mix 4 teaspoons of cornstarch with 2 tablespoons of water until it’s smooth and lump-free. This slurry is key for thickening, so take your time about 30 seconds to get it right before adding it gradually to the pan while stirring constantly.
5-Fifth: Fifth, continue cooking the mixture over medium heat until the apples turn tender-crisp and the filling thickens up nicely. Let it bubble for about 1 minute to ensure everything blends perfectly, then remove from heat and let it cool this final step, taking 5-10 minutes, makes it safe and easy to use in your favorite recipes.
6-Final step: Final step: Once cooled, your apple pie filling is ready to star in pies, tarts, or even as a topping for breakfast treats like the ones in my maple apple breakfast crisp recipe. Remember, tasting as you go helps adjust sweetness, and this whole process should wrap up in 15-20 minutes total pure kitchen joy!
Last Step:
Please leave a rating and comment letting us know how you liked this recipe! This helps our business to thrive and continue providing free, high-quality recipes for you.Notes
🍎 Choose firm, slightly tart apples like Granny Smith for the best flavor and texture – they hold their shape better during cooking.
🌡 Stir the cornstarch mixture in gradually to prevent lumps from forming in the filling.
⏰ Cook the filling just until it reaches the desired thickness – overcooking can make it too thick and gummy.
- Prep Time: 10 minutes
- Cook Time: 15 minutes
- Category: Dessert
- Method: Simmering
- Cuisine: American
- Diet: None
Nutrition
- Serving Size: 1/2 cup
- Calories: 120
- Sugar: 18g
- Sodium: 5mg
- Fat: 4g
- Saturated Fat: 2g
- Unsaturated Fat: 2g
- Trans Fat: 0.1g
- Carbohydrates: 24g
- Fiber: 3g
- Protein: 0g
- Cholesterol: 10mg





