

Why You’ll Love This Easter Jello Pie
Imagine whipping up a dessert that’s as fun to make as it is to eat! Easter Jello Pie is all about that easy vibe, perfect for celebrating spring with family and friends. You’ll appreciate how simple Easter Jello Pie is to prepare, making it a go-to choice for anyone wanting a festive treat without the fuss.
This pie packs in some great perks too, like nutrients from the ingredients that keep things light and wellness-focused. Its colorful layers bring joy to Easter gatherings, while offering options for different diets to suit everyone at the table. Dive into this delightful recipe and see why it’s a hit for busy families and food lovers alike!
Ease of preparation makes Easter Jello Pie a favorite for home cooks. With minimal ingredients and straightforward steps, you can have this pie ready in no time, making it ideal for both novice and experienced cooks. Health benefits come from the nutritious ingredients in Easter Jello Pie, offering a light dessert option that contributes to wellness with vitamins and antioxidants. Versatility allows you to adapt the recipe to various dietary needs, whether vegan, gluten-free, or low-calorie, without losing that distinctive fruity flavor and creamy texture.
Jump to:
- Why You’ll Love This Easter Jello Pie
- Essential Ingredients for Easter Jello Pie
- How to Prepare the Perfect Easter Jello Pie: Step-by-Step Guide
- Adding the Layers
- Dietary Substitutions to Customize Your Easter Jello Pie
- Mastering Easter Jello Pie: Advanced Tips and Variations
- More Ideas for Toppings
- How to Store Easter Jello Pie: Best Practices
- FAQs: Frequently Asked Questions About Easter Jello Pie
- Can I use a store-bought graham cracker crust for Easter Jello Pie?
- What’s the best way to make homemade whipped cream for the pie?
- How long should I chill the Jello layer before folding in the whipped cream?
- What can I do if my graham cracker crust starts to crumble while preparing the pie?
- Can I prepare Easter Jello Pie ahead of time and how should I store it?
- Easter Jello Pie
- Ingredients
- Instructions
- Last Step:
- Notes
- Nutrition
- Did you make this recipe?
Essential Ingredients for Easter Jello Pie
Getting the ingredients right is the key to a perfect Easter Jello Pie, and it’s thrilling to see how each one comes together to create something special! Start with fresh, simple items that you can find at your local store to keep things accessible. For this recipe, focus on quality to make those vibrant layers pop with color and taste.
Below is a complete list of everything you’ll need, broken down into the crust and filling sections. I’ve included exact measurements to ensure your pie turns out just right every time. Remember, these ingredients are the heart of Easter Jello Pie, so don’t skip any!
- Crust:
- 2½ cups graham cracker crumbs
- 12 tablespoons butter (1½ sticks), melted
- Filling:
- ½ package pink gelatin dessert powder (approximately 1¾ ounces / under 50g)
- ½ package blue gelatin dessert powder (1½ ounces / 42.5g)
- ½ package yellow gelatin dessert powder (1½ ounces / 42.5g)
- ½ package purple gelatin dessert powder (1½ ounces / 42.5g)
- 16 ounces whipped topping, divided
- 3 cups boiling water
- 1⅓ cups cold water, divided
- Yellow food dye (optional)
- Pink food dye (optional)
For special touches, consider vegan or gluten-free swaps to make Easter Jello Pie work for your needs. You might use agar-agar instead of gelatin for a plant-based option, or pick gluten-free graham crackers for the crust. These choices keep the fun alive while fitting different lifestyles!
How to Prepare the Perfect Easter Jello Pie: Step-by-Step Guide
Ready to create your own Easter Jello Pie? It’s easier than you think, and the process is full of excitement as you watch the layers form! Begin by gathering all your ingredients to make things smooth sailing from start to finish. This guide walks you through each part with clear steps, so even if you’re new to baking, you’ll feel like a pro.
First, melt the butter until it’s fully liquified to get that perfect crust base. Then, combine the graham cracker crumbs with the melted butter, mixing until you get a thick, sand-like texture that holds together nicely. For more ideas on crusts, check out our banana chocolate chip muffins recipe which shares tips on mixing crumbs. Press this mixture firmly into the bottom and sides of a 9 to 9½-inch springform pan, then freeze it until you’re ready to add the layers.
Next, place each gelatin powder color in separate bowls and add ¾ cup boiling water to each, stirring until completely dissolved. Add ⅓ cup cold water to each bowl and stir again to help it set up. Refrigerate the gelatin mixtures for 20-30 minutes until they thicken but are not yet solid, which is a fun step to see the colors come alive!
Adding the Layers
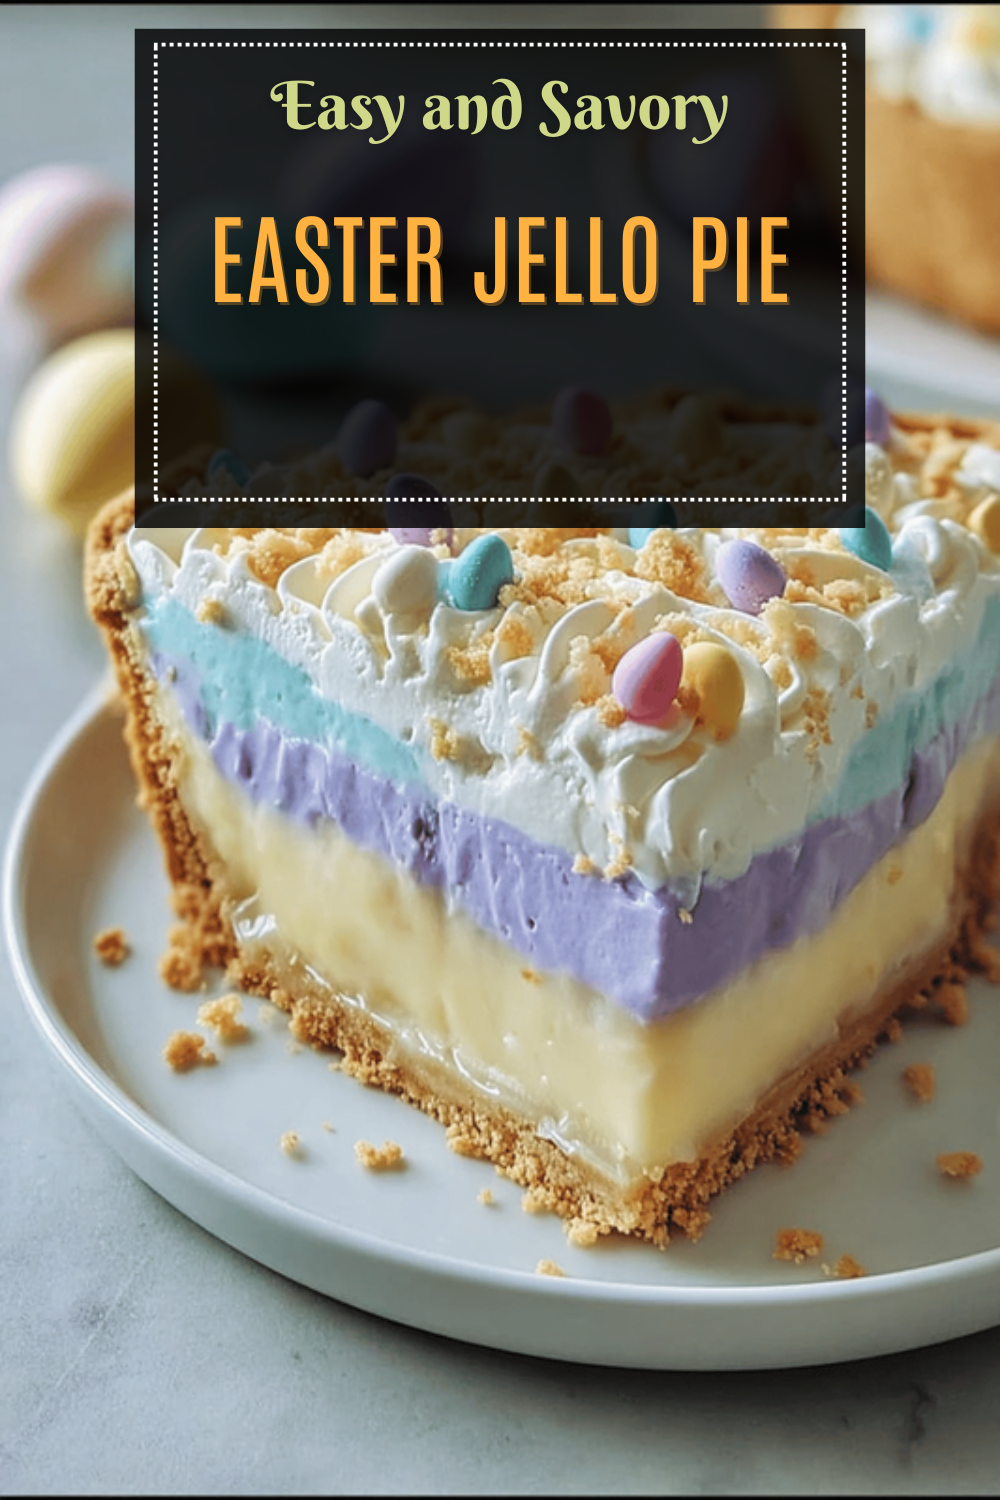
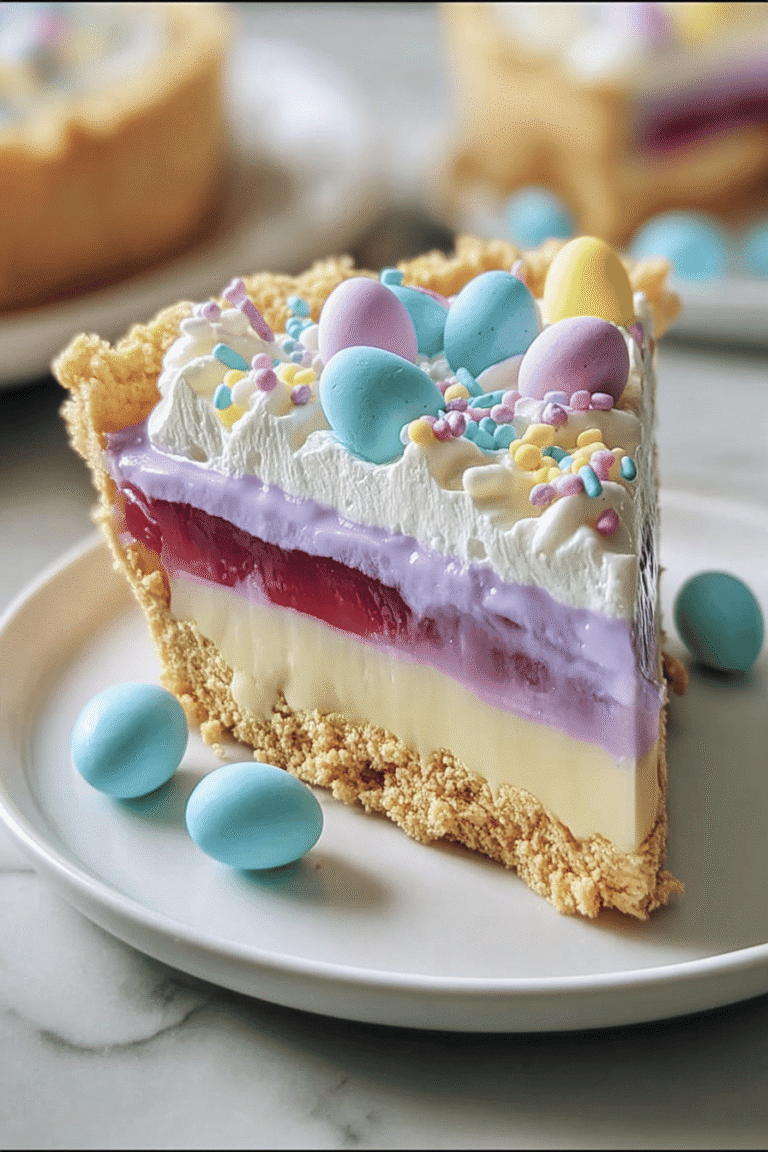
Now for the creative part! Add 4 ounces of whipped topping to each gelatin bowl and mix vigorously until fully combined. If you want brighter hues, add yellow food dye to the yellow mixture and pink food dye to the pink one, then mix until uniform. Spread the first gelatin color evenly over the frozen crust and freeze for 5 minutes to set.
Repeat the layering: spread the next color over the previous one and freeze for 5 minutes, continuing until all four colors are in place. Finally, freeze the whole pie for 3-4 hours until it’s fully set, then top with extra whipped topping if you like. For more dessert inspiration, visit our maple apple breakfast crisp to explore similar layering techniques.

Dietary Substitutions to Customize Your Easter Jello Pie
One of the best parts about Easter Jello Pie is how flexible it is for different tastes and needs! If you’re watching what you eat or have specific preferences, swapping ingredients can make this pie just as delicious. Let’s look at some easy changes to keep everyone happy at your spring gathering.
For protein and main components, try substituting traditional gelatin with plant-based agar-agar for a vegan-friendly version. You can use fruit purees or vegetable juices as natural flavors and colorants to add a fresh twist. When it comes to vegetables, sauces, and seasonings, incorporate seasonal fruits like berries or citrus segments to boost freshness.
Switch to alternative sweeteners such as honey or agave nectar for a different taste, or experiment with spices like cinnamon or nutmeg for subtle flavors. These tweaks ensure Easter Jello Pie fits into various diets without losing its charm, making it a versatile choice for families.
Mastering Easter Jello Pie: Advanced Tips and Variations
Once you’re comfortable with the basics, level up your Easter Jello Pie with some pro moves! These tips will help you create a pie that’s not only tasty but also looks amazing on the table. Start by focusing on techniques that make everything smoother and more enjoyable.
For a silkier texture, strain the gelatin mixture before pouring it into the crust and use room temperature ingredients to avoid lumps. Try flavor variations like combining different gelatin flavors in layers or adding fresh herbs such as mint or basil for a fresh twist. Presentation is key, so serve slices with a dollop of whipped cream and a sprig of mint for an elegant look.
Make-ahead options are great for busy days; prepare the pie a day in advance and store it in the fridge to let flavors blend. Adding food dye to the yellow and pink layers enhances color vibrancy, and layering colors strategically avoids clashes for the best visual effect. Use a food processor to combine crumbs and butter for a quicker crust, and remember it’s okay if layers extend above the crust.
More Ideas for Toppings
Excellent toppings include fresh berries, jelly beans, mini chocolate eggs, sprinkles, or extra whipped topping to make your pie stand out. Crust alternatives like crushed chocolate graham crackers or vanilla wafers can add a fun variation, keeping Easter Jello Pie exciting every time.
How to Store Easter Jello Pie: Best Practices
After all that effort, you want to keep your Easter Jello Pie fresh and tasty! Storing it properly ensures it stays just as good the next day. Follow these simple steps to maintain that creamy texture and vibrant colors.
Store the pie in an airtight container in the fridge for up to 3 days to keep it fresh. Freezing isn’t ideal as it can change the texture, but if you must, wrap it tightly and use it within a month. Serve it chilled to preserve the flavor, and for meal prep, make it a day ahead to ease holiday stress.
Freezing the finished pie is not recommended as it affects texture, so stick to refrigeration for leftovers. This way, your Easter Jello Pie stays delightful for up to 4 days when covered properly.
FAQs: Frequently Asked Questions About Easter Jello Pie
Can I use a store-bought graham cracker crust for Easter Jello Pie?
Yes, you can use a store-bought graham cracker crust for convenience. Many grocery stores carry ready-made crumb crusts that work well with Jello pies. Just pour in your prepared filling, and chill as directed. If you prefer a homemade crust, mix crushed graham crackers with melted butter to achieve the right texture that holds together without crumbling.
What’s the best way to make homemade whipped cream for the pie?
To make homemade whipped cream, beat 1 cup of cold heavy cream with 1 ½ tablespoons of powdered sugar and ½ teaspoon of vanilla extract using an electric mixer on high speed. Whip until stiff peaks form—when the cream holds its shape without falling over. Homemade whipped cream gives a fresh, creamy texture ideal for mixing with the Jello filling.
How long should I chill the Jello layer before folding in the whipped cream?
Chill your Jello in the refrigerator for about 20 to 30 minutes, or until it starts to thicken but is not fully set. This timing prevents large gelatin chunks when mixing in the whipped cream, ensuring a smooth, creamy consistency in your pie. If you chill for too long, the Jello becomes firm and harder to mix evenly.
What can I do if my graham cracker crust starts to crumble while preparing the pie?
If your crust is crumbly, try adding a little more melted butter—about a teaspoon at a time—until the crumbs stick together when pressed firmly. Press the crust mixture firmly into the pie pan to compact it well. Avoid over-baking the crust if you’re pre-baking, as that can cause it to dry out and crumble.
Can I prepare Easter Jello Pie ahead of time and how should I store it?
Yes, Easter Jello Pie can be made a day in advance. After assembling, cover the pie loosely with plastic wrap or foil and keep it refrigerated. It’s best eaten within 2 to 3 days for optimal texture and freshness. Storing it in the fridge helps the filling set properly and keeps the whipped cream topping from melting.
Easter Jello Pie
🥧 Celebrate spring with this colorful Easter Jello-O Pie that brings festive fun to any dessert table.
🌈 Layered with vibrant gelatin and creamy whipped topping, this pie is an eye-catching treat perfect for gatherings and celebrations.
- Total Time: 4 hours
- Yield: 12 servings 1x
Ingredients
2½ cups graham cracker crumbs
12 tablespoons butter (1½ sticks), melted
½ package pink gelatin dessert powder (approximately 1¾ ounces / under 50g)
½ package blue gelatin dessert powder (1½ ounces / 42.5g)
½ package yellow gelatin dessert powder (1½ ounces / 42.5g)
½ package purple gelatin dessert powder (1½ ounces / 42.5g)
16 ounces whipped topping, divided
3 cups boiling water
1⅓ cups cold water, divided
Yellow food dye (optional)
Pink food dye (optional)
Instructions
1- First, melt the butter until it’s fully liquified to get that perfect crust base. Then, combine the graham cracker crumbs with the melted butter, mixing until you get a thick, sand-like texture that holds together nicely. For more ideas on crusts, check out our banana chocolate chip muffins recipe which shares tips on mixing crumbs. Press this mixture firmly into the bottom and sides of a 9 to 9½-inch springform pan, then freeze it until you’re ready to add the layers.
2- Next, place each gelatin powder color in separate bowls and add ¾ cup boiling water to each, stirring until completely dissolved. Add ⅓ cup cold water to each bowl and stir again to help it set up. Refrigerate the gelatin mixtures for 20-30 minutes until they thicken but are not yet solid, which is a fun step to see the colors come alive!
3-Adding the Layers: Now for the creative part! Add 4 ounces of whipped topping to each gelatin bowl and mix vigorously until fully combined. If you want brighter hues, add yellow food dye to the yellow mixture and pink food dye to the pink one, then mix until uniform. Spread the first gelatin color evenly over the frozen crust and freeze for 5 minutes to set.
4- Repeat the layering: spread the next color over the previous one and freeze for 5 minutes, continuing until all four colors are in place. Finally, freeze the whole pie for 3-4 hours until it’s fully set, then top with extra whipped topping if you like. For more dessert inspiration, visit our maple apple breakfast crisp to explore similar layering techniques.
Last Step:
Please leave a rating and comment letting us know how you liked this recipe! This helps our business to thrive and continue providing free, high-quality recipes for you.Notes
🎨 Add food dye to yellow and pink layers to boost vibrancy.
🍰 Use a food processor to combine crust ingredients evenly and quickly.
🥄 Layer colors thoughtfully for the best visual appeal, avoiding placing light pink next to purple.
- Prep Time: 15 minutes
- Chill/Freeze Time: 3-4 hours
- Category: Dessert
- Method: No bake (layering and chilling)
- Cuisine: American
- Diet: Vegetarian
Nutrition
- Serving Size: 1 slice
- Calories: 497
- Sugar: 29g
- Sodium: 445mg
- Fat: 32g
- Saturated Fat: 19g
- Unsaturated Fat: 10g
- Trans Fat: 1g
- Carbohydrates: 48g
- Fiber: 1g
- Protein: 6g
- Cholesterol: 88mg





