

Why You’ll Love This Golden Cheese Balls
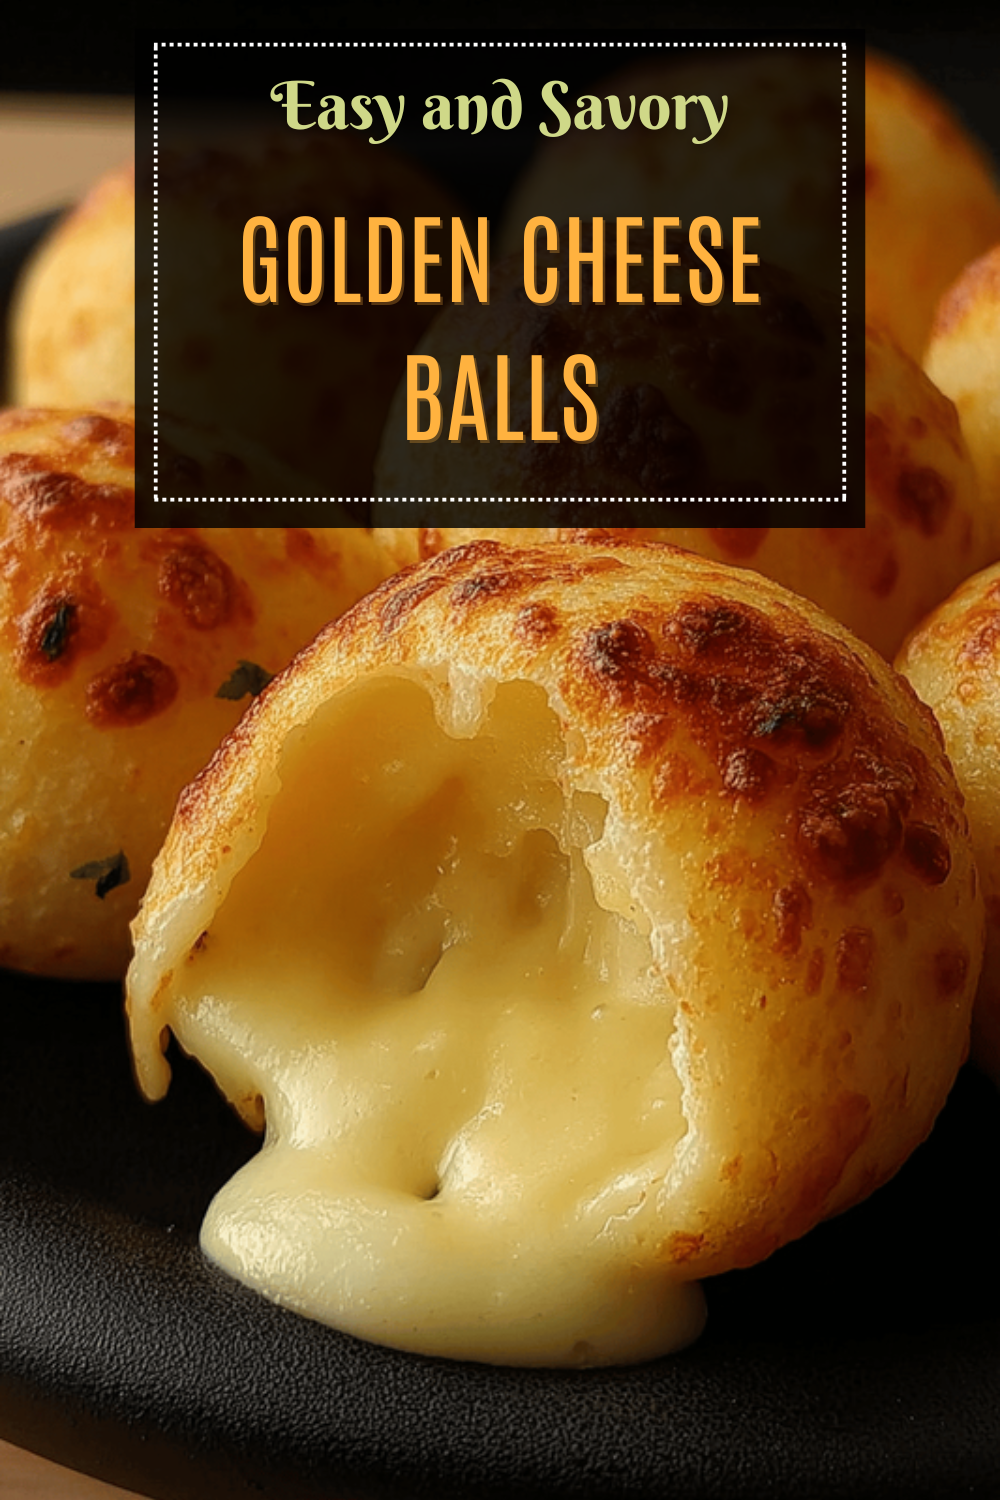
Golden Cheese Balls offer a delightful mix of crunchy outside and melty inside that makes them a hit for any occasion. This recipe stands out for its simple steps and quick prep, appealing to home cooks and busy parents who want tasty snacks without much fuss. Whether you’re hosting a game day party or a holiday gathering, these bite-sized treats bring joy with every bite.
Beyond their ease, Golden Cheese Balls pack nutritional perks like protein and calcium from the cheese, supporting bone health and energy needs. They’re versatile enough for students, diet-conscious folks, or food enthusiasts to tweak for different preferences. This makes them ideal for travelers, newlyweds, seniors, working pros, baking fans, and party hosts looking for something fun and shareable.
The standout flavor comes from the blend of cheeses and seasonings that create a savory crunch, perfect for pairing with drinks from the blog. For instance, if you enjoy recipes like our refreshing Watermelon Lemonade Slushies, these cheese balls add a savory contrast to your beverage lineup. Overall, Golden Cheese Balls are a go-to for turning simple ingredients into memorable moments.
Key Benefits at a Glance
- Quick and simple to make, ready in under 1.5 hours total.
- Nutritious with proteins that fit into balanced meals.
- Easy to adapt for various dietary needs.
- Deliciously crispy and gooey, enhancing any event.
To expand on their appeal, these Golden Cheese Balls pair wonderfully with beverages, making them a great addition to your home mixology adventures. Imagine serving them alongside a cool cocktail for an elevated gathering experience.
Jump to:
- Why You’ll Love This Golden Cheese Balls
- Key Benefits at a Glance
- Essential Ingredients for Golden Cheese Balls
- For the Cheese Balls:
- For the Coating:
- For Frying:
- Optional for Garnish:
- How to Prepare the Perfect Golden Cheese Balls: Step-by-Step Guide
- Mix and Chill the Mixture
- Form and Coat the Balls
- Fry and Serve
- Dietary Substitutions to Customize Your Golden Cheese Balls
- Mastering Golden Cheese Balls: Advanced Tips and Variations
- Flavor and Presentation Ideas
- How to Store Golden Cheese Balls: Best Practices
- FAQs: Frequently Asked Questions About Golden Cheese Balls
- Can I use different types of cheese to make Golden Cheese Balls?
- How far in advance can I prepare Golden Cheese Balls?
- Is it better to use pre-shredded or freshly shredded cheese for cheese balls?
- How do I cook Golden Cheese Balls using an air fryer?
- Why do my Golden Cheese Balls leak cheese when cooked, and how can I fix it?
- Golden Cheese Balls
- Ingredients
- Instructions
- Last Step:
- Notes
- Nutrition
- Did you make this recipe?
Essential Ingredients for Golden Cheese Balls
Gathering the right ingredients is key to making perfect Golden Cheese Balls. This section breaks down everything you need, ensuring your recipe turns out crispy and full of flavor. We’ll focus on the precise measurements and categories to make shopping and prep straightforward.
For the Cheese Balls:
- 1 ½ cups (6 ounces) shredded low moisture mozzarella cheese
- ¾ cup (3 ounces) shredded sharp cheddar cheese (or substitute with mozzarella or Pepper Jack)
- 3 tablespoons (0.75 ounces) cornstarch
- 1 large egg, lightly beaten
For the Coating:
- 2 large eggs, beaten
- 1 ½ cups (3 ounces) Panko breadcrumbs
- ¼ cup (1 ounce) freshly grated Parmesan cheese
For Frying:
- 1 cup peanut oil (or enough for about one inch depth in the pan)
Optional for Garnish:
- Freshly grated Parmesan cheese
- Minced fresh parsley
This structured list covers all items needed, making it easy to measure and prepare. Each ingredient plays a role in achieving that ideal gooey center and crunchy exterior, as detailed in the provided summary.
For more ideas on complementary treats, check out our recipe for Strawberry Cheesecake Dip, which could serve as a creative pairing for your Golden Cheese Balls.
How to Prepare the Perfect Golden Cheese Balls: Step-by-Step Guide
Creating Golden Cheese Balls involves a few straightforward steps that lead to a crispy, gooey result. Start by mixing your ingredients to build a solid base, then move on to shaping and coating for the best texture. This guide uses the key preparation steps from the summary to ensure success.
Mix and Chill the Mixture
First, combine 1 ½ cups shredded low moisture mozzarella cheese, ¾ cup shredded sharp cheddar cheese, and 3 tablespoons cornstarch in a bowl. Add 1 large lightly beaten egg and stir until well mixed. Refrigerate the mixture for at least 30 minutes to help it firm up.
This chilling step is crucial as it prevents the balls from falling apart later. It’s a simple way to lock in flavors and make handling easier.
Form and Coat the Balls
Next, use a 1 ½ tablespoon scoop to form the chilled mixture into 1-inch balls, each about 19 grams. Place them on a parchment-lined baking sheet for easy transfer.
Then, set up a coating station with beaten eggs and a mix of 1 ½ cups Panko breadcrumbs and ¼ cup grated Parmesan cheese. Dip each ball in the eggs, roll in the breadcrumb mixture, and repeat for a double coat. Chill the coated balls for another 30 minutes to set the crust.
Fry and Serve
Heat 1 cup peanut oil in a heavy skillet to 350°F. Fry the balls in batches of 5-6 for 2-3 minutes, turning occasionally, until golden brown. Drain on paper towels and garnish with grated Parmesan and minced parsley if desired.
Serve them hot with sauces like marinara or hot honey. The total time is about 1 hour 25 minutes, including 15 minutes prep and 10 minutes cooking. For variations, baking at 400°F for 15-20 minutes works for a lighter option.
| Step | Time Estimate | Tips |
|---|---|---|
| Mix and Chill | 15 minutes prep + 30 minutes chill | Stir thoroughly for even binding. |
| Form and Coat | 10 minutes | Double coat for extra crunch. |
| Fry and Serve | 10 minutes + 30 minutes chill | Fry in batches to avoid crowding. |

Dietary Substitutions to Customize Your Golden Cheese Balls
Golden Cheese Balls are highly adaptable, letting you tweak them for different needs. This makes them suitable for vegans, those with gluten sensitivities, or anyone watching calories. By swapping a few items, you keep the crispy texture and gooey center intact.
- Swap cheddar cheese with vegan cheese alternatives for a plant-based version.
- Use gluten-free Panko breadcrumbs to make the coating safe for gluten-free diets.
- Opt for low-fat cheese and bake instead of fry to reduce calories while maintaining flavor.
For more inspiration, consider experimenting with herbs or veggies in the mix. These changes ensure everyone at your gathering can enjoy the recipe.
Mastering Golden Cheese Balls: Advanced Tips and Variations
Taking your Golden Cheese Balls to the next level involves fine-tuning techniques and flavors. For a crunchier result, double dip in egg and breadcrumbs or use a thermometer to maintain oil at 350°F. These pro tips help achieve that perfect golden exterior every time.
Flavor and Presentation Ideas
Try mixing in herbs like basil for an Italian twist, or use different cheeses such as mozzarella for creaminess. Presentation matters too; arrange on a platter with dipping sauces and garnish with parsley for visual appeal.
If you’re looking for more dessert pairings, our Mini Cheesecake Recipe offers a sweet complement to these savory bites.
Make-ahead options include freezing uncooked balls, so you can fry them fresh when needed. This is great for busy hosts planning events.
How to Store Golden Cheese Balls: Best Practices
Proper storage keeps your Golden Cheese Balls tasty and crisp for later. After cooling, place them in an airtight container in the fridge for up to 3 days. For longer keeps, freeze them on a baking sheet first, then bag them for up to 2 months.
- Reheat in an oven at 350°F to restore crunch without sogginess.
- Avoid microwaving, as it can make them lose texture.
- Prep in batches for easy weeknight snacks.
This method ensures you enjoy the gooey inside even after storage, making meal prep simple for families and professionals.
FAQs: Frequently Asked Questions About Golden Cheese Balls
Can I use different types of cheese to make Golden Cheese Balls?
Yes, you can use different cheeses in this recipe. Mozzarella is a great choice for a mild and stretchy texture, while Pepper Jack adds a bit of spice. Cheddar works well for a sharp flavor. Mixing cheeses can also create a richer taste. Just make sure the cheese is shredded and not too moist for the best results.
How far in advance can I prepare Golden Cheese Balls?
You can prepare the cheese balls up to a day ahead. Form and coat them, then store in the refrigerator. For longer storage, freeze them on a baking sheet before transferring to an airtight container. When cooking from frozen, add a couple of minutes to the frying or baking time for even cooking.
Is it better to use pre-shredded or freshly shredded cheese for cheese balls?
Pre-shredded cheese is recommended because it usually contains an anti-caking agent that helps bind the ingredients together, reducing the chance of cheese leaking during cooking. Freshly shredded cheese can be used but may require extra cornstarch or chilling time to prevent leaks.
How do I cook Golden Cheese Balls using an air fryer?
Lightly spray the cheese balls with cooking oil and air fry at 375°F for 6 to 7 minutes, flipping halfway through. For reheating, warm refrigerated cheese balls at 375°F for 4 to 6 minutes, and frozen ones for 7 to 9 minutes. This method yields crispy, evenly cooked cheese balls with less oil.
Why do my Golden Cheese Balls leak cheese when cooked, and how can I fix it?
Cheese leaking usually happens if the balls aren’t chilled long enough to set or if the binding ingredients are insufficient. To prevent this, chill the formed cheese balls for at least 30 minutes, allowing the cornstarch and egg to bind properly. Using pre-shredded cheese and avoiding overly wet cheese also helps keep the filling inside.
Golden Cheese Balls
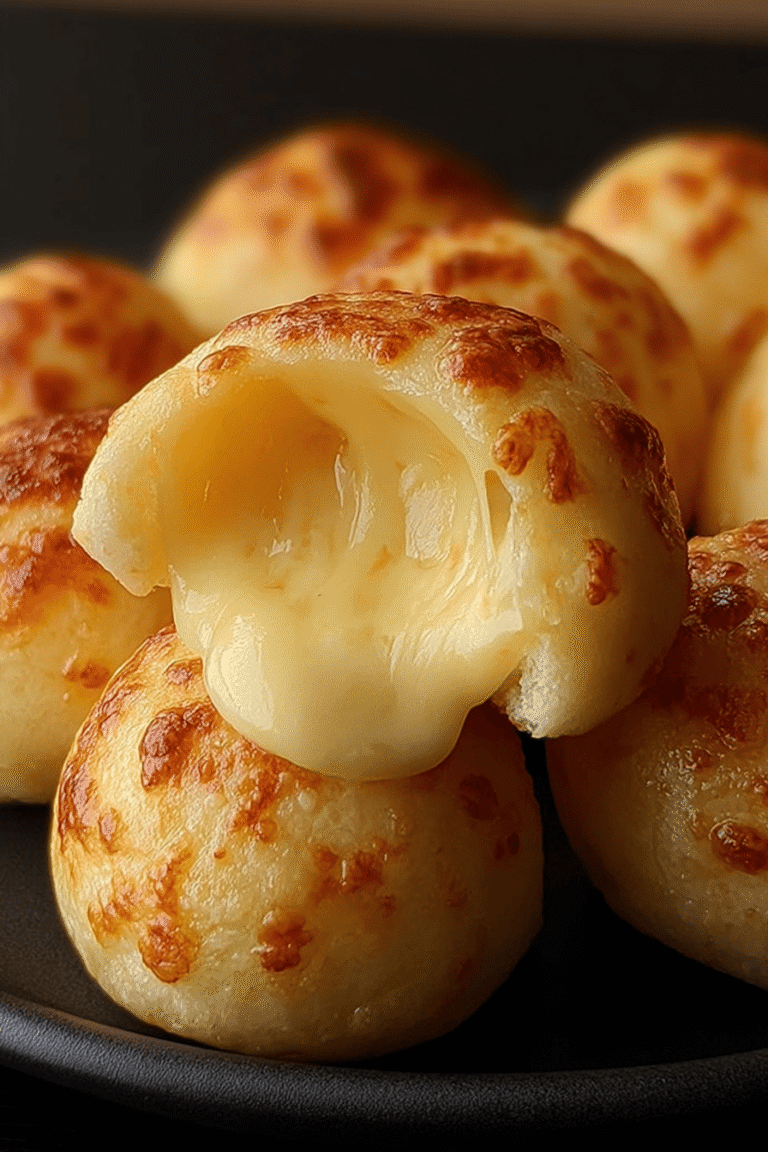
🧀 Enjoy crispy, golden cheese balls with a delightfully gooey center that’s perfect for snacking or entertaining.
🍽️ This easy recipe guarantees a crowd-pleasing appetizer that pairs wonderfully with your favorite dipping sauces.
- Total Time: 1 hour 25 minutes
- Yield: About 20 cheese balls 1x
Ingredients
1 ½ cups (6 ounces) shredded low moisture mozzarella cheese
¾ cup (3 ounces) shredded sharp cheddar cheese (or substitute with mozzarella or Pepper Jack)
3 tablespoons (0.75 ounces) cornstarch
1 large egg, lightly beaten
2 large eggs, beaten
1 ½ cups (3 ounces) Panko breadcrumbs
¼ cup (1 ounce) freshly grated Parmesan cheese
1 cup peanut oil (or enough for about one inch depth in the pan)
Freshly grated Parmesan cheese
Minced fresh parsley
Instructions
1-Mix and Chill the Mixture: First, combine 1 ½ cups shredded low moisture mozzarella cheese, ¾ cup shredded sharp cheddar cheese, and 3 tablespoons cornstarch in a bowl. Add 1 large lightly beaten egg and stir until well mixed. Refrigerate the mixture for at least 30 minutes to help it firm up.
2-Mix and Chill the Mixture: This chilling step is crucial as it prevents the balls from falling apart later. It’s a simple way to lock in flavors and make handling easier.
3-Form and Coat the Balls: Next, use a 1 ½ tablespoon scoop to form the chilled mixture into 1-inch balls, each about 19 grams. Place them on a parchment-lined baking sheet for easy transfer.
4-Form and Coat the Balls: Then, set up a coating station with beaten eggs and a mix of 1 ½ cups Panko breadcrumbs and ¼ cup grated Parmesan cheese. Dip each ball in the eggs, roll in the breadcrumb mixture, and repeat for a double coat. Chill the coated balls for another 30 minutes to set the crust.
5-Fry and Serve: Heat 1 cup peanut oil in a heavy skillet to 350°F. Fry the balls in batches of 5-6 for 2-3 minutes, turning occasionally, until golden brown. Drain on paper towels and garnish with grated Parmesan and minced parsley if desired.
6-Fry and Serve: Serve them hot with sauces like marinara or hot honey. The total time is about 1 hour 25 minutes, including 15 minutes prep and 10 minutes cooking. For variations, baking at 400°F for 15-20 minutes works for a lighter option.
Last Step:
Please leave a rating and comment letting us know how you liked this recipe! This helps our business to thrive and continue providing free, high-quality recipes for you.Notes
🧊 Chill the cheese mixture to help form firm balls and prevent melting during frying.
🍞 Double coating with egg and breadcrumbs ensures extra crispiness.
🌡️ Maintain the oil temperature at 350°F for perfect frying without greasiness.
- Prep Time: 15 minutes
- Chilling Time: 1 hour
- Cook Time: 10 minutes
- Category: Appetizer
- Method: Frying
- Cuisine: American
- Diet: Vegetarian
Nutrition
- Serving Size: 2 cheese balls
- Calories: 150
- Sugar: 1g
- Sodium: 260mg
- Fat: 10g
- Saturated Fat: 5g
- Unsaturated Fat: 4g
- Trans Fat: 0g
- Carbohydrates: 9g
- Fiber: 1g
- Protein: 7g
- Cholesterol: 50mg





