

Why You’ll Love This Peanut Butter Blossoms
This peanut butter blossoms recipe is a timeless favorite that combines simplicity with delicious results, making it ideal for anyone from busy parents to baking enthusiasts. The ease of preparation means you can whip up a batch in just about an hour, perfect for last-minute treats or family gatherings. Beyond its straightforward nature, these cookies offer health benefits like protein from peanut butter that supports energy levels and heart health.
One of the best parts is the versatility, allowing tweaks for various dietary needs without losing that signature soft center. The distinctive flavor profile features a creamy peanut butter base topped with a chocolate kiss, creating a treat that stands out from ordinary cookies. Whether you’re a student looking for a quick snack or a party host wanting to impress, these cookies deliver a balance of sweet and nutty notes that everyone enjoys.
To add more value, you might try similar baked goods like our banana chocolate chip muffins for another easy chocolate treat. Overall, this recipe brings joy to baking with minimal effort and maximum flavor, appealing to home cooks of all skill levels.
Jump to:
- Why You’ll Love This Peanut Butter Blossoms
- Essential Ingredients for Peanut Butter Blossoms
- How to Prepare the Perfect Peanut Butter Blossoms: Step-by-Step Guide
- Subheadings for Detailed Steps
- Dietary Substitutions to Customize Your Peanut Butter Blossoms
- Mastering Peanut Butter Blossoms: Advanced Tips and Variations
- How to Store Peanut Butter Blossoms: Best Practices
- FAQs: Frequently Asked Questions About Peanut Butter Blossoms
- How do I keep my peanut butter blossoms soft and chewy?
- When should I press the chocolate kiss onto the cookie?
- Can I freeze peanut butter blossom dough for later baking?
- What is the best way to measure flour for peanut butter blossoms?
- Why do some peanut butter blossoms turn out dry or crumbly?
- Peanut Butter Blossoms
- Ingredients
- Instructions
- Last Step:
- Notes
- Nutrition
- Did you make this recipe?
Essential Ingredients for Peanut Butter Blossoms
Gathering the right ingredients is key to making perfect peanut butter blossoms, and this section covers everything you need for a successful bake. Start with high-quality items to ensure the best texture and taste in every cookie. Below is a comprehensive list of all the ingredients required, based on a proven recipe that yields about 36 cookies.
- 1/2 cup granulated sugar
- 1/2 cup packed brown sugar
- 1/2 cup creamy peanut butter
- 1/2 cup salted butter, softened
- 1 large egg
- 1 1/2 cups all-purpose flour
- 3/4 teaspoon baking soda
- 1/2 teaspoon baking powder
- Additional granulated sugar for rolling
- Approximately 36 unwrapped milk chocolate candies
These ingredients come together to create a dough that’s easy to handle and bakes into soft, chewy cookies. For special dietary options, you can swap in alternatives like using plant-based peanut butter for vegan versions or gluten-free flour to accommodate sensitivities. Remember, precise measurements help avoid common pitfalls, so follow this list closely for the best outcome.
How to Prepare the Perfect Peanut Butter Blossoms: Step-by-Step Guide
Follow this straightforward guide to make peanut butter blossoms, starting with preheating your oven for even baking. The process is simple and rewarding, with steps designed for beginners or experienced bakers alike. You’ll end up with cookies that have that irresistible soft center everyone loves.
Begin by preheating the oven to 375°F and preparing your baking sheets. Then, in a large bowl, beat the granulated sugar, brown sugar, peanut butter, softened butter, and egg until well blended this creates a smooth base for your dough. Next, stir in the flour, baking soda, and baking powder until the dough forms, making sure it’s evenly mixed. Shape the dough into 1-inch balls and roll each one in additional granulated sugar for that classic crinkled top.
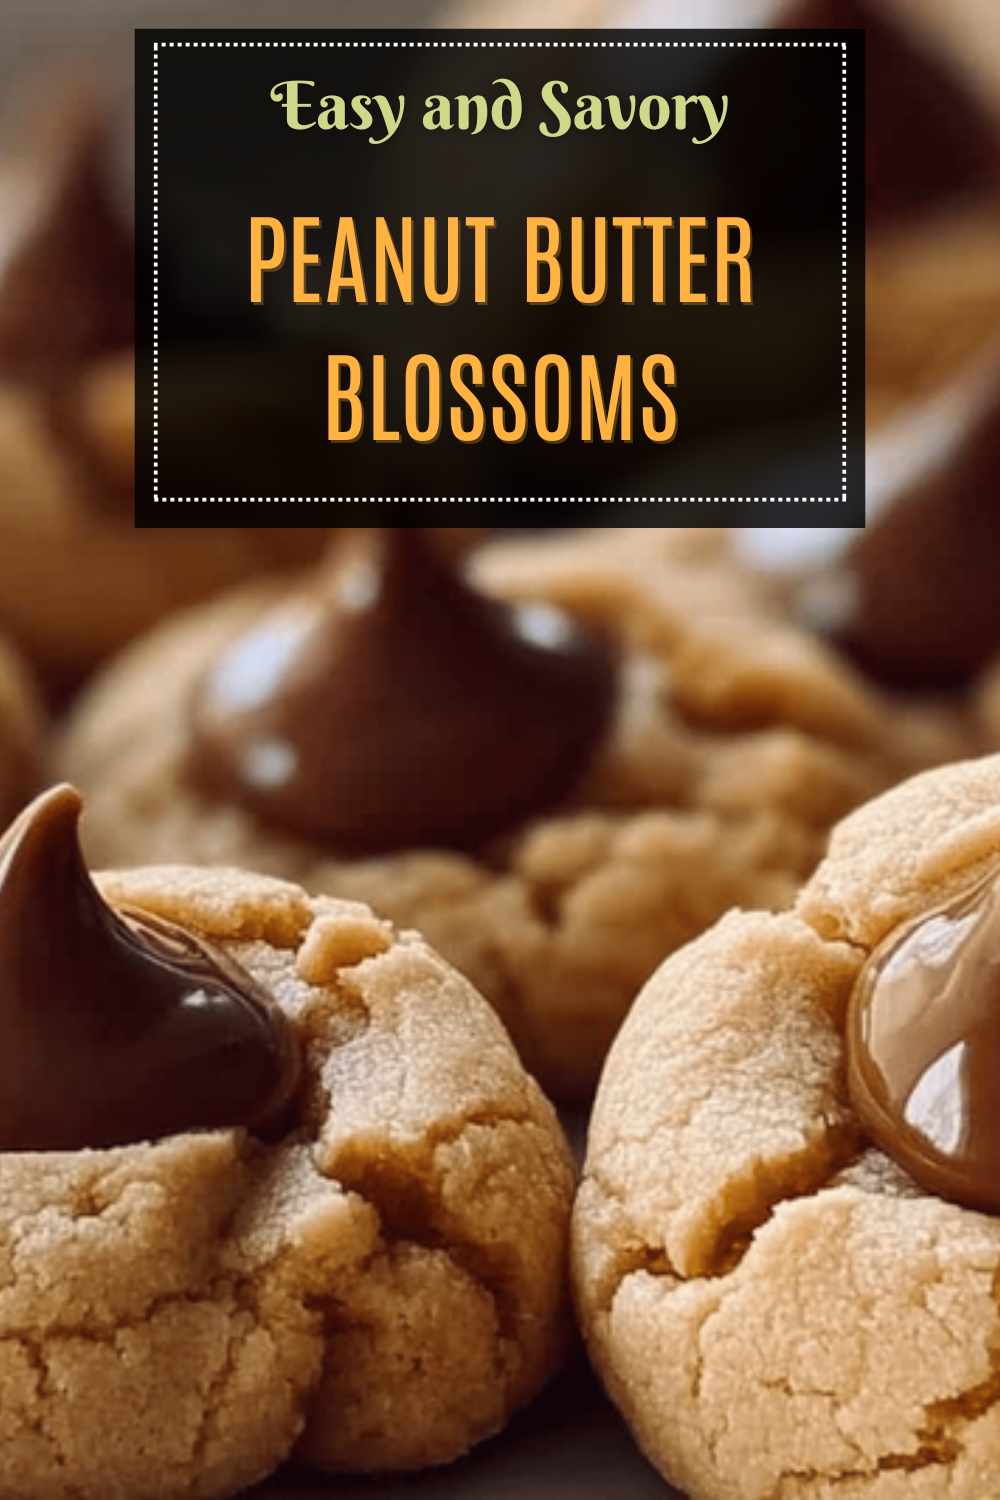
Place the balls on ungreased cookie sheets, spacing them about 2 inches apart to allow for spreading. Bake one sheet at a time for 8 to 10 minutes, or until the edges turn light golden brown. Immediately after baking, press one milk chocolate candy into the center of each hot cookie to secure it in place. Finally, move the cookies to a cooling rack and let them cool for about 1 hour until the chocolate sets, allowing the flavors to meld perfectly.
If you’re looking for more baking inspiration, check out our double chocolate oatmeal cups recipe for another chocolate-forward option. This method takes about 60 minutes total, including baking and cooling, and results in approximately 36 cookies ready to enjoy.
Subheadings for Detailed Steps
For longer sections, breaking things down helps. Here, we’ve kept it concise, but always focus on key techniques like mixing the dough thoroughly to avoid streaks of butter or peanut butter.

Dietary Substitutions to Customize Your Peanut Butter Blossoms
Adapting peanut butter blossoms to different diets is easy and keeps the recipe flexible for everyone from diet-conscious individuals to families with allergies. Start with the main components and make swaps as needed to maintain that soft, flavorful texture. This way, you can enjoy the cookies without compromising on taste.
For protein and main component alternatives, try using almond butter or sunflower seed butter in place of peanut butter if nuts are an issue. To keep it vegan, replace the egg with flaxseed or chia seed gel for binding. When it comes to vegetable, sauce, and seasoning modifications, add a pinch of sea salt or cinnamon for extra depth, or use natural sweeteners like maple syrup in reduced-sugar versions.
Don’t forget gluten-free options by incorporating gluten-free baking powder if needed. These changes ensure your peanut butter blossoms appeal to a wide audience, from seniors to working professionals, while preserving the signature soft center and overall enjoyment.
Mastering Peanut Butter Blossoms: Advanced Tips and Variations
Taking your peanut butter blossoms to the next level involves some pro cooking techniques that enhance texture and flavor. For instance, chill the dough before rolling to keep cookies from spreading too much and maintain their shape. This step is especially useful for busy parents or baking enthusiasts aiming for consistent results.
Explore flavor variations by adding a sprinkle of sea salt or chopped nuts on top for contrast, or swap in white chocolate kisses for a fresh twist. Presentation tips include serving on decorative plates with a light dusting of powdered sugar to make them festive for parties. If you’re planning ahead, prepare the dough in advance and refrigerate it for up to 3 days or freeze for up to 1 month, which is great for travelers or students with packed schedules.
One external resource from a trusted baking expert offers more advice: insights from a baking pro can help refine your skills. These expert tips make customizing peanut butter blossoms fun and encourage creativity for any occasion, ensuring your treats are as enjoyable as they are delicious.
How to Store Peanut Butter Blossoms: Best Practices
Proper storage keeps your peanut butter blossoms fresh and tasty, extending their shelf life for busy lifestyles. Keep them in an airtight container at room temperature for up to 3 days to preserve that soft center. For longer storage, freeze the cookies in a single layer on a tray before transferring to a sealable bag, where they last up to 1 month.
When reheating, warm them briefly in an oven or microwave to bring back softness without melting the chocolate. Meal prep ideas include batch baking and freezing portions, so food enthusiasts or working professionals can grab a treat anytime. Following these steps ensures your cookies stay moist and flavorful, making them a reliable option for quick snacks.
FAQs: Frequently Asked Questions About Peanut Butter Blossoms
How do I keep my peanut butter blossoms soft and chewy?
To keep your peanut butter blossoms soft and chewy, use room temperature butter and avoid overbaking. Remove cookies from the oven when the edges just start to turn golden, as they will continue to cook slightly on the hot baking sheet. Storing baked cookies in an airtight container with a slice of bread can also help maintain moisture.
When should I press the chocolate kiss onto the cookie?
Press the chocolate kiss onto the cookie immediately after removing it from the oven while the cookie is still warm. This allows the chocolate to soften just enough to stick to the cookie, but cools to maintain its shape. Avoid adding the kiss before baking, as it can melt too much and lose its form.
Can I freeze peanut butter blossom dough for later baking?
Yes, you can freeze the dough balls for up to 3 months. Arrange the rolled dough balls on a parchment-lined baking sheet and freeze until firm. Then transfer them to a freezer-safe bag. When ready to bake, thaw at room temperature for about 30 minutes before placing in the oven, baking as usual for best texture.
What is the best way to measure flour for peanut butter blossoms?
For best results, spoon flour lightly into your measuring cup and level it off with a knife instead of scooping directly from the bag. Scooping can compact the flour and result in dry, dense cookies. Loose flour measurement ensures the dough remains tender and soft.
Why do some peanut butter blossoms turn out dry or crumbly?
Dry or crumbly texture often results from overmixing the dough, using too much flour, or baking for too long. Make sure to mix ingredients until just combined, measure flour properly, and check cookies early during baking to avoid overbaking. Using fresh ingredients like baking soda and peanut butter also impacts cookie moisture.
Peanut Butter Blossoms
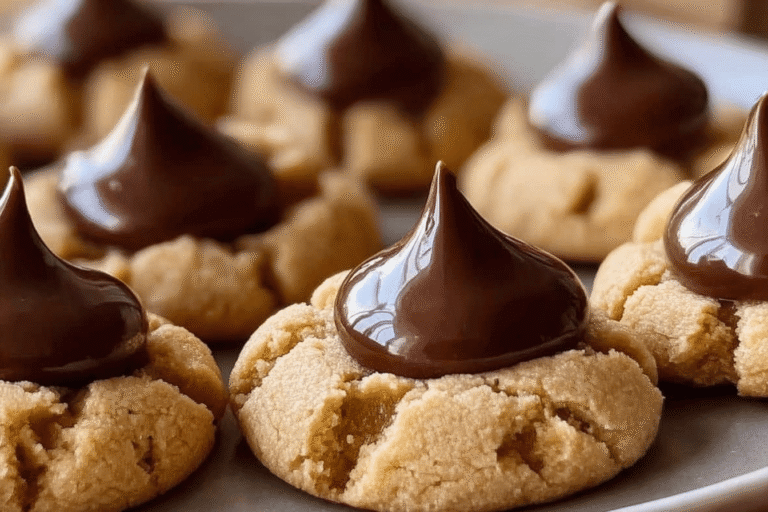
🍪 Classic Peanut Butter Blossom Cookies deliver a perfect balance of soft, chewy peanut butter dough and a melty chocolate center.
🎉 These festive cookies are easy to make, appealing to both kids and adults, perfect for any occasion or holiday treat.
- Total Time: 60 minutes
- Yield: Approximately 36 cookies
Ingredients
– 1/2 cup granulated sugar
– 1/2 cup packed brown sugar
– 1/2 cup creamy peanut butter
– 1/2 cup salted butter, softened
– 1 large egg
– 1 1/2 cups all-purpose flour
– 3/4 teaspoon baking soda
– 1/2 teaspoon baking powder
– Additional granulated sugar for rolling
– Approximately 36 unwrapped milk chocolate candies
Instructions
1-Begin by preheating the oven to 375°F and preparing your baking sheets.
2-Then, in a large bowl, beat the granulated sugar, brown sugar, peanut butter, softened butter, and egg until well blended this creates a smooth base for your dough.
3-Next, stir in the flour, baking soda, and baking powder until the dough forms, making sure it’s evenly mixed.
4-Shape the dough into 1-inch balls and roll each one in additional granulated sugar for that classic crinkled top.
5-Place the balls on ungreased cookie sheets, spacing them about 2 inches apart to allow for spreading.
6-Bake one sheet at a time for 8 to 10 minutes, or until the edges turn light golden brown.
7-Immediately after baking, press one milk chocolate candy into the center of each hot cookie to secure it in place.
8-Finally, move the cookies to a cooling rack and let them cool for about 1 hour until the chocolate sets, allowing the flavors to meld perfectly.
Last Step:
Please leave a rating and comment letting us know how you liked this recipe! This helps our business to thrive and continue providing free, high-quality recipes for you.Notes
🍫 Remove candy wrappers before starting to save time.
🥄 Use both granulated and brown sugar for the ideal flavor and texture balance.
🎨 Roll dough balls in colored or sparkling sugar for a festive look.
- Prep Time: 15 minutes
- Baking and cooling time: 45 minutes
- Cook Time: 10 minutes
- Category: Dessert, Snack
- Method: Baking
- Cuisine: American
Nutrition
- Serving Size: 1 cookie
- Calories: 115
- Sugar: 14 g
- Sodium: 75 mg
- Fat: 6 g
- Saturated Fat: 3 g
- Carbohydrates: 14 g
- Fiber: 1 g
- Protein: 2 g
- Cholesterol: 15 mg





